
D
David FowlerAug 16, 2025
What to do if my Craftsman Jack will not lower completely?
- JJesse ThorntonAug 16, 2025
If your Craftsman Jack will not lower completely, it could be because the oil reservoir is overfilled. Drain some oil to correct this.
What to do if my Craftsman Jack will not lower completely?
If your Craftsman Jack will not lower completely, it could be because the oil reservoir is overfilled. Drain some oil to correct this.
What to do if my Craftsman Jack will not hold load?
If your Craftsman Jack will not hold a load, it's possible that the power unit has trapped air inside. To resolve this, release the air from the system.
Why does the handle raise by itself while under load on my Craftsman Jack?
If the handle of your Craftsman Jack raises by itself while under load, this indicates that the power unit is malfunctioning. The suggested solution is to replace the power unit.
What to do if my Craftsman Jack will not lift to full height?
If your Craftsman Jack will not lift to its full height, it might be that the release valve isn't closing correctly. Make sure to turn the release valve clockwise tightly.
Why is my Craftsman Jack lifting poorly and the pump feels spongy?
If your Craftsman Jack's lifting action is poor and the pump feels spongy, it may need lubrication. Lubricate the moving parts to improve its performance.
Why is my Craftsman Automobile Accessories jack lifting poorly and the pump feels spongy?
The probable cause is air in the hydraulic system. You should release air from the system. Refer to the 'BEFORE INITIAL USE' section for instructions.
What to do if Craftsman Automobile Accessories jack will not lift load?
Ensure the release valve is tightly closed by turning it clockwise.
Why Craftsman Automobile Accessories jack will not lift to full height?
The oil level in the jack is likely low. Add oil as required.
What to do if Craftsman Automobile Accessories jack will lift load, but will not hold?
The power unit is malfunctioning, so the jack should be replaced.
How to fix Craftsman Automobile Accessories jack that will not lower completely?
Here are a few things to try: 1. If the ram is still extended after the load is removed, manually push down the saddle. 2. The oil reservoir may be over-filled, so drain out some oil. 3. Lubricate the moving parts.
Key safety precautions and warnings for jack operation.
Instructions for assembling the hydraulic bottle jack components.
Guidance on the correct procedures for using the jack.
Procedures for upkeep and care of the hydraulic jack.
Identification and list of available replacement parts for the jack.
Details of the product's warranty coverage and terms.
Importance of retaining and following all provided instructions.
Overview of the jack's capabilities and intended use.
Essential safety warnings to prevent personal injury and property damage.
Specific warnings related to crushing hazards and safe operating practices.
List of items included within the product packaging.
Step-by-step guide for assembling the jack and its handle.
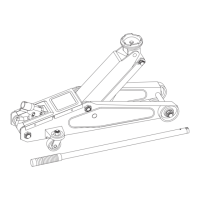
Identification of the jack's parts through diagrams and labels.
Steps to prepare the jack for operation, including air release.
Explanation of the hydraulic system's function during operation.
Detailed instructions for safely lifting a load with the jack.
Procedures for safely lowering loads and the jack itself.
Detailed model specifications, dimensions, and capacities.
Guidelines for checking, adding, and replacing hydraulic oil.
Steps for adding, replacing, and bleeding air from the hydraulic system.
Advice on lubricating parts and preventing rust on the jack.
Proper methods for storing the jack for compactness and protection.
Common problems, causes, and solutions for jack malfunctions.
Location and importance of model and serial numbers for service.
List of parts with corresponding order numbers.
Details on home repair services and parts ordering options.
Phone numbers and websites for customer support and inquiries.
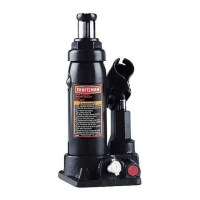
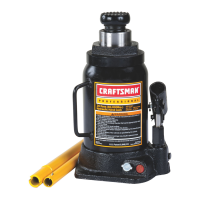
This document is an operator's manual for Craftsman Professional Hydraulic Bottle Jacks, specifically models 50284 (12 Ton Capacity) and 50285 (20 Ton Capacity). The manual provides essential information regarding safety, assembly, operation, maintenance, and parts for these devices.
Craftsman Professional Hydraulic Bottle Jacks are designed primarily for lifting loads, not for sustaining them. They are suitable for lifting loads ranging from 12 tons to 20 tons, depending on the specific model's rated capacity. These jacks are intended for vertical use and, after lifting, require immediate support of the load with appropriate means, such as jack stands. They are also suitable for use in appropriately rated and designed vertical or bench press structures. The manual explicitly states that these jacks are not appropriate for lifting or positioning construction trailers, houses, or other building structures.
The manual provides a table of specifications for both models:
| Item | Description | 50284 (12 Tons) | 50285 (20 Tons) |
|---|---|---|---|
| A x B | Base Dimension (B not shown) | 5-1/8 in. x 5-1/4 in. | 5-15/16 in. x 6-1/4 in. |
| C | Maximum Height | 18-5/8 in. (473mm) | 18-11/16 in. (475mm) |
| D | Minimum Height | 9-7/16 in. (240mm) | 9-1/2 in. (242mm) |
| E | Hydraulic Stroke (travel) | 6 in. | 6 in. |
| F | Extension Screw Travel | 3-1/8 in. | 3-1/8 in. |
The jacks are covered by U.S. Patent: 5,946,912.
The manual emphasizes several key usage features and safety precautions:
The jack comes with a 2-piece handle and a rubber handle holder.
The manual includes a troubleshooting guide for common issues such as:
The manual lists available replacement parts:
For after-sale support and assistance, customers can call 1-888-332-6419 from 8:00 AM - 4:45 PM CST, Monday - Friday.
| Brand | Craftsman |
|---|---|
| Model | 50284 |
| Category | Automobile Accessories |
| Language | English |