GAS SPRINGS iNSTALLATiON
Items Needed:
Gas Springs (Qty: 2)
5/16 - 18 Ball Studs (Qty: 4)
5/16 - 18 Clip-on Nut (Qty: 4)
1/2-in Wrench
Process:
• Install (2) 5/16-18 Ball Studs and (2) 5/16-18 Clip-on Nut
into slot on left and right side of cover. Tighten using 1/2-
in wrench.
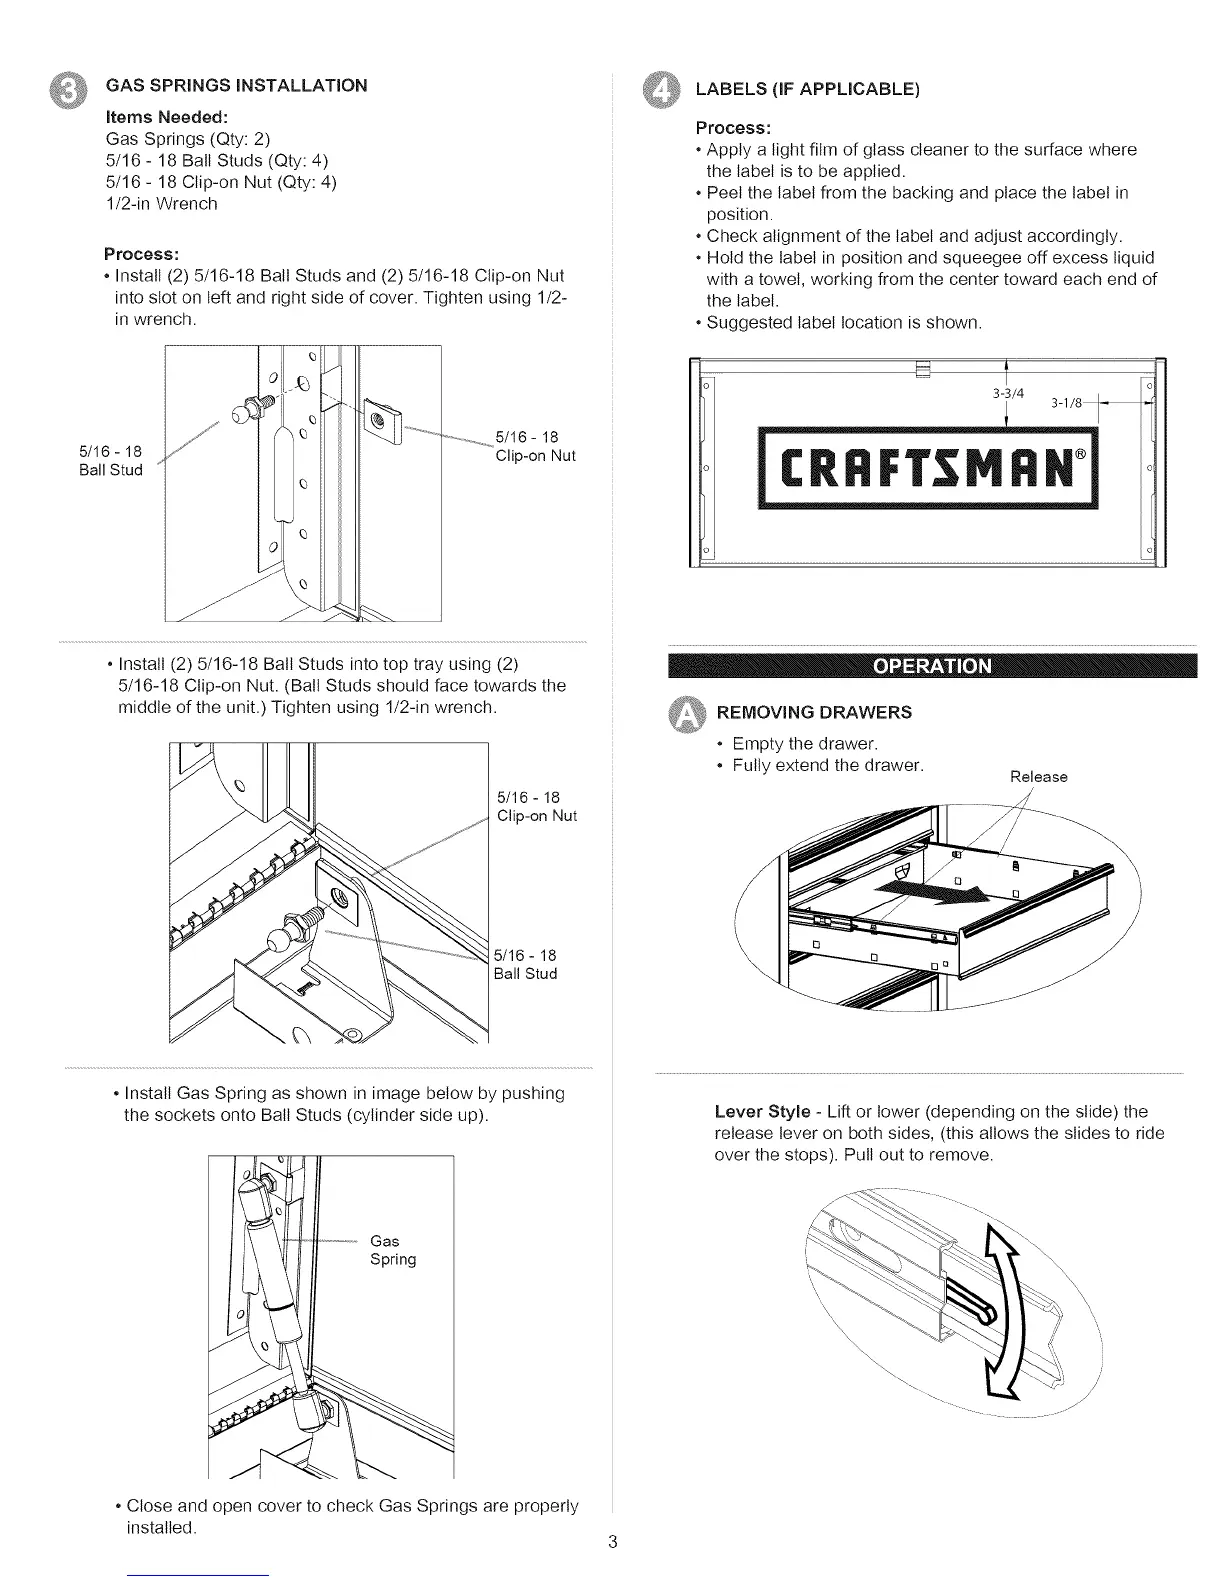
LABELS (iF APPLICABLE)
Process:
• Apply a light film of glass cleaner to the surface where
the label is to be applied.
• Peel the label from the backing and place the label in
position.
• Check alignment of the label and adjust accordingly.
• Hold the label in position and squeegee off excess liquid
with a towel, working from the center toward each end of
the label.
• Suggested label location is shown.
5/16 - 18
Ball Stud
..................................5/16- 18
Clip-on Nut
• Install (2) 5/16-18 Ball Studs into top tray using (2)
5/16-18 Clip-on Nut. (Ball Studs should face towards the
middle of the unit.) Tighten using 1/2-in wrench.
5/16 - 18
Clip-on Nut
5/16- 18
Ball Stud
CRRF MRN
_ REMOVING DRAWERS
• Empty the drawer.
• Fully extend the drawer.
Release
\
\
• Install Gas Spring as shown in image below by pushing
the sockets onto Ball Studs (cylinder side up).
Lever Style - Lift or lower (depending on the slide) the
release lever on both sides, (this allows the slides to ride
over the stops). Pull out to remove.
Gas
Spring
\
x\\\\\\\\\\\\\ i
• Close and open cover to check GasSprings are properly
installed.
3