MAINTENANCE
UNIT CYCLES AUTOMATICALLY WHEN POWER IS ON. WHEN DOING MAINTENANCE, YOU MAY BE
EXPOSED TO VOLTAGE SOURCES, COMPRESSED AIR OR MOVING PARTS. PERSONAL INJURIES CAN
OCCUR. BEFORE PERFORMING ANY MAINTENANCE OR REPAIR, UNPLUG THE COMPRESSOR AND
BLEED OFF ALL AIR PRESSURE.
ALL MAINTENANCEAND REPAIR OPERATIONSNOT LISTED MUST BE DONE BY QUALIFIED SERVICE PERSONNEL.
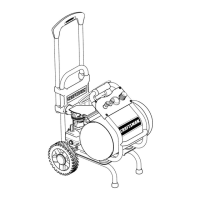
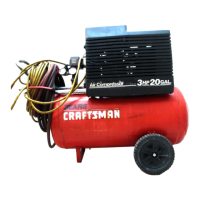
Air Filter - Inspection and Replacement Check Valve Replacement - Portable
Compressors
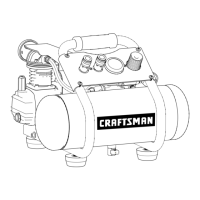
Hot surfaces. Risk of burn. Compressor
heads are exposed when filter cover is
removed. Allow compressor to cool prior
to servicing. _@_
Risk of personal injury. Mainfold assembly
contains compressed air which can be hazard-
ous. Manifold gets hot during
operation. Before servicing:
• Unplug or disconnect electrical
supply to compressor.
• Bleed tank of pressure.
Keep the air filter clean at all times. Do not operate the
compressor with the air filter removed.
A dirty air filter will not allow the compressor to operate at
full capacity. Before you use the compressor, check the air
filter to be sure it is clean.
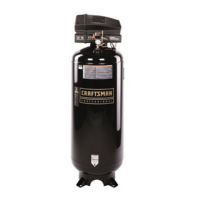
Check Valve - Replacement - Stationary
(Permanently Mounted) Compressors
1. Release all air pressure from air tank and disconnect
outfit from supply circuit.
2. Remove rear shroud.
3, Remove tubes and compression fittings at the tee and
remove the tee from the check valve.
4. Remove the pressure release tube and fitting from the
check valve.
5. Unscrew the check valve (turn counterclockwise) us-
ing a socket wrench.
6. The check valve may be cleaned with a solvent, such as
paint and varnish remover.
7. Apply sealant to the check valve threads. Reinstall the
check valve (turn clockwise). DO NOT OVER-
TIGHTEN.
8. Replace the pressure release tube, fitting and tee.
9. Replace the outlet tubes and tighten fittings.
10. Replace the shroud.
11. Connect compressor to supply circuit.
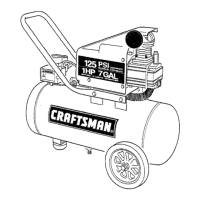
l. Release all air pressure from air tank and unplug outfit.
2. Remove shroud.
3. Loosen the top and bottom nuts and remove the outlet
tube.
4. Remove the pressure release tube and fitting.
5. Unscrew the check valve (turn counterclockwise) us-
ing a socket wrench.
6. Check that the valve disc moves freely inside the check
valve and that the spring holds the disc in the upper,
closed position. The check valve may be cleaned with
a solvent, such as paint and varnish remover.
7. Apply sealant to the check valve threads. Reinstall the
check valve (turn clockwise).
8. Replace the pressure release tube and fitting.
9. Replace the outlet tube and tighten top and bottom nuts.
10. Replace the shroud.
Safety Valve - Inspection
If the safety valve does not work properly,
over-pressurization may occur, causing air
tank rupture or an explosion. Before starting
compressor, pull the ring on the safety valve
to make sure that the safety valve operates
freely. If the valve is stuck or does not operate
smoothly, it must be replaced with the same
type of valve.
!0