Do you have a question about the Craftsman CMCCS320 and is the answer not in the manual?
Do not modify the tool; always wear certified safety glasses and respiratory protection.
Be aware of dust hazards from chemicals and protect hearing from loud noise.
Store tools safely, keep vents clear, and follow proper handling precautions.
Keep the workspace tidy and illuminated to prevent accidents.
Do not use in areas with flammable liquids, gases, or dust due to spark risk.
Ensure children and others are kept away to maintain focus and control.
Use correct plugs and outlets to reduce electric shock risk.
Prevent contact with earthed surfaces to minimize electric shock risk.
Keep power tools dry to reduce the risk of electric shock.
Handle cords carefully; damaged cords increase electric shock risk.
Use suitable cords for outdoor use to reduce electric shock risk.
Employ GFCI protection in damp areas to reduce electric shock risk.
Remain attentive and use judgment to avoid injury while operating the tool.
Always use eye protection; other PPE reduces personal injury.
Ensure the switch is off before connecting power or handling the tool.
Remove tools before operating to prevent injury from moving parts.
Keep stable footing for better control, especially in unexpected situations.
Avoid loose clothing or jewelry that can get caught in moving parts.
Connect and use dust collection to reduce hazards from dust.
Use the correct power tool for the application for optimal performance and safety.
Do not use a tool if the switch is not working; it must be repaired.
Remove battery or unplug before making changes to prevent accidental starts.
Keep idle tools away from children and untrained users who may cause accidents.
Check for damage or misalignment; repair before use to prevent accidents.
Sharp tools are less likely to bind, easier to control, and perform better.
Operate the tool according to instructions and working conditions to avoid hazardous situations.
Ensure handles are dry and free of oil/grease for safe handling and control.
Use only the manufacturer-specified charger to avoid fire risk.
Use only compatible battery packs to prevent injury and fire.
Keep battery terminals away from metal objects to prevent short circuits.
Avoid contact with battery liquid; flush with water if contact occurs.
Avoid using damaged or modified batteries due to unpredictable behavior.
Do not expose batteries to fire or high temperatures to prevent explosion.
Charge within specified temperature ranges to prevent battery damage and fire risk.
Have tools serviced by qualified personnel using identical replacement parts for safety.
Battery pack servicing should only be performed by the manufacturer or authorized providers.
Ensure no body parts are near the saw chain before and during operation.
Hold the pruner with the right hand on the rear and left on the front handle for safety.
Hold by insulated grips only to prevent electric shock from hidden wires.
Use PPE, including eye and hearing protection, for reduced injury risk.
Avoid operating the pruner while in a tree for personal safety.
Operate only on fixed, secure, level surfaces to prevent loss of balance.
Be cautious with tensioned limbs and slender brush for safety.
Follow safe practices for carrying, lubricating, and tensioning the chain.
Maintain a firm grip, avoid overreaching, and use specified parts.
Learn what causes kickback and how operator actions prevent it.
Implement measures like firm grip, avoiding overreach, and proper maintenance.
Employ techniques like using low kickback accessories and keeping the chain sharp.
Designed with a small radius tip to reduce kickback danger zone.
Contoured depth gauge and guard link deflect force, allowing wood to ride into cutter.
Avoid operating from unstable surfaces, ladders, or trees; maintain proper footing.
Hold by insulated grips to prevent shock if cutting tool contacts hidden wiring.
Read and understand all instructions; do not exceed your experience or capacity.
Make sure the saw chain is not contacting any object before starting.
A pruner is intended for two-handed use only; one-handed use is dangerous.
Handles must be dry, clean, and free of oil or grease for safe grip.
Do not allow debris to build up on air vents or motor.
Always stop the pruner before setting it down.
Avoid cutting vines or small underbrush; use caution with saplings.
Charge battery packs exclusively in CRAFTSMAN chargers for safety.
Avoid water contact and store in cool, dry locations away from extreme heat.
Do not store batteries with the trigger locked on; do not incinerate or expose to high temperatures.
Wash skin immediately if battery contents contact it; seek medical attention if needed.
Do not attempt to open or service damaged battery packs; return for recycling.
Protect battery terminals from metal contact during storage and transport to prevent fire.
Clean battery exteriors with a dry cloth; do not use water or cleaning solutions.
Charge only with CRAFTSMAN chargers; other chargers may cause overheating or bursting.
Do not expose the charger to rain or snow; keep liquids out of the charger.
Disconnect by the plug; ensure the cord is protected from damage.
Use extension cords only when necessary and ensure they are properly rated.
Connect the charger to an appropriate outlet.
Insert and fully seat the battery pack; green light indicates charging.
Charging is complete when the green light remains continuously ON.
A faulty battery may be indicated by charging lights staying OFF.
Charger suspends charging if battery is too hot or cold until temperature is optimal.
Delay is indicated by blinking green light and solid red light.
Charge batteries between 65-75°F (18-24°C) for best performance and life.
It is normal for the charger and battery to become warm during charging.
Check receptacle, light switch, or consult service center if battery does not charge.
Charging a partially used pack has no adverse effect on battery pack life.
Place saw on a firm surface; ensure battery is removed before starting.
Remove sprocket cover and bar lock nut using the wrench.
Wrap chain around guide bar ensuring teeth face correct direction.
Place chain on sprocket, aligning guide bar slot with tensioning pin.
Replace sprocket cover, ensuring rear fits first and aligns with housing bolt.
Install bar lock nut, tighten until snug, then loosen one turn for tensioning.
Rotate tension screw clockwise to tighten chain; ensure it's snug.
Check tension when chain snaps back 1/8" after pulling; no sag should be visible.
Loosen the bar lock nut before adjusting chain tension.
Use the flat screwdriver end of the wrench to adjust the chain tension screw.
Do not over-tension chain to prevent excessive wear and reduce life.
Once tension is correct, tighten the bar lock nut until snug.
Check tension frequently during the first two hours of use as new chains stretch.
Use high-quality bar/chain oil or SAE30 motor oil; vegetable oil for pruning.
Lubricate the saw chain evenly before each use and when changing batteries.
Ensure battery is removed; wear protective gloves as the chain is sharp.
Only use chains rated at greater than 4.4 m/s for this product.
Turn tension screw counterclockwise to loosen chain tension.
Lift the worn saw chain out of the guide bar groove.
Place new chain in guide bar slot, ensuring teeth face correct direction.
Follow installation instructions and adjust chain tension properly.
Open the scabbard by lifting the latch; close by securing the latch to the notch.
Open scabbard for wrench access; store wrench by securing it in retaining slots.
Never operate without the bar tip guard to prevent rotational kickback.
The guard reduces contact at the guide bar end, preventing kickback.
Turn unit off, remove battery, and cover guide bar with scabbard for transport.
Use left hand on front handle and right hand on rear handle for safe operation.
Do not hold the pruner by the front hand guard; lock left elbow for kickback resistance.
Align battery with rails and slide into handle until firmly seated.
Press release button and pull battery pack out of the tool handle.
Read and understand all instructions to prevent electric shock, fire, or injury.
Take precautions to avoid kickback, which can result in severe injury or death.
Remove branches from fallen trees, supporting logs with larger limbs.
Cut felled trees/logs into lengths, using a pruner horse or proper support.
Wear protective gloves; ensure battery is removed before maintenance.
Wipe away dust, sticks, and debris from the sprocket cover and chain.
Rotate chain tension screw counterclockwise to allow guide bar to recede.
Grasp chain and guide bar, lifting them away from the tool.
Install chain, guide bar, and sprocket cover, then adjust chain tension.
Wear protective gloves; ensure battery is removed before sharpening.
Do not over-file chain rakers; this increases kickback risk. Replace after four sharpenings.
Each sharpening reduces low kickback qualities; use extra caution.
Turn unit off, remove battery, and cover teeth before mounting on trackwall.
Install the guide bar scabbard securely if the tool is on the trackwall.
Flip or pull open the integral hang hook until it clicks into position.
Mount the integral hang hook securely to the Versatrack™ Trackwall.
Do not suspend tools or objects overhead from the integral hang hook.
Adequately space tools on trackwall to not exceed 75 lb (35 kg) per linear foot.
Ensure the Versatrack™ integral hang hook is returned to its original position before use.
Charger and batteries are not serviceable; no user-serviceable parts inside.
Repairs, maintenance, and adjustments should be done by a CRAFTSMAN authorized center.
Check battery installation, charging requirements, and lock-off lever.
Check battery charge; restart and apply less pressure if unit is being forced.
Check charger outlet, receptacle connection, and temperature range.
Refer to Adjusting Chain Tension section for overheating or looseness.
Refer to Adjusting Chain Tension section; check lubrication and wear.
Ensure chain is installed correctly; check sections for installation and removal.
| Power Source | Battery |
|---|---|
| Voltage | 20V |
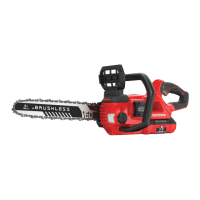
| Bar Length | 12 inches |
| Motor | Brushless |
| Automatic Oiler | Yes |
| Tool-Free Chain Tensioning | Yes |
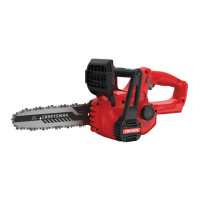
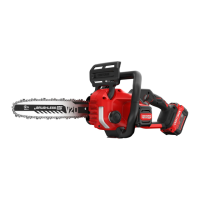
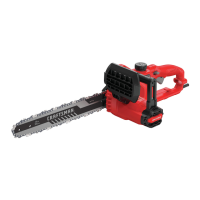
| Type | Cordless Chainsaw |
| Chain Pitch | 3/8 inch |
| Chain Gauge | 0.043 inch |






 Loading...