ENGLISH
10
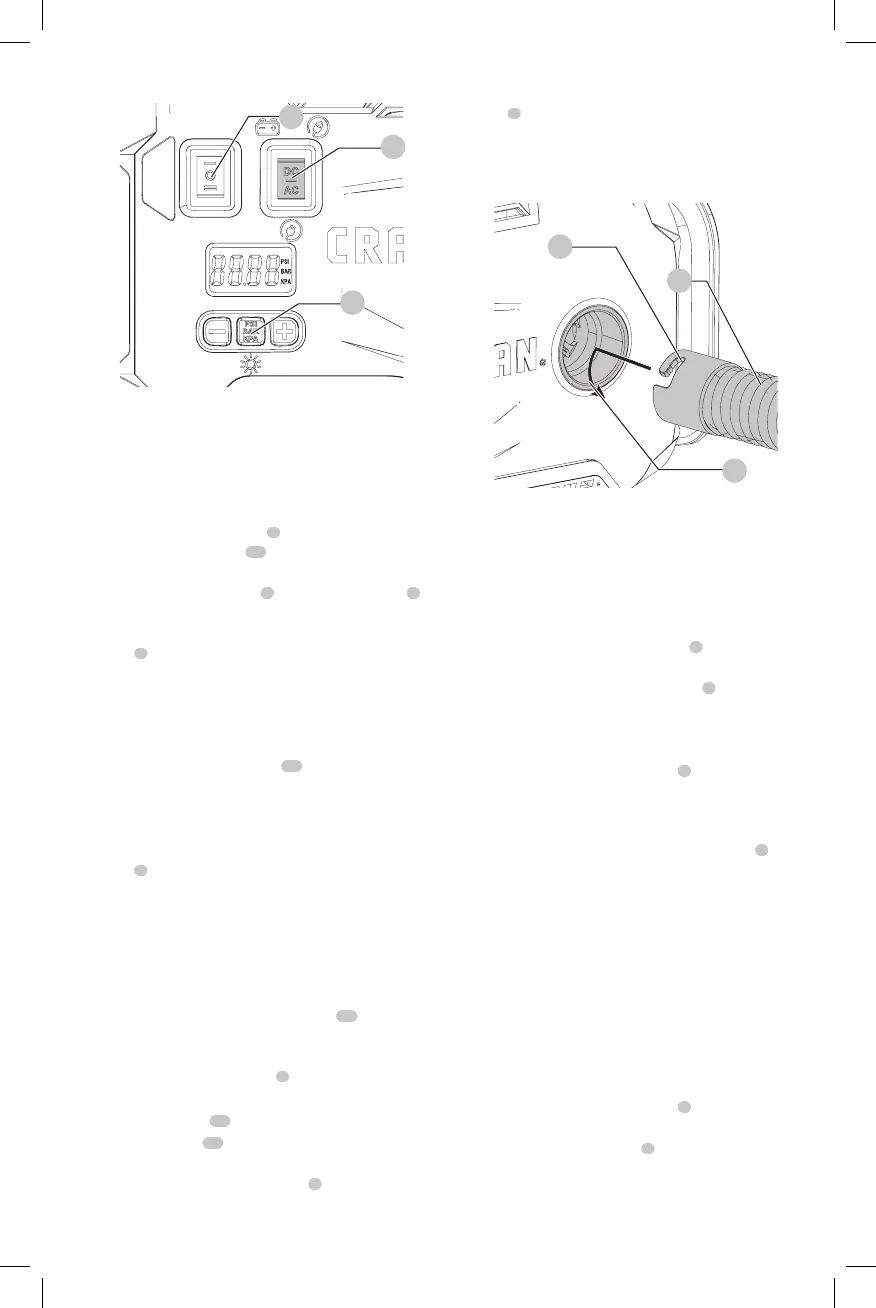
Fig.E
1
2
5
To Turn on High-Volume
The high-volume hose is meant to be used for objects that
hold large amounts of air, such as air mattresses, rafts, and
swimming poolfloats.
NOTE: The high-volume mode DOES NOT have an auto
shut-offfeature.
1. Attach the high-volume hose
7
to the high volume
pump inflator connection
12
as described in the High
Volume Hosesection.
2. Insert the high-volume hose
7
, or it's tapered nozzle
8
into the object beinginflated.
3. Press the high-volume side of the mode power
switch
2
, indicated by the air mattress symbol.
4. To turn off, push the power switch to the centerposition.
To Turn on High-Pressure
The high-pressure hose is meant to be used for objects that
need more air pressure, such as tires andbasketballs.
1. Remove the high-pressure hose
10
from thestorage.
2. Attach a nozzle as described in the Universal valve
adaptersection.
3. Insert the nozzle into the object beinginflated.
4. Press the high-pressure side of the mode power
switch
2
, indicated by the tire symbol.
5. To turn off, push the power switch to the centerposition.
Deflate Using the High-Volume Hose
(Fig. A, F)
WARNING: Beware of objects being ejected.
When deflating, large amounts of air will exit the
high volume pump inflator connection
12
. Ensure
the universal valve adapter is not pointed at anyone
oranything.
1. Remove the high-volume hose
7
from the
storagelocation.
2. Line up the hose end
24
with the
high-volume pump
deflate connection
11
. Then, firmly slide in the hose so it
is securly in place.
3. Insert the hose, or it's tapered nozzle
8
into the object
beingdeflated.
4. Press the high-volume side of the mode power
switch
2
, indicated by the air mattress symbol.
5. To turn off, push the power switch to the centerposition.
6. To remove the hose, twist the hose counterclockwise
and slide hose off.
Fig.F
11
24
7
Setting the Automatic Shut-Off Pressure
(Fig. A)
NOTE: The digital readout will only show inflation pressures
when the inflator is being used. In both inflation and pump
mode the unit will show batterystatus.
1. To switch between the different units (psi, bar or kPa),
press the pressure mode/reset button
5
until the
required units aredisplayed.
2. Press the - or + pressure setting buttons
4
until the
required pressure isdisplayed.
3. After 3 seconds the display will flash and return to a
reading of "0.0". This isnormal.
4. Connect the universal valve adapter
9
and accessories,
if required, to the item to be inflated, making sure that
the lever of the universal valve adapter is in the down
position to lock it inplace.
5. To start the inflator press the mode power switch
2
,
towards the side of the tire symbol.
6. When the item to be inflated has reached the preset
value the unit will automatically turn off.
NOTE: You may notice the actual pressure reading may
drop after a couple of seconds. This isnormal.
7. To stop the inflator at any time, press the main power
button back to the centerposition.
NOTE: If the AC/DC power switch is turned off, all settings
will be lost and will need to be reentered. This is a safety
feature to prevent the risk of items OVERINFLATING.
Using the Inflator as a Pressure Gauge
1. Connect the universal valve adapter
9
to the item to
bechecked.
2. Press the mode power switch
2
, on the side of the tire
symbol.
3. The digital readout will display the item'spressure.