EasyManua.ls Logo

Craftsman Contractor 113.299112 User Manual

Craftsman Contractor 113.299112
76 pages
To Next Page IconTo Next Page
Page #1 background imageLoading...
Page #1 background image
F
Save ThisManual
For FutureReference
MODEL NO.
113.299112
SAW WITH LEGS
TWO CAST IRON
TABLEEXTENSIONS
MOTOR
QUICK RELEASE
EXACT-i-RIP FENCE
SAWDUST COLLECTOR KIT
MITER GAUGE AND HOLD
DOWN
Seria!
Number
Model and serial number
may be found at the right-
hand side of the base.
You should record both
model and serial number in
a safe place for future use.
YOUR
SAFETY:
READ ALL
INSTRUCTIONS
CAREFULLY
,,...
Part No. SP5802
[RRFTZMRN
I 0" Deluxe Belt Drive Saw
assembly
operating
repair parts
SEARS, ROEBUCK AND CO., Hoffman Estates, IL 60179
J
Printed in USA

Table of Contents

Question and Answer IconNeed help?

Do you have a question about the Craftsman Contractor 113.299112 and is the answer not in the manual?

Craftsman Contractor 113.299112 Specifications

General IconGeneral
TypeTable Saw
Blade Diameter10 inches
Arbor Size5/8 inch
Motor1.5 HP
Voltage120V
No Load Speed5000 RPM
Max Cut Depth at 90°3 inches
Rip Capacity25 inches
Amps15 Amps

Summary

Safety Instructions for Table Saw

Before Using the Saw

Steps to complete before plugging in the saw for the first time.

Safety Instructions for Table Saw (Continued)

Motor Specifications and Electrical Requirements

Connecting to Power Source Outlet

Instructions and warnings for connecting the saw to an electrical outlet.

Motor Specifications and Electrical Requirements (Continued)

Changing Motor Voltage

Instructions for converting the motor for different voltage operations.

Assembly

Installing Handwheels

Instructions for attaching the elevation and tilt handwheels.

Checking Table Insert

Procedure to ensure the table insert is flush with the table top.

Assembly (Continued)

Checking Blade Squareness to Table

Importance and method for checking blade squareness before assembly.

Mounting Saw to Leg Set

Instructions for attaching the saw housing to the assembled leg set.

Attaching and Assembling Table Extensions

Guide for attaching the table extensions to the saw table.

Installing Front Rip Fence Guide Bar

Alignment procedure for the front guide bar using blade marks.

Installing Rear Fence Guide Bar

Steps to install the rear guide bar for the rip fence.

Adjusting Rip Fence Guide Bars

Procedure for aligning the rip fence guide bars for proper operation.

Rip Fence Alignment Adjustment

How to adjust the rip fence to be parallel with the sawblade and miter gauge.

Assembling Micro Adjust and Racks

Final adjustments and troubleshooting for the micro-adjust mechanism.

Installing Blade Guard

Attaching the spreader and aligning antikickback pawls.

Positioning Motor on Motor Mounting Base

Steps for correctly positioning the motor onto its base.

Assembling Steel Legs

Step-by-step guide for assembling the saw's leg set.

Getting to Know Your Saw

Getting to Know Your Saw (Continued)

Safety Instructions for Basic Saw Operations

Safety Instructions for Basic Saw Operations (Continued)

Plan the Way You Will Push the Workpiece Through

Safe techniques for feeding workpieces and avoiding injury.

Whenever Saw is Running

Precautions to follow while the saw is operating.

Using the Miter Gauge

Using the Miter Gauge (Continued)

Using the Rip Fence

Using Featherboards for Thru-Sawing

Using Featherboards for Non Thru-Sawing

Adjustments

Adjustments (Continued)

Heeling Adjustment or Parallelism of Sawblade to Miter Gauge Groove

Adjusting the rear and front trunnions for blade parallelism.

Blade Tilt, or Squareness of Blade to Table

Adjusting stop screws and scales for 45-degree blade tilt.

Maintenance

Lubrication

Troubleshooting

Troubleshooting - General

Common problems and their solutions for general saw operation.

Troubleshooting (Continued)

Troubleshooting - Motor

Troubleshooting for motor starting, overheating, and stalling issues.
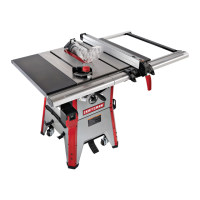
Related product manuals