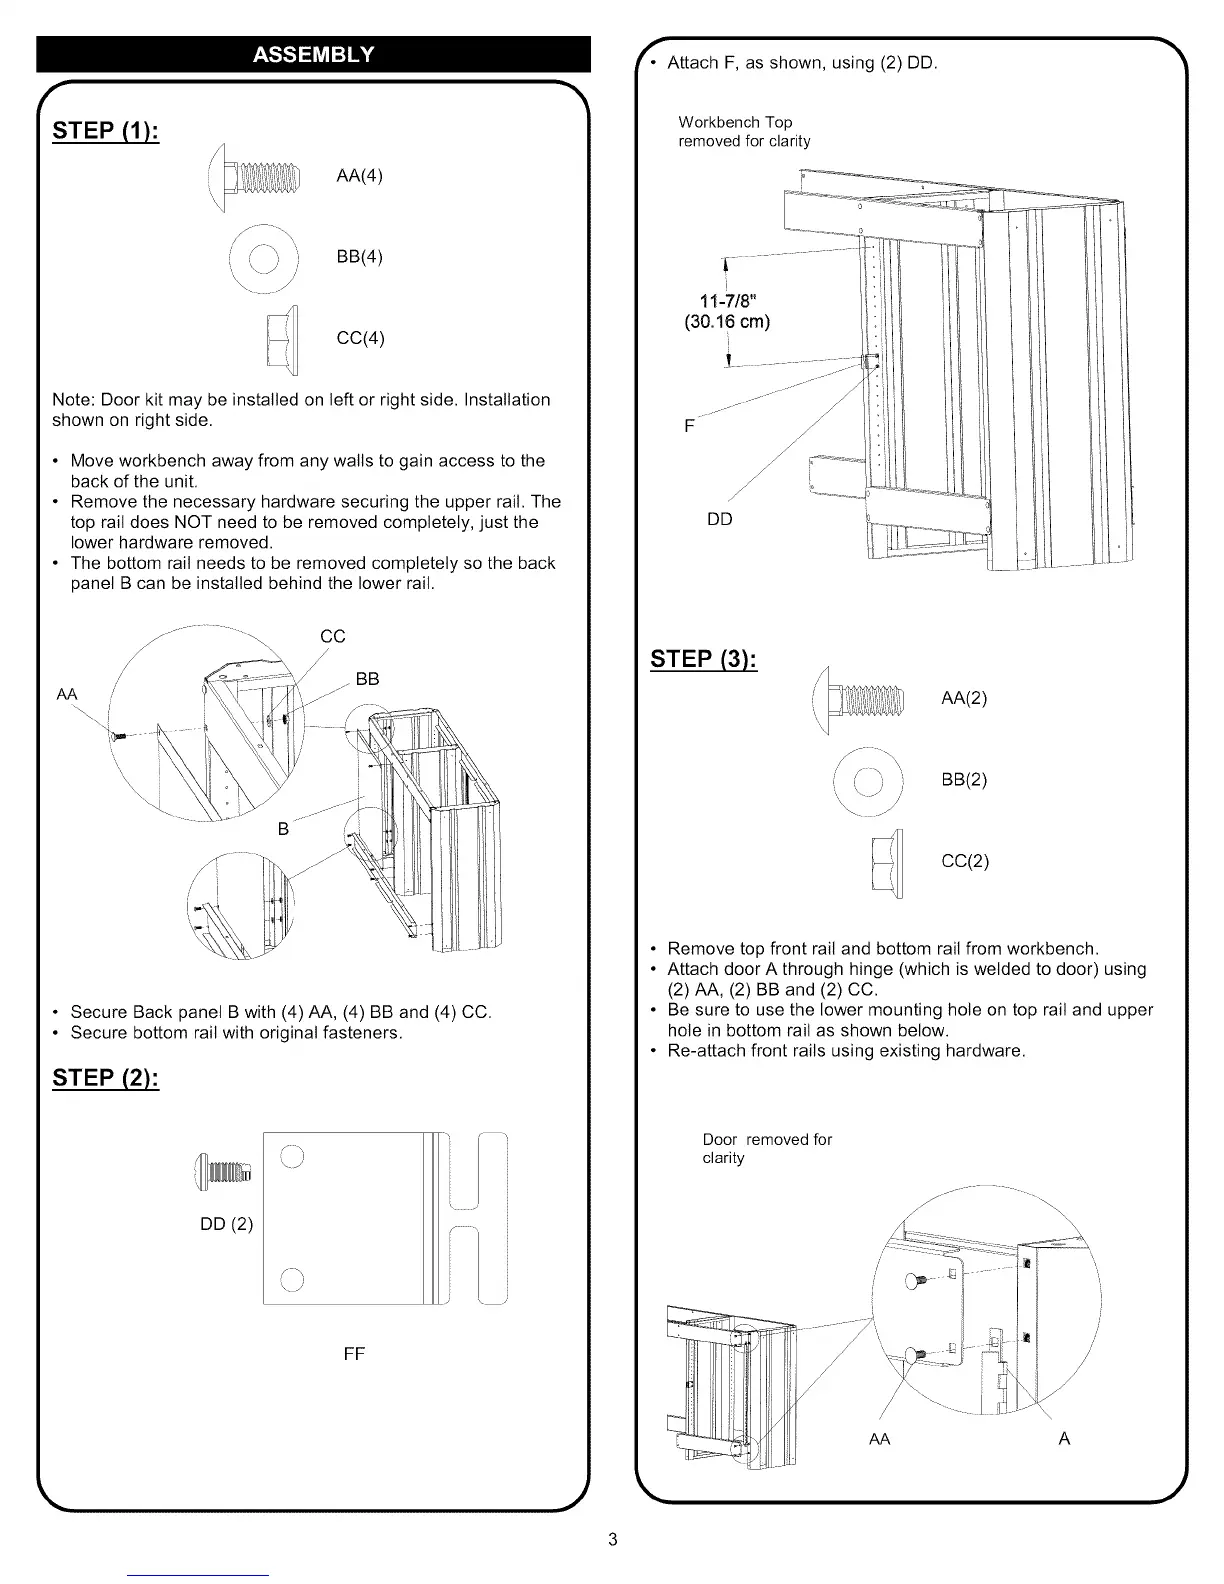
STEP (1):
AA(4)
BB(4)
CC(4)
Note: Door kit may be installed on left or right side. Installation
shown on right side.
• Move workbench away from any walls to gain access to the
back of the unit.
• Remove the necessary hardware securing the upper rail. The
top rail does NOT need to be removed completely, just the
lower hardware removed.
• The bottom rail needs to be removed completely so the back
panel B can be installed behind the lower rail.
AA
BB
• Secure Back panel B with (4) AA, (4) BB and (4) CC.
• Secure bottom rail with original fasteners.
STEP (2):
DD (2)
' i
\_/
FF
_111111
f
• Attach F, as shown, using (2) DD.
Workbench Top
removed for clarity
i
11-7/8"
(30.16 cm)
!
F
STEP (3):
AA(2)
BB(2)
cc(2)
• Remove top front rail and bottom rail from workbench.
• Attach door A through hinge (which is welded to door) using
(2) AA, (2) BB and (2) CC.
• Be sure to use the lower mounting hole on top rail and upper
hole in bottom rail as shown below.
• Re-attach front rails using existing hardware.
Door removed for
clarity
//
A
,J