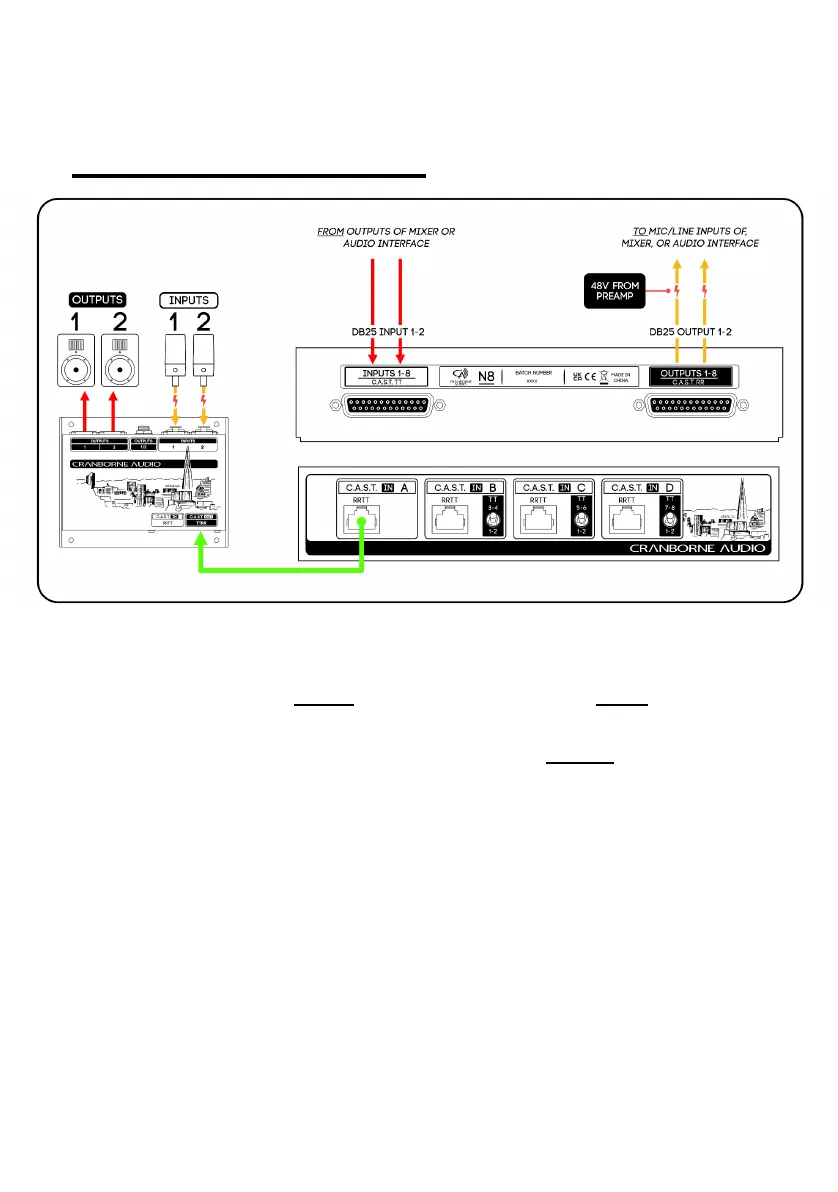
HARDWARE SETUP
The diagram above details the steps required in order to connect N8 to your recording
system and C.A.S.T.-enabled devices.
1. Connect the DB25 Output Connector [4] to the Mic/Line Inputs 1-8 of your
audio interface.
2. Connect the DB25 Input Connector [3] to the Line Outputs 1-8 of your audio
interface.
3. Connect the C.A.S.T. Output of any C.A.S.T.-enabled device to the C.A.S.T.
Input [1] of N8 using a shielded Cat 5e, Cat 6, or Cat 7 cable.
4. Connect your Mics or Line sources into the Inputs of the connected
C.A.S.T.-enabled device.
5. Connect the Outputs of the C.A.S.T.-enabled device to your desired
destination such as a speaker, monitor, or recording device.
Once set up, mic/line sources connected to Inputs 1/2 of the C.A.S.T. device will be sent
through C.A.S.T., through N8, out of channels 1/2 on the DB25 Output Connector [4]
and into Inputs 1/2 of your audio interface.
At the same time, Outputs 1/2 from your audio interface are sent into inputs 1/2 on N8’s
DB25 Input Connector [3], through the same C.A.S.T. cable, and to outputs 1/2 of the
connected C.A.S.T. device.
Page 4 ©2022 Cranborne Audio Ltd