6
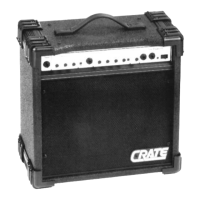
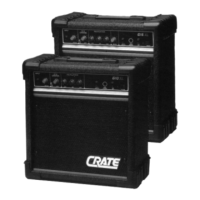
CRATE TAXI • TX-30E
THE FRONT PANEL:
1. INPUT 1: Connect an instrument, tape/CD
player or microphone here using a shielded sig-
nal cable (see pages 8 & 9). Use the Tone and
Level controls (#3 & 4) to control this signal.
2. INPUT 2: Connect an instrument, tape/CD
player or microphone here using a shielded sig-
nal cable (see pages 8 & 9). Use the Gain,
Tones (Low, Mid and High) and Level controls
(#6 – 10) to control this signal. This high-Z input
accepts a wide range of signals, from Piezo to
line-level.
3. LEVEL: Use this control to adjust the output
volume level of Input 1. When using devices
such as a CD or tape player, a rhythm machine,
etc., use this control along with the output vol-
ume control of the device to achieve a good vol-
ume balance between the Input 1 and Input 2
signals.
4. TONE: Use this control to adjust the
midrange frequencies for Input 1.
5. GAIN SELECT: This switch pads the Input 2
signal just before the Gain control (#6), allow-
ing you to get two different sounds from the
same control settings – clean sounds with the
switch in the out position; dirty sounds with the
switch depressed. (As a general rule, leave this
switch in the out position for use with acoustic
instruments.)
6. GAIN: When the Gain Select switch (#5) is in
the out position this control can add a lot of
crunch to the Input 2 signal. When the Gain
Select switch is depressed this control can add
a lot of overdrive distortion when turned up.
Use this control along with the Level control
(#10) to get the right sound at the volume you
need.
7. LOW: Use this control to adjust the level of
the low frequencies for Input 2. For less bass,
rotate this control counterclockwise; for more
bass, rotate this control clockwise. At higher
playing levels it is sometimes helpful to turn the
low control down a bit.
8. MID: Use this control to adjust the level of
the midrange frequencies for Input 2.
9. HIGH: Use this control to adjust the level of
the high frequencies for Input 2 .
10. LEVEL: Use this control to adjust the output
volume level of Input 2. Use this control along
with the Gain Select and Gain control (#5 & 6) to
get the volume you need and the desired sound.
11. INSERT: Use this jack to connect an external
effects device (reverb, chorus, etc.) to the
amplifier (see page 6). The jack is a standard
stereo 1/4” jack and is wired as follows:
Tip = Line In (Return – from effect’s output)
Ring = Line Out (Send – to effect’s input)
Sleeve = Ground
The Insert jack can also be used as a third input
– see “Idea 4” on page 9.
12. HEADPHONES: Use this jack to connect a
pair of stereo headphones for a private practice
session. The speakers are disconnected when
headphones are used.
13. LED: When the battery is fully charged, this
LED illuminates yellow when the power switch
is in the on position. The LED illuminates red
when the battery needs recharging.
14. POWER: Use this switch to turn the amplifi-
er on and off. The “on” position is marked with
a small white line. To conserve battery power,
turn the amp off when not in use.

 Loading...