6 Crathco
®
Model 3311 Beverage Freezer
Installation (continued)
Installing Your Unit (continued)
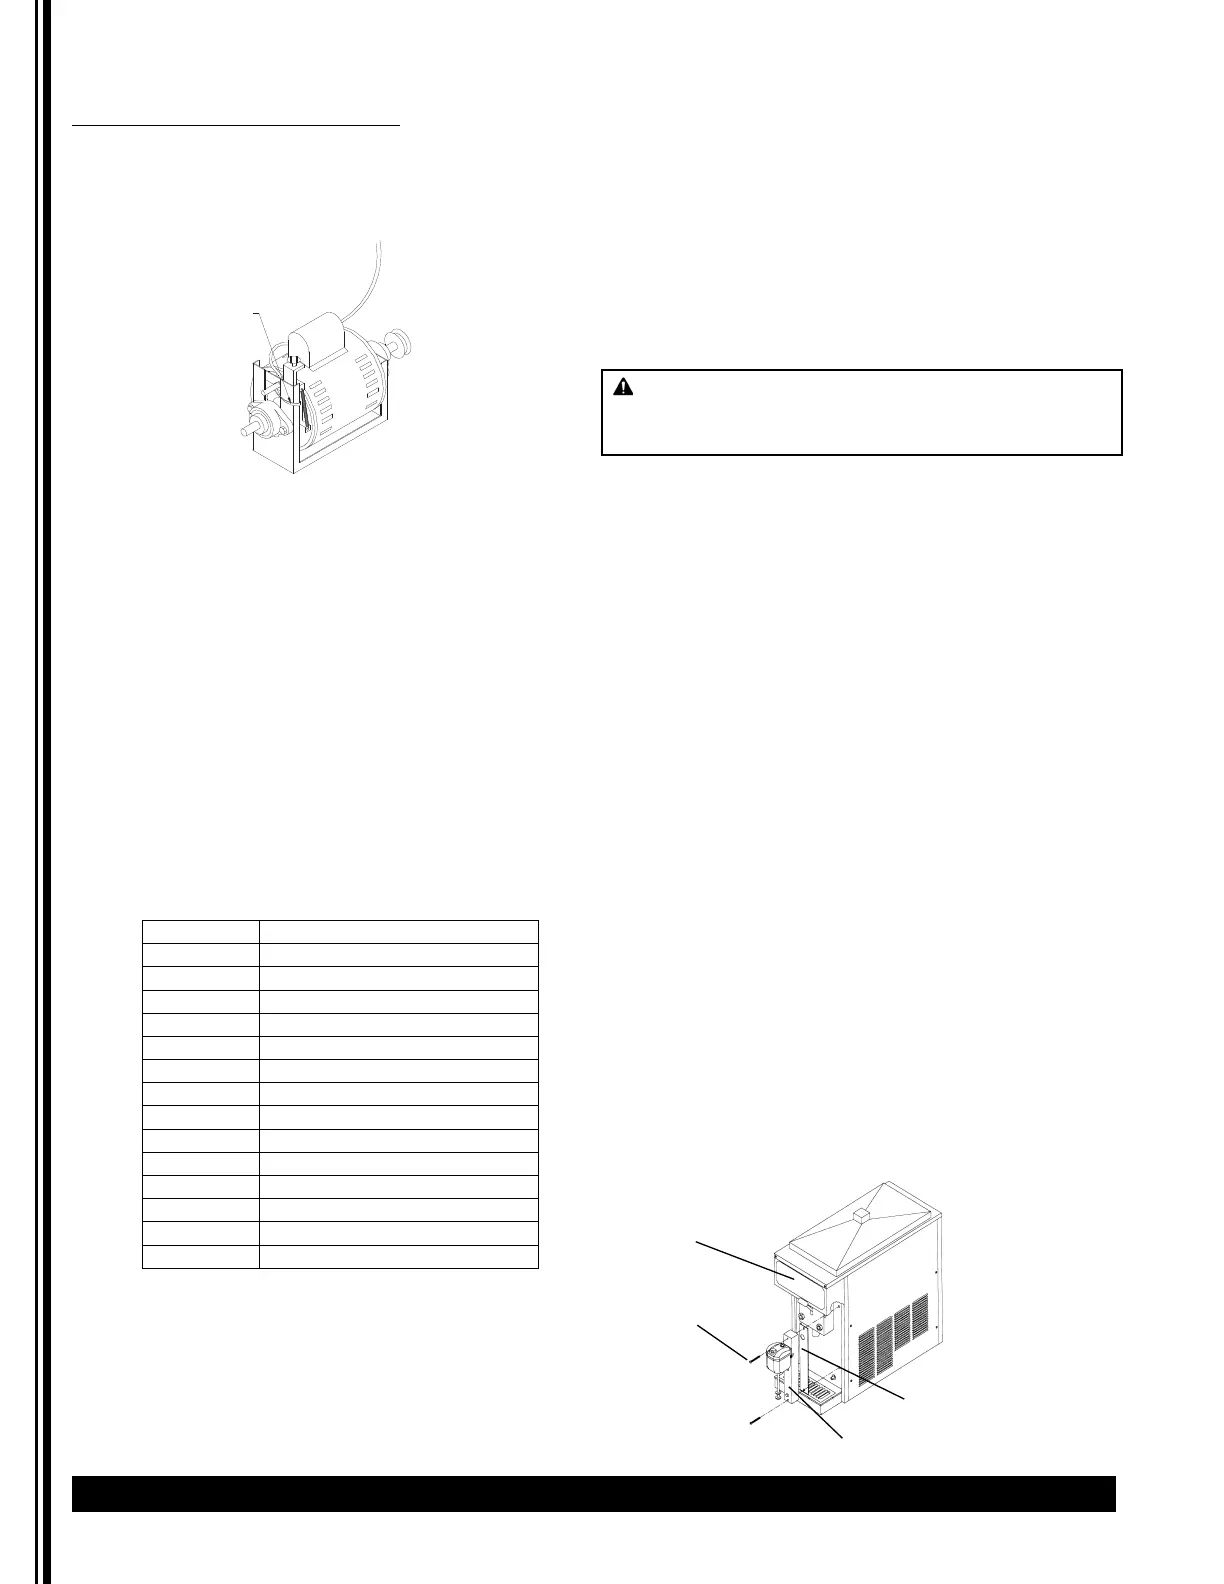
4. The side panels should still be removed. Cut
the cable tie used to secure motor during
shipment. Make sure motor rocks freely.
(Figure D)
5. Water Cooled Units Only: Connect water
to inlet (3/8” flare fitting). Connect the
drain line to the fitting on the out port. The
out port will go to a drain or recirculating
pump (reservoir with recirculating pump is
recommended).
6. 220V/50Hz Units: These units come with a
plugless cord that requires the appropriate
plug configuration be connected. This must
be determined by the power outlets at the
specified location. See wiring diagram at
back of manual for assistance. It is
recommended that a service technician
performs this operation.
7. Review hopper contents to make sure all
parts are available:
* Optional items specified when the unit is ordered.
8. Fill out Warranty Registration Card with the
requested information and mail to
Grindmaster-Cecilware.
9. Replace side panels.
10. Assemble the dispense valve following the
instructions on page 9. The valve plunger,
spring, and retaining pin come in the small
parts bag.
11. Be sure ON-OFF-CLEAN switch (toggle
switch located underneath the electrical
box) is in the “OFF” position.
12. Connect the power cord directly to a
properly grounded DEDICATED 120V/60Hz,
15 Amp circuit or 220-240V/ 50Hz, 15 Amp
circuit for CE models. Do not use an
extension cord.
WARNING Do not alter or deform the plug in any
way! Altering or deforming the plug may cause
electrical shock, damage unit and will void warranty.
13. Remove the drip tray kit from the bubble
wrap. Separate the parts and remove the
protective coating. The drip tray is mounted
on two screws that are located on the lower
front of the freezer cabinet.
14. Place the key hole slot of the drip tray
support bracket (W0472064) on to these
screws and tighten the screws.
15. Angle the back of the drip tray surround
bracket into the drip tray support bracket
(W0472064) and lower bracket to lock it
into place.
16. Place drip tray onto drip tray surround
bracket.
17. Place the louvered drip tray insert into drip
tray.
The Model 3311 has several optional accessories that
can be added to the unit in the field to meet your
application’s needs. These accessories come with
installation instructions.
• Spinner - Spinners are typically used in applications
that add flavoring to a frozen neutral base product
after it is dispensed.
Allows operator to serve a wider variety of frozen
drinks from one machine (i.e. hazelnut added to
cappuccino). See Figure E.
Figure D
Part # Description
W0600110 Manual
W0600073 Rubber Pad Sheet
W0600121 Merchandiser Installation Sheet
W0600012 MSDS Sanitizer Sheet
W0600159 Warranty Registration Card
W0890218 Drip Tray Kit
W0520094 Hopper Cover
W0480445 Valve Handle
W0631230 Valve Spring
*
Carb Tube
*
Dispense Valve Plunger
W0470076 Lubricant
W0631903 Sanitizer Packets
W0340022 O-rings
Accessory Installation
Spinner mounting bracket
Spinner
Mounting screws
Electrical box
Figure E
REMOVE CABLE TIE


 To Next Page