Preview
After specifying the Object, Size, Feature, Accuracy, Color Mapping and Turntable options, press
to enter the scanning page. The left area of the 3D Model Preview window shows the distance. Place the
scanner at an "Optimal distance" from the object and try to maintain it during scanning.
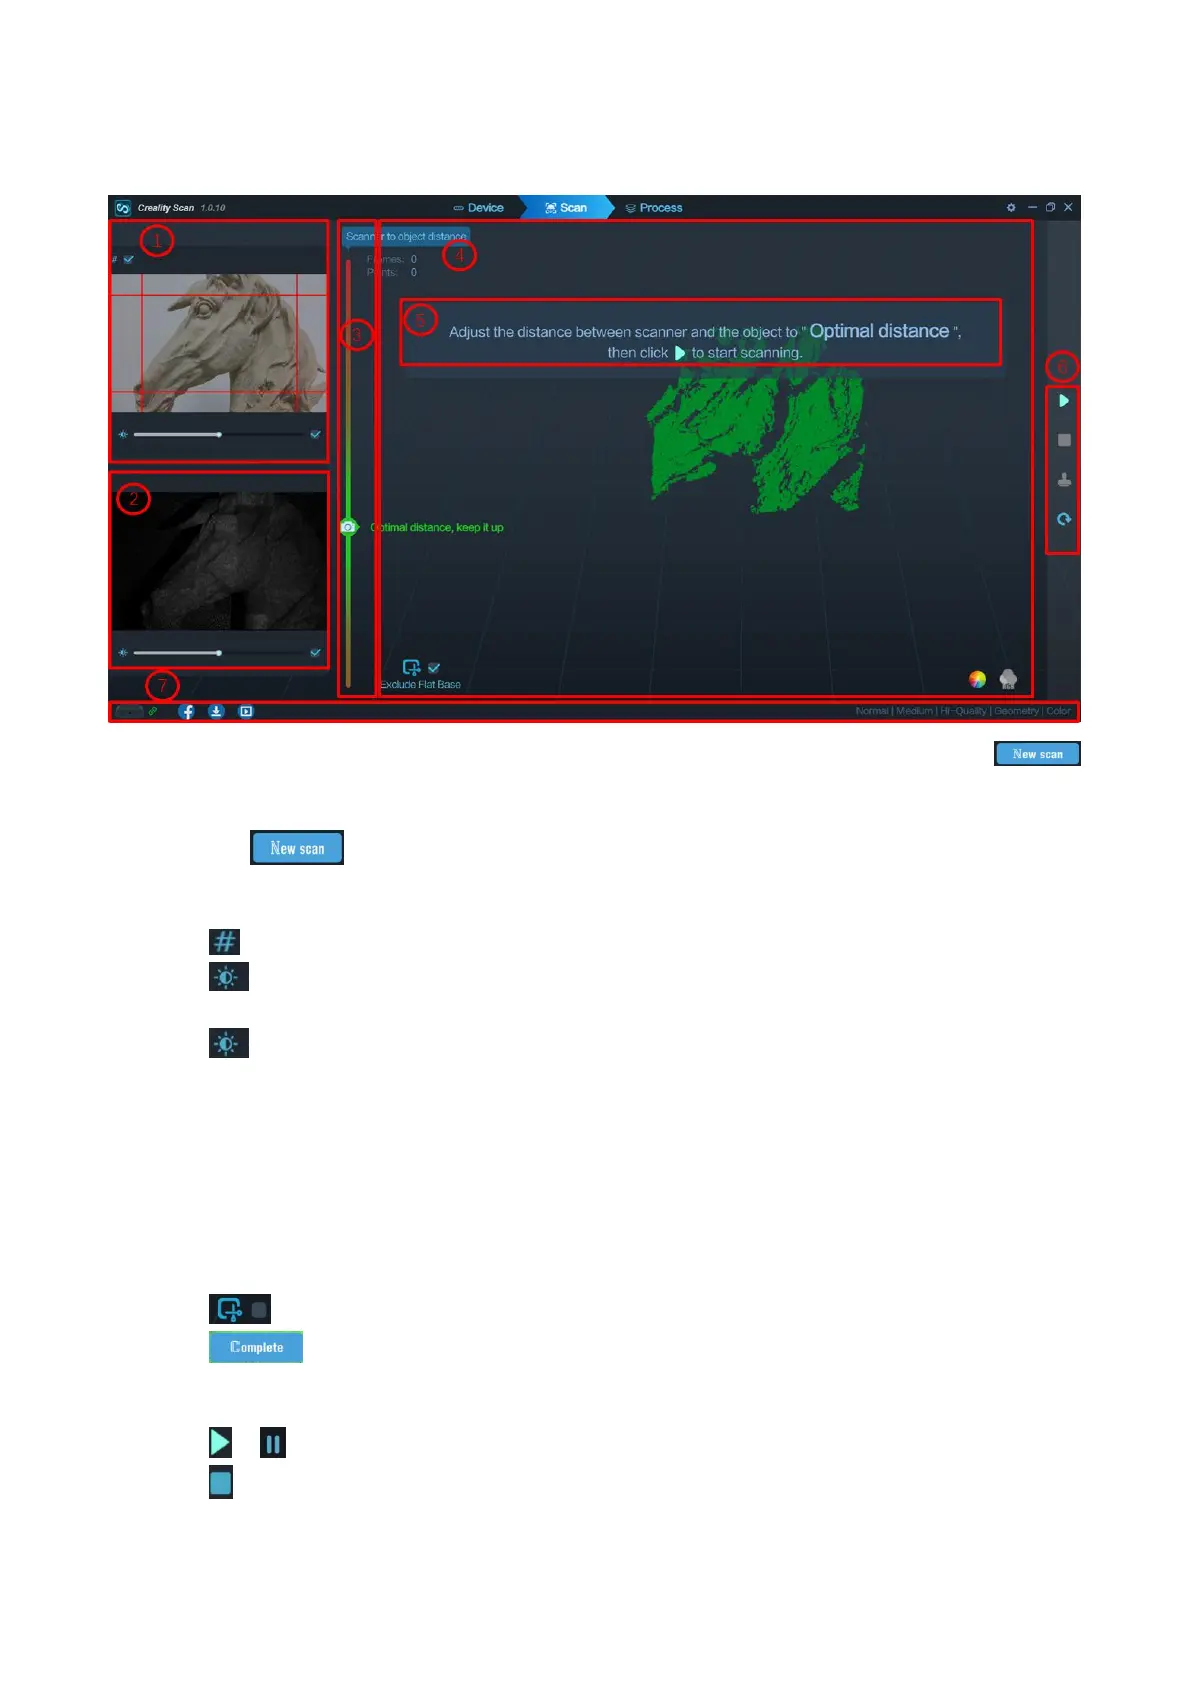
When click the on the Project Setting UI, the scan UI is shown to users.
① RGB Camera: Display the image captured by the RGB Texture camera.
Icon : This option aids in positioning the object to be scanned so that the cameras can see it.
Icon : Exposure can be manually adjusted for best results.
② IR Camera: Display the IR image captured with the current exposure setting.
Icon : Exposure can be manually adjusted for best results (the areas not displayed in red or blue).
Although the software can automatically adjust to find the appropriate setting, remember to adjust manually
to prevent exposure variations that may interfere with data capture.
③ Scanning distance: Place the scanner's distance to the object so that it is in the Perfect zone to ensure
scanning accuracy. Adjust the optimal distance according to the prompt.
④ 3D Model Preview Window: Display the 3D model data that will be captured when scanning starts or all
of the data that has been captured after scanning has started. The view of the model may be dragged or
zoomed in the 3D Model preview area by the mouse (Left Mouse Button: Rotate the model; Wheel: Zoom
in/out).
Icon : Exclude the point cloud on a flat base during scanning.
Icon : Stop the current scanning project and processing the point clouds on the Process UI.
⑤ Prompt: Display some prompts during scanning.
⑥ Function Buttons:
Icon / : Start / pause scanning.
Icon : Stop the current scanning project and processing the point clouds on the Process UI.
 Loading...