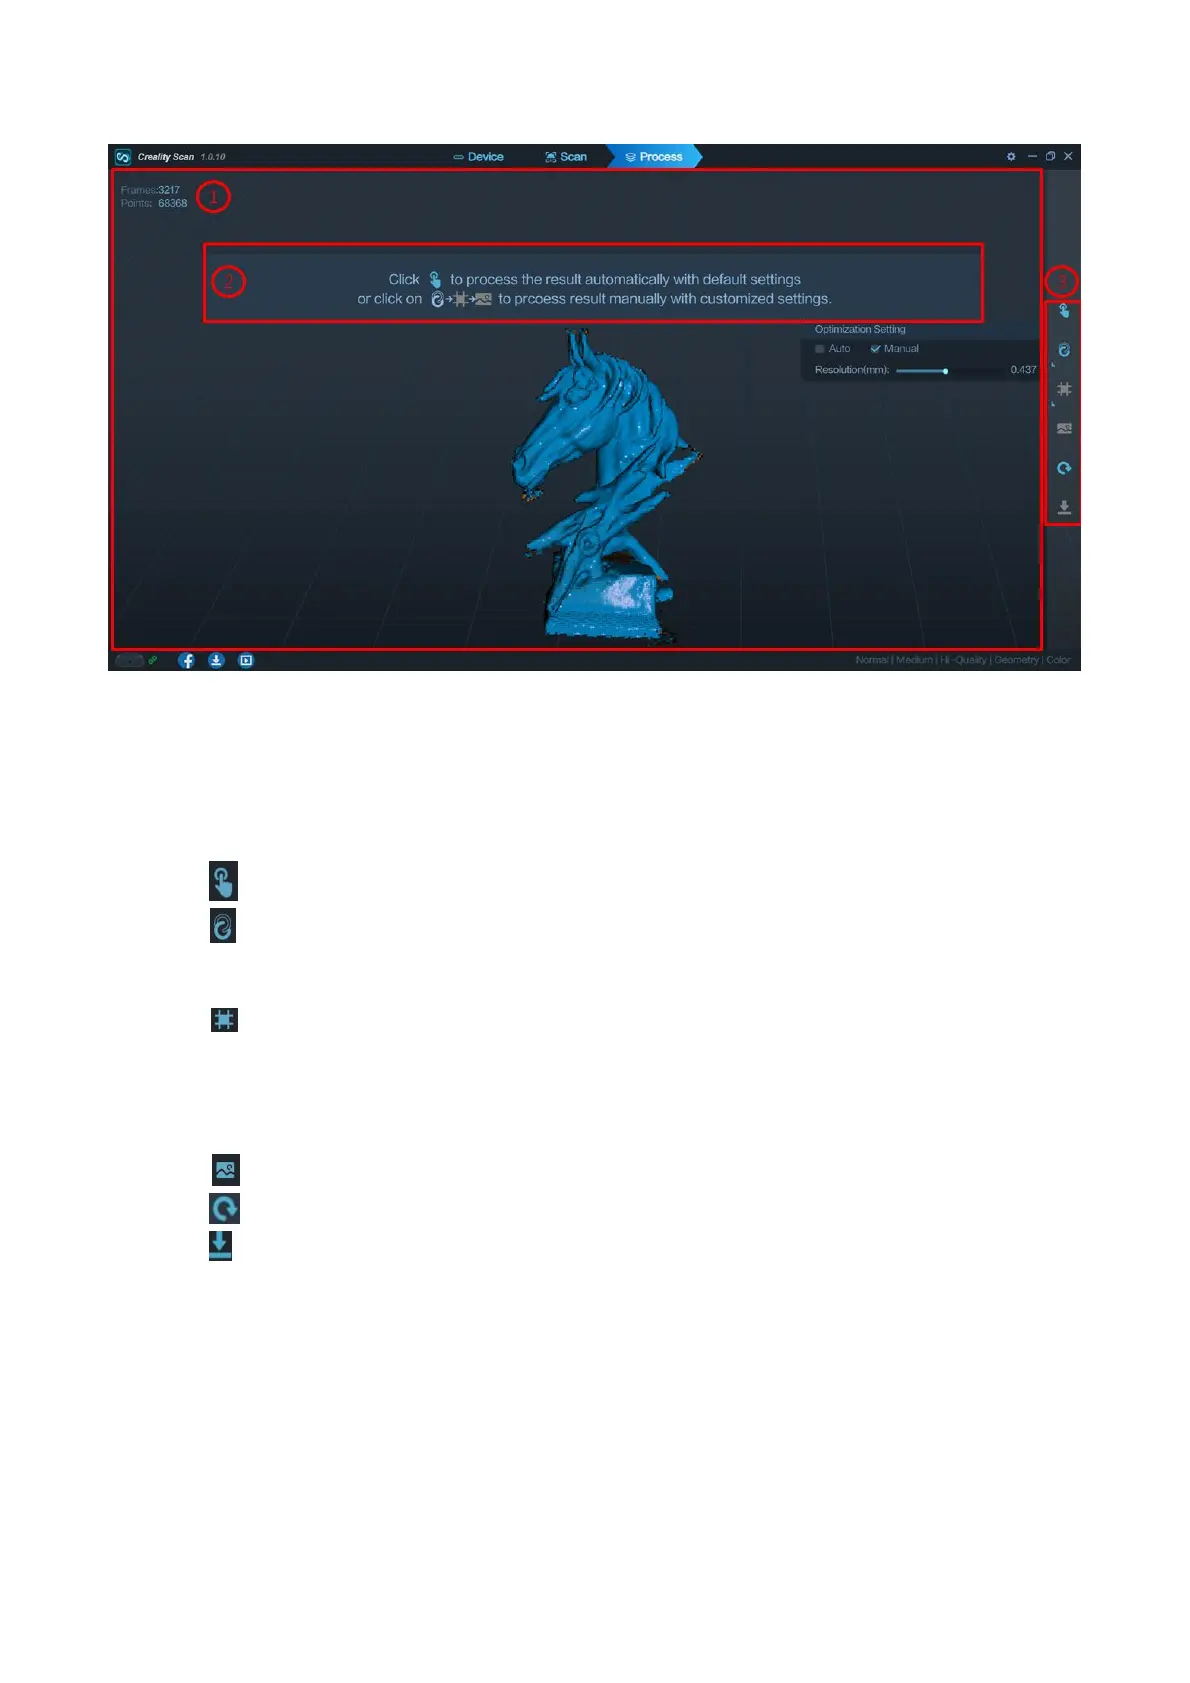
① 3D Model Preview Window: Display the 3D model data that will be captured when scanning starts or all
of the data that has been captured after scanning has started. The view of the model may be dragged or
zoomed in the 3D Model preview area by the mouse (Left Mouse Button: Rotate the model; Wheel: Zoom
in/out).
② Prompt: Display some tips during processing.
③ Function Buttons:
Icon One-Click Processing. One click to complete all processing.
Icon Point cloud optimization. Integrate scanned point clouds to obtain high-quality point cloud
models. There are two ways to do this. Automatic mode uses default parameters for point cloud fusion
optimization. Manual mode allows you to configure parameters by yourself.
Icon Meshing. Convert the scanned 3D point cloud data into triangles. There are two ways to
achieve this function. In the automatic mode, nets are constructed with the default parameters. In the
manual mode, you can configure the parameters yourself. If "No Color" is selected when the Scan Mode is
defined, the model only consists of point cloud and mesh information. If the "Color" option is selected, then
the model will also contain the color information of each point.
Icon Color Mapping. It will generate a UV map for coloring the mesh model.
Icon Clear scanning. It will clear all the scanned data to re-start a new scanning.
Icon Export the completed 3D model. Format .PLY, .OBJ & .STL, are supported. The point cloud will
be exported simultaneously when the mesh file is exported.
 Loading...