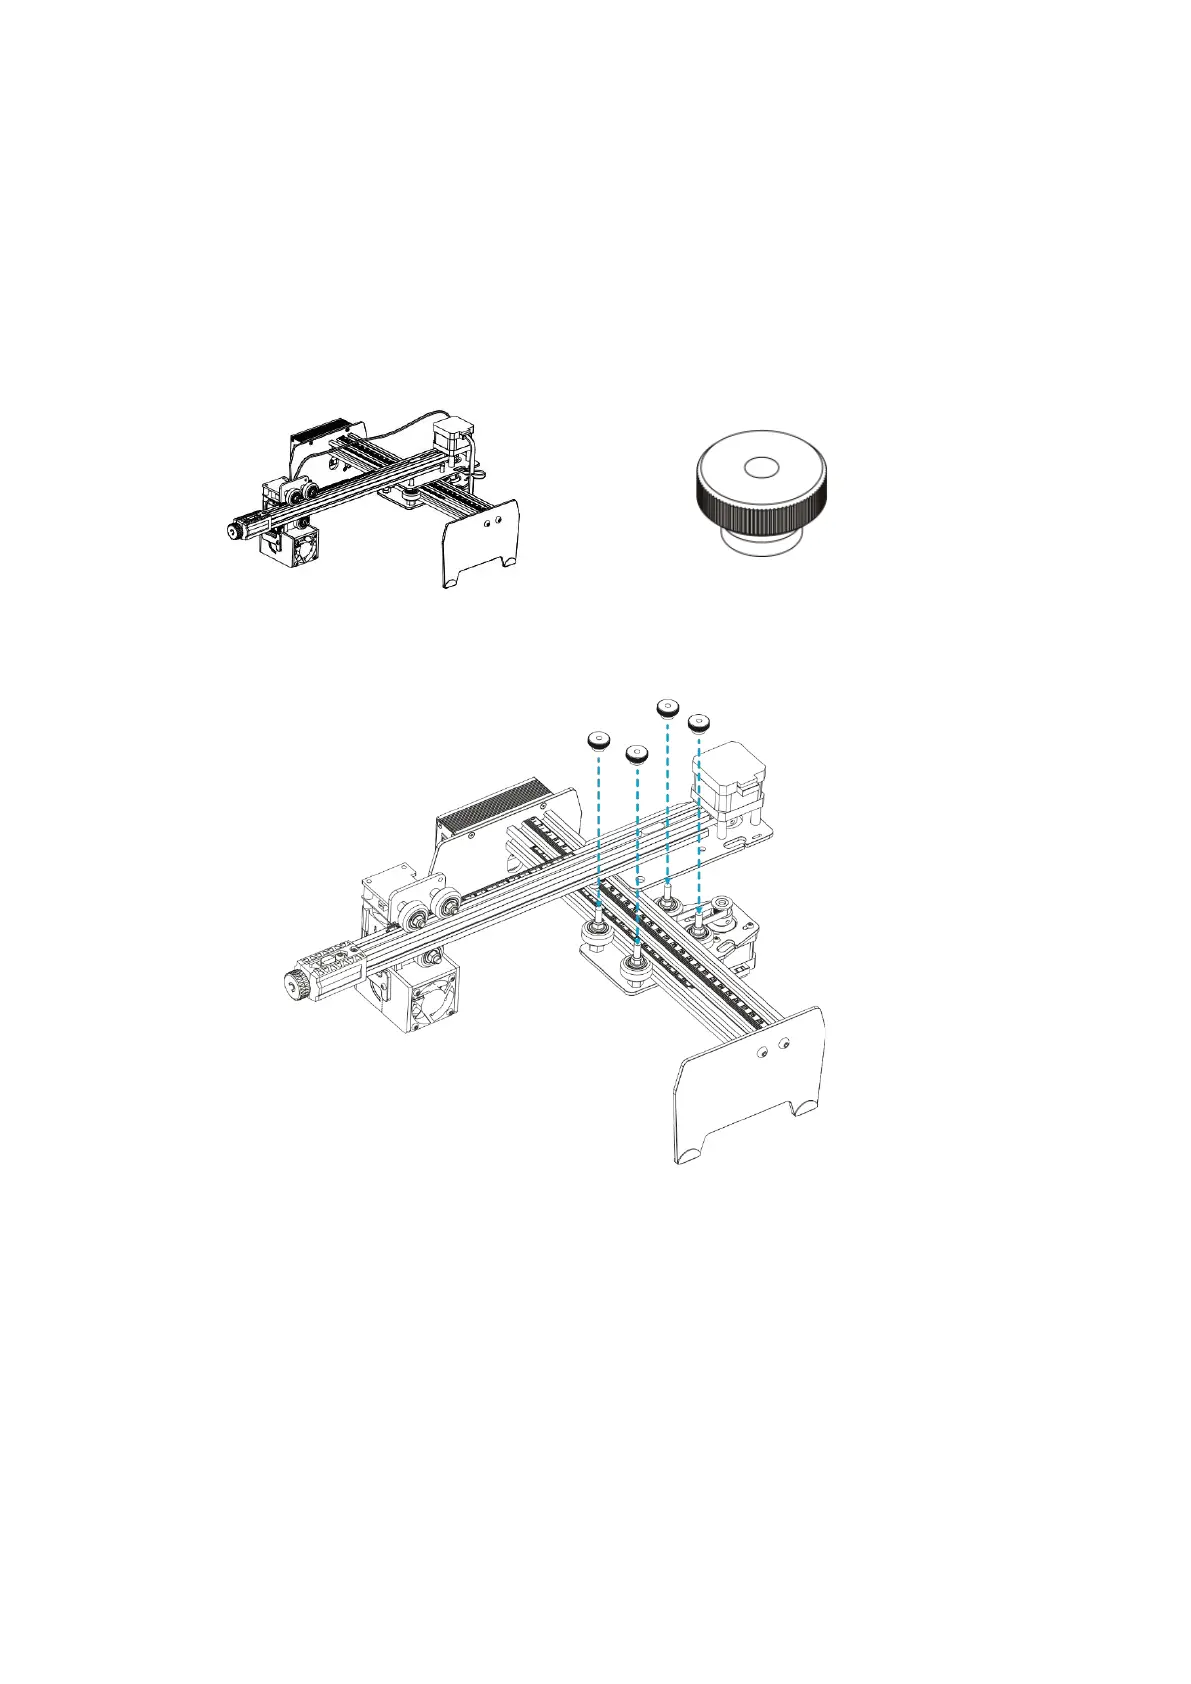
EasyManuals Logo

Creality CV-01 PRO User Manual

Creality CV-01 PRO
65 pages
To Next Page IconTo Next Page
To Previous Page IconTo Previous Page
Page #6 background imageLoading...
Page #6 background image
6
Assembled laser engraving machine
1. Assemble the X-axis assembly and the Y-axis assembly. Take out the X-axis assembly
and the Y-axis assembly from packaging box. Horizontally place the X-axis assembly
above the Y-axis assembly, and align the tapped holes to the projected screws
underneath. Then lower it horizontally onto the Y-axis assembly. Finally, put on 4
knurled nuts with collar and tighten them clockwise.
X-axis assembly, Y-axis
assembly x1
Knurled nut
with collar x4

Questions and Answers:

Question and Answer IconNeed help?

Do you have a question about the Creality CV-01 PRO and is the answer not in the manual?

Creality CV-01 PRO Specifications

General IconGeneral
Output Voltage24V
ConnectivityUSB
Supported File FormatsSTL/OBJ
Slicer SoftwareCreality Slicer
Printer Dimensions470 x 470 x 615 mm
Engraving AreaNot Applicable
Laser PowerNot Applicable
Spot SizeNot Applicable
WavelengthNot Applicable
Engraving AccuracyNot Applicable
Engraving SpeedNot Applicable
Operating SystemNot Applicable
Machine Size470 x 470 x 615 mm
Machine Weight12 kg
Nozzle DiameterUnavailable
Nozzle TemperatureUnavailable
Bed TemperatureUnavailable
Filament DiameterUnavailable

Related product manuals