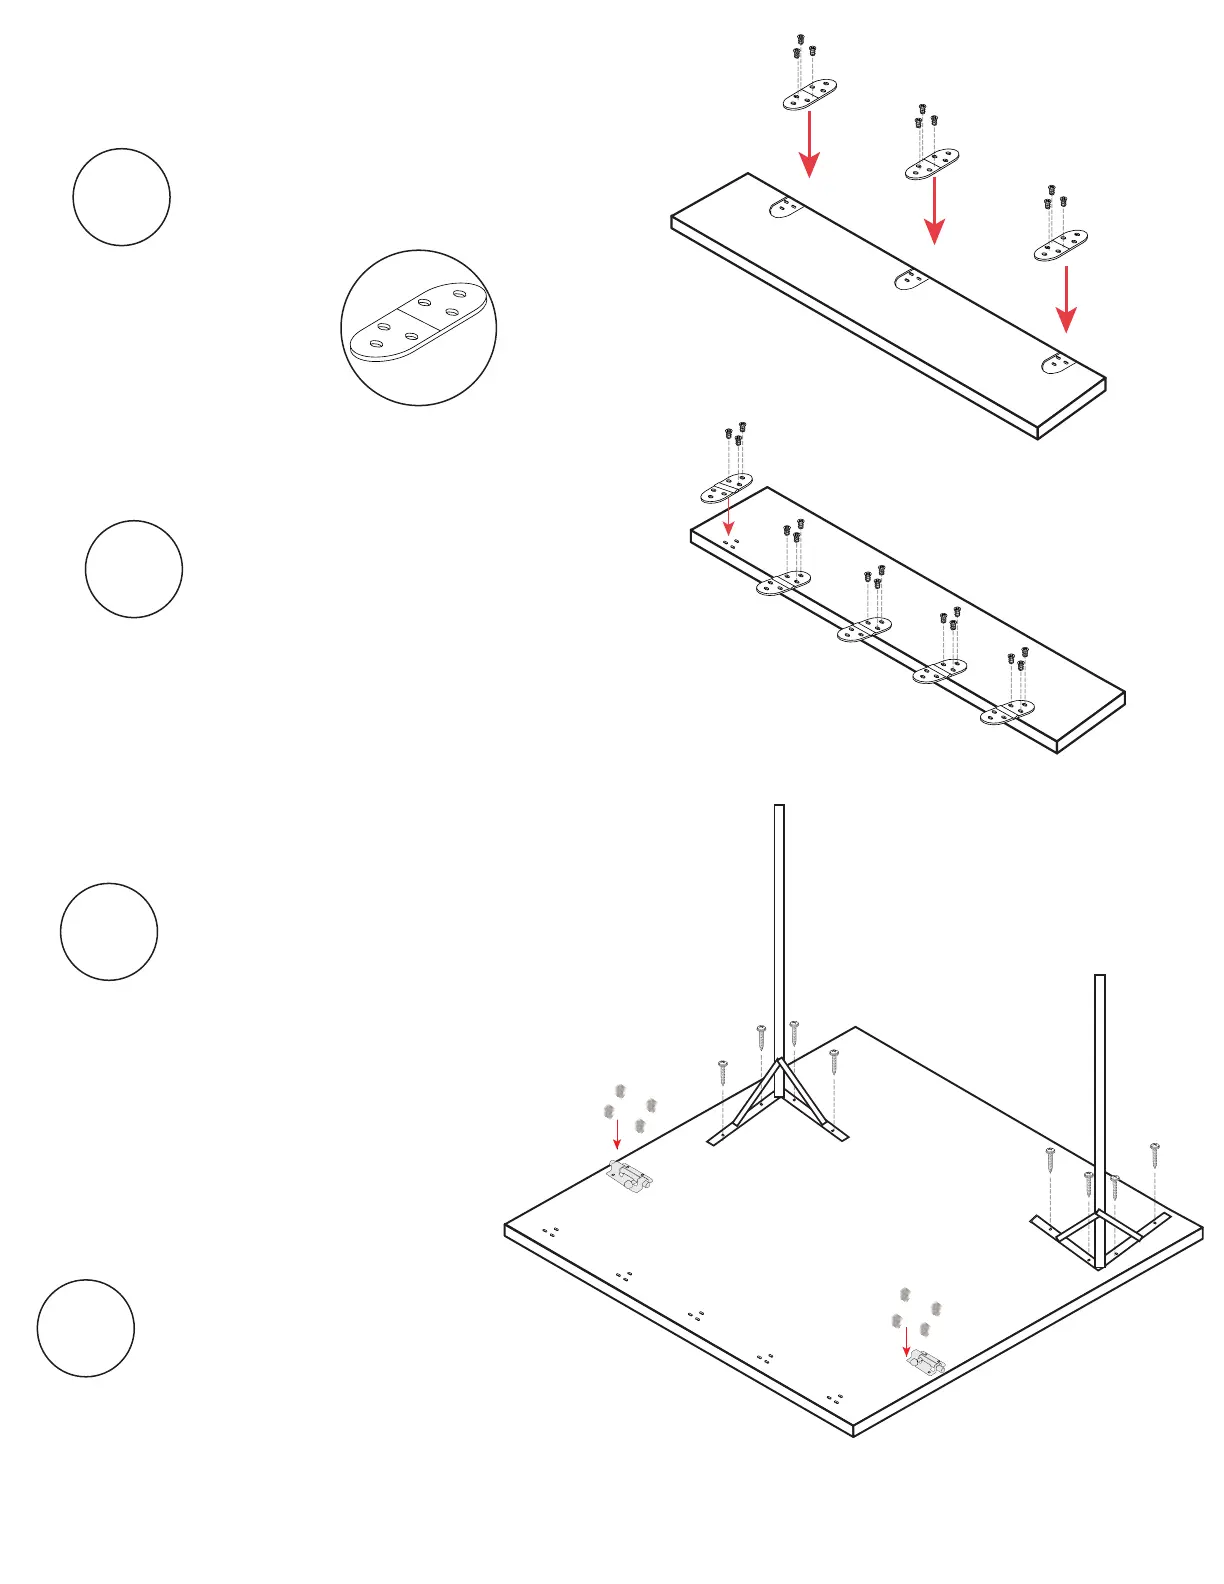
8
Proprietary, patented product and assembly instructions. Do not copy or distribute.
16
Attach (2) Barrel Locks
(with
knob in down position) to Table
2 using (8) #1: 13mm Euro Screws.
17
Install (2) Adjustable Table Legs
using (8) # 4: Screws . Use
pre-drilled holes to guide you.
14
Install (3) Folding Hinges
with the barrel facing down to
Table 1 using (9) #1: 13mm Euro
Screws.
15
Turn Table 1 over and install (5)
Standard Hinges with the barrel
facing up to the other side using
(15) 1:13mm Euro Screws
.
#
Table 1
Folding Hinges (3)
#1 Screws (9)
Table 1
Standard Hinges
#1 Screws (15)
Center Box
Table 2
#1 Screws (8)
#4 Screws (8)
7
Proprietary, patented product and assembly instructions. Do not copy or distribute.
This side up.
Caution: Do NOT over screw. Take your time!
IMPORTANT NOTE!
To collapse table legs, pull joint in towards the middle.
Refer to page 11 for any questions regarding the table legs.