7
Proprietary, patented product and assembly instructions. Do not copy or distribute.
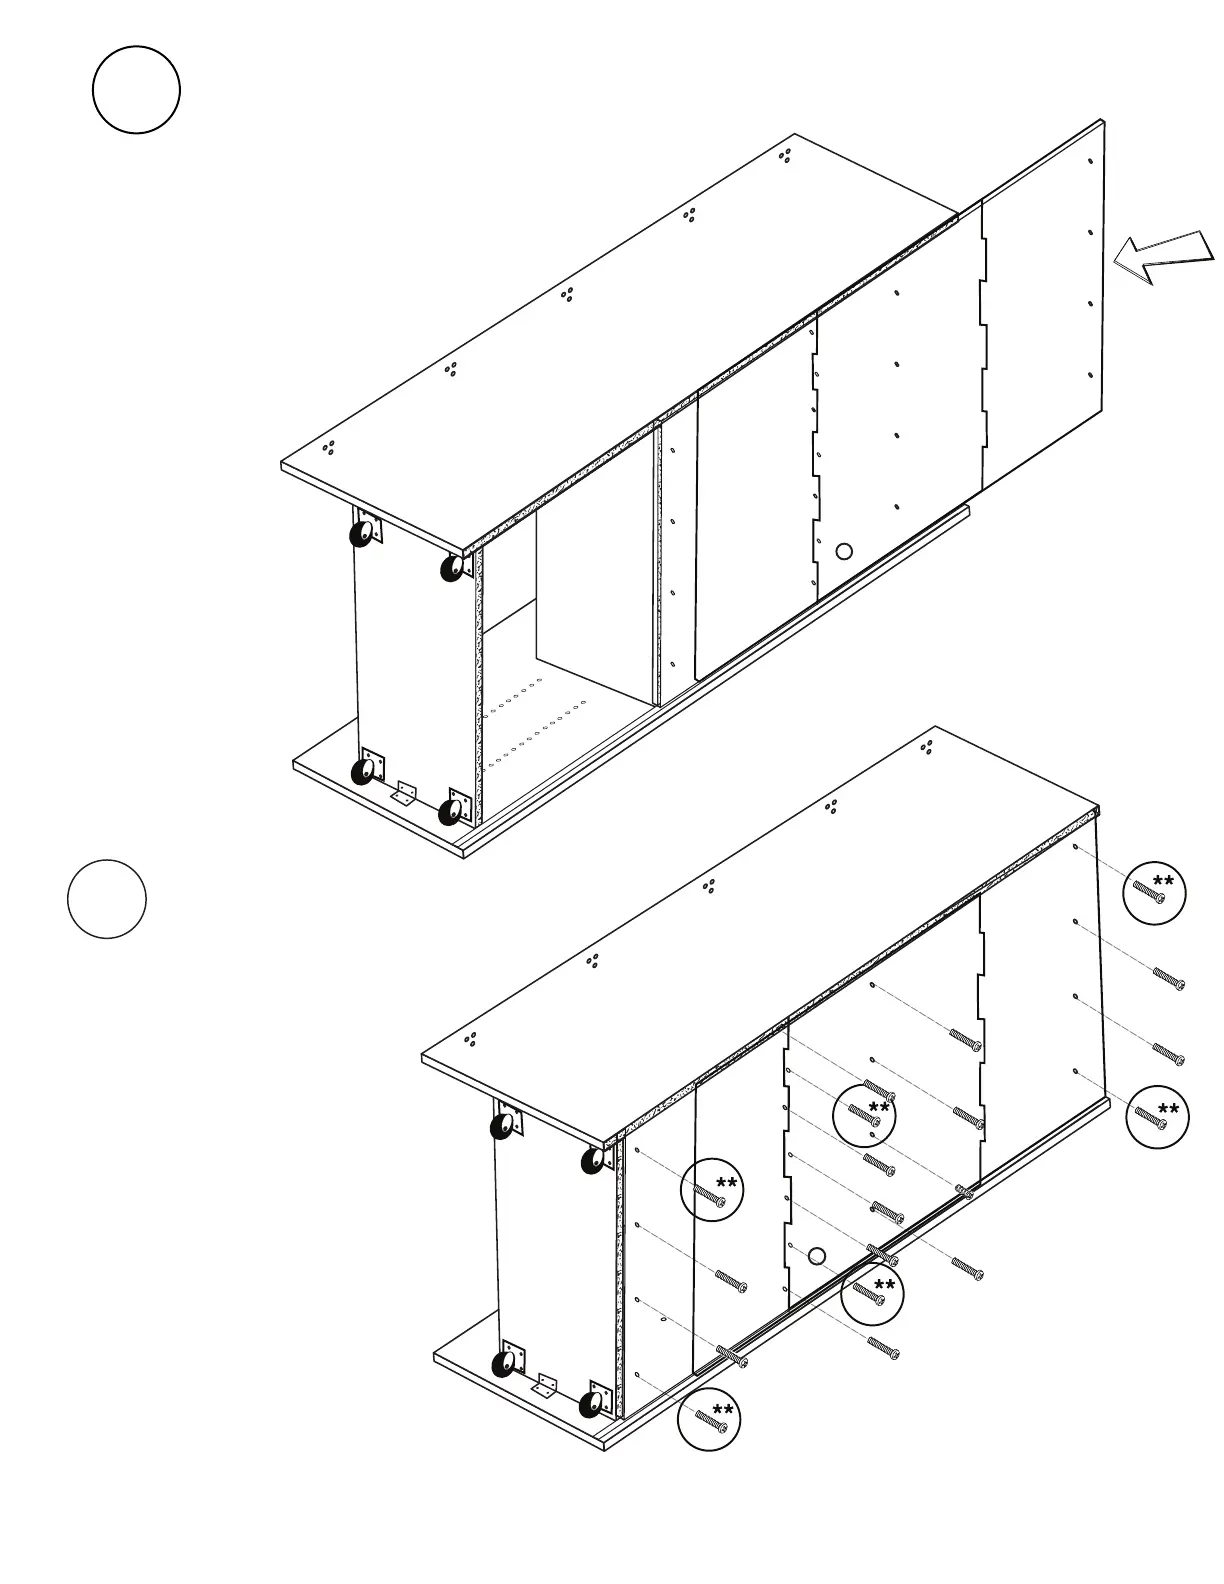
Side 2
Side 2
CB Lower Back
CB Middle Back
CB Upper Back
#5 Screws (19)
12
Carefully slide CB Back Panels into
back grooves one at a time, start-
ing with CB Lower Back. Be sure that
holes are aligned with
corresponding pilot holes.
13
Install (19) #5: 28 mm Panhead
Screws into corresponding holes
on back panel to secure.
It is safe
to use an electric screwdriver
for this step.
*Make sure back fits
tightly and holes line up
with pilot holes in built
section.
3
Left Box
Facing Side 2
Divider
19
23
27
31
35
39
43
47
5
Use the shelf peg tool to install another (24)
shelf pegs in holes on Side 1 of Left Box Divider
to match peg placement from step 5.
x24
Shelf
Pegs
Shelf Peg Tool
Proprietary, patented product and assembly instructions. Do not copy or distribute.
Screw in four corners of each
panel first.