6
Proprietary, patented product and assembly instructions. Do not copy or distribute.
RH
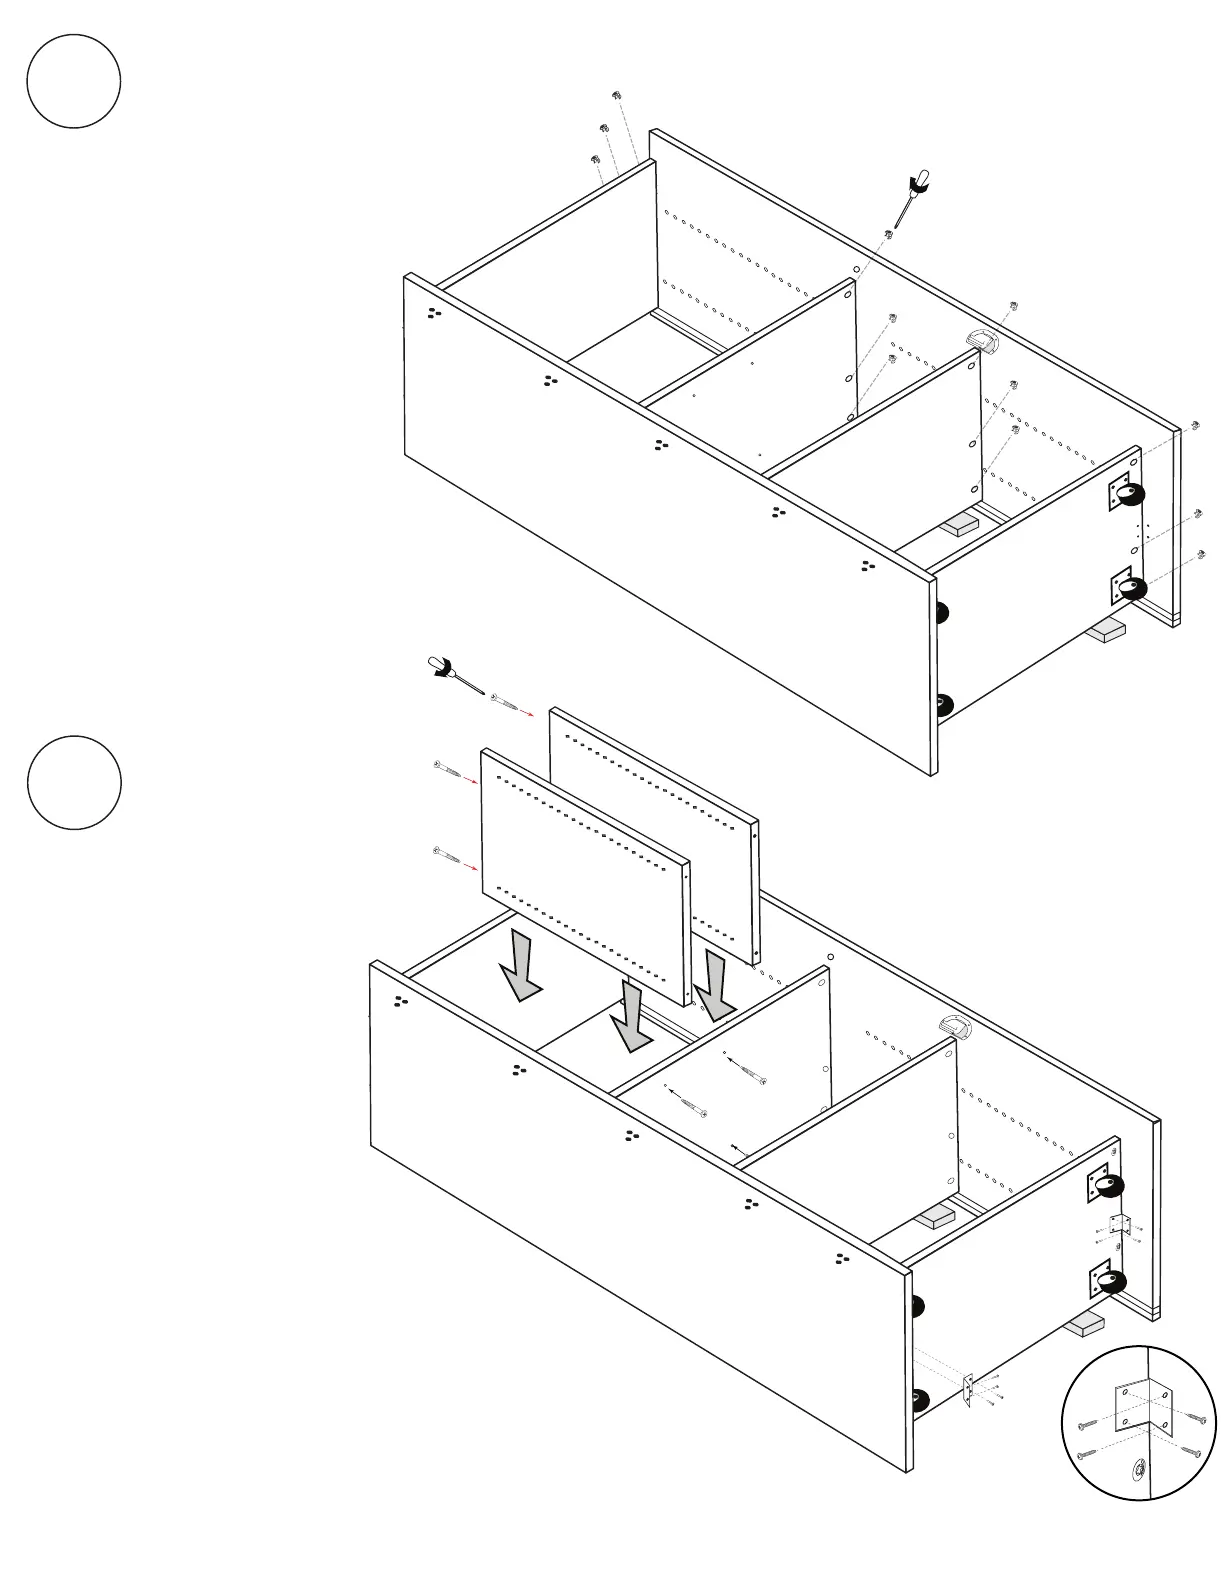
Slide CB dividers (2) in one at a time
& secure to
CB Lid
&
CB Shelf 2
using
(4) #3: 1 1/2 Confirmat Screws
in each divider.
Use ONLY a MANUAL phillips
screw driver.
Install (2) Angle Brackets
using (8) #5: #8 Phillips
Screws.
11
RH
CB Shelf 2
CB Lid
CB1
CB Divider
CB1
*Tip: If you ordered the three
drawers, now is a good time
to assemble them. Use the
separate instruction sets.
Tighten (12) Locking Cams until secure.
*Note that 3 Locking Cams will insert into
the TOP of Lid (outside of the box).
Locking
Cams (12)
10
CB2
#3 Screws (4)
Angle Bracket
#5 Screws (4)
Slide CB dividers (2) in one at a time
&
CB Shelf 2
using
(4) #3 1 1/2 Confirmat Screws
CB Shelf 2
CB Lid
CB1
CB Divider
Slide CB dividers (2) in one at a time
&
CB Shelf 2
using
(4) #3 1 1/2 Confirmat Screws
CB Shelf 2
CB Lid
CB1
CB Divider
Slide CB dividers (2) in one at a time
CB Shelf 2
using
(4) #3 1 1/2 Confirmat Screws
CB Shelf 2
CB Lid
CB1
CB Divider