Proprietary, patented product and assembly instructions. Do not copy or distribute.
Proprietary, patented product and assembly instructions. Do not copy or distribute.
in each divider.
Use ONLY a MANUAL phillips
screw driver.
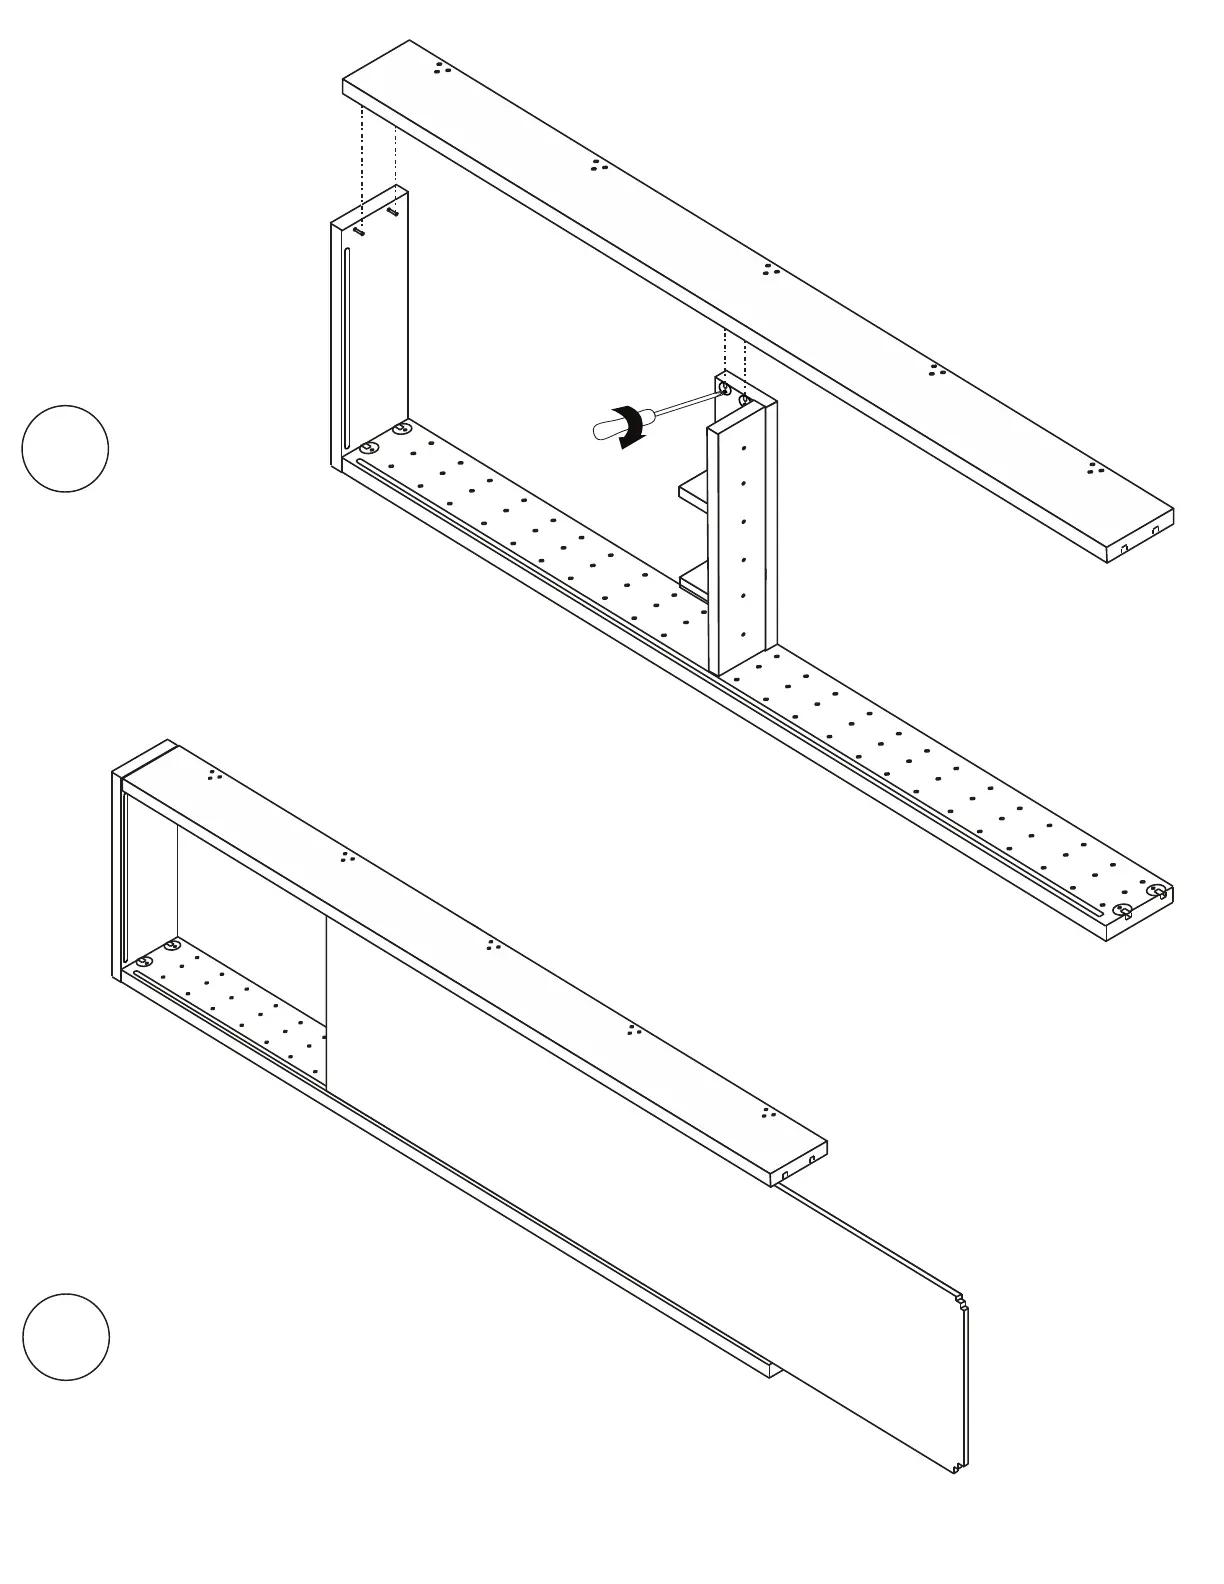
Install (2) angle brackets
using (8) #5 14mm washer
screws.
Proprietary, patented product and assembly instructions. Do not copy or distribute.
in each divider.
Use ONLY a MANUAL phillips
screw driver.
Install (2) angle brackets
using (8) #5 14mm washer
screws.
Proprietary, patented product and assembly instructions. Do not copy or distribute.
in each divider.
Use ONLY a MANUAL phillips
screw driver.
Install (2) angle brackets
using (8) #5 14mm washer
screws.
29
Proprietary, patented product and assembly instructions. Do not copy or distribute.
RS1
tekcoP gniwS BL
Back Panel
RS2
RS Lid
Pocket Shelf
Place RS2 on top of Lid and Pocket
and fit over Connecting Bolts with
Locking Cams. Tighten 2 Locking Cams
on Lid and 2 Locking Cams on Pocket.
Two people are needed for this step.
Lift up RS2 slightly to slide the Back Panel
into the grooves of RS1 and RS2. Slide
Back Panetoward Lid until secure.
4
5