7
Proprietary, patented product and assembly instructions. Do not copy or distribute.
Proprietary, patented product and assembly instructions. Do not copy or distribute.
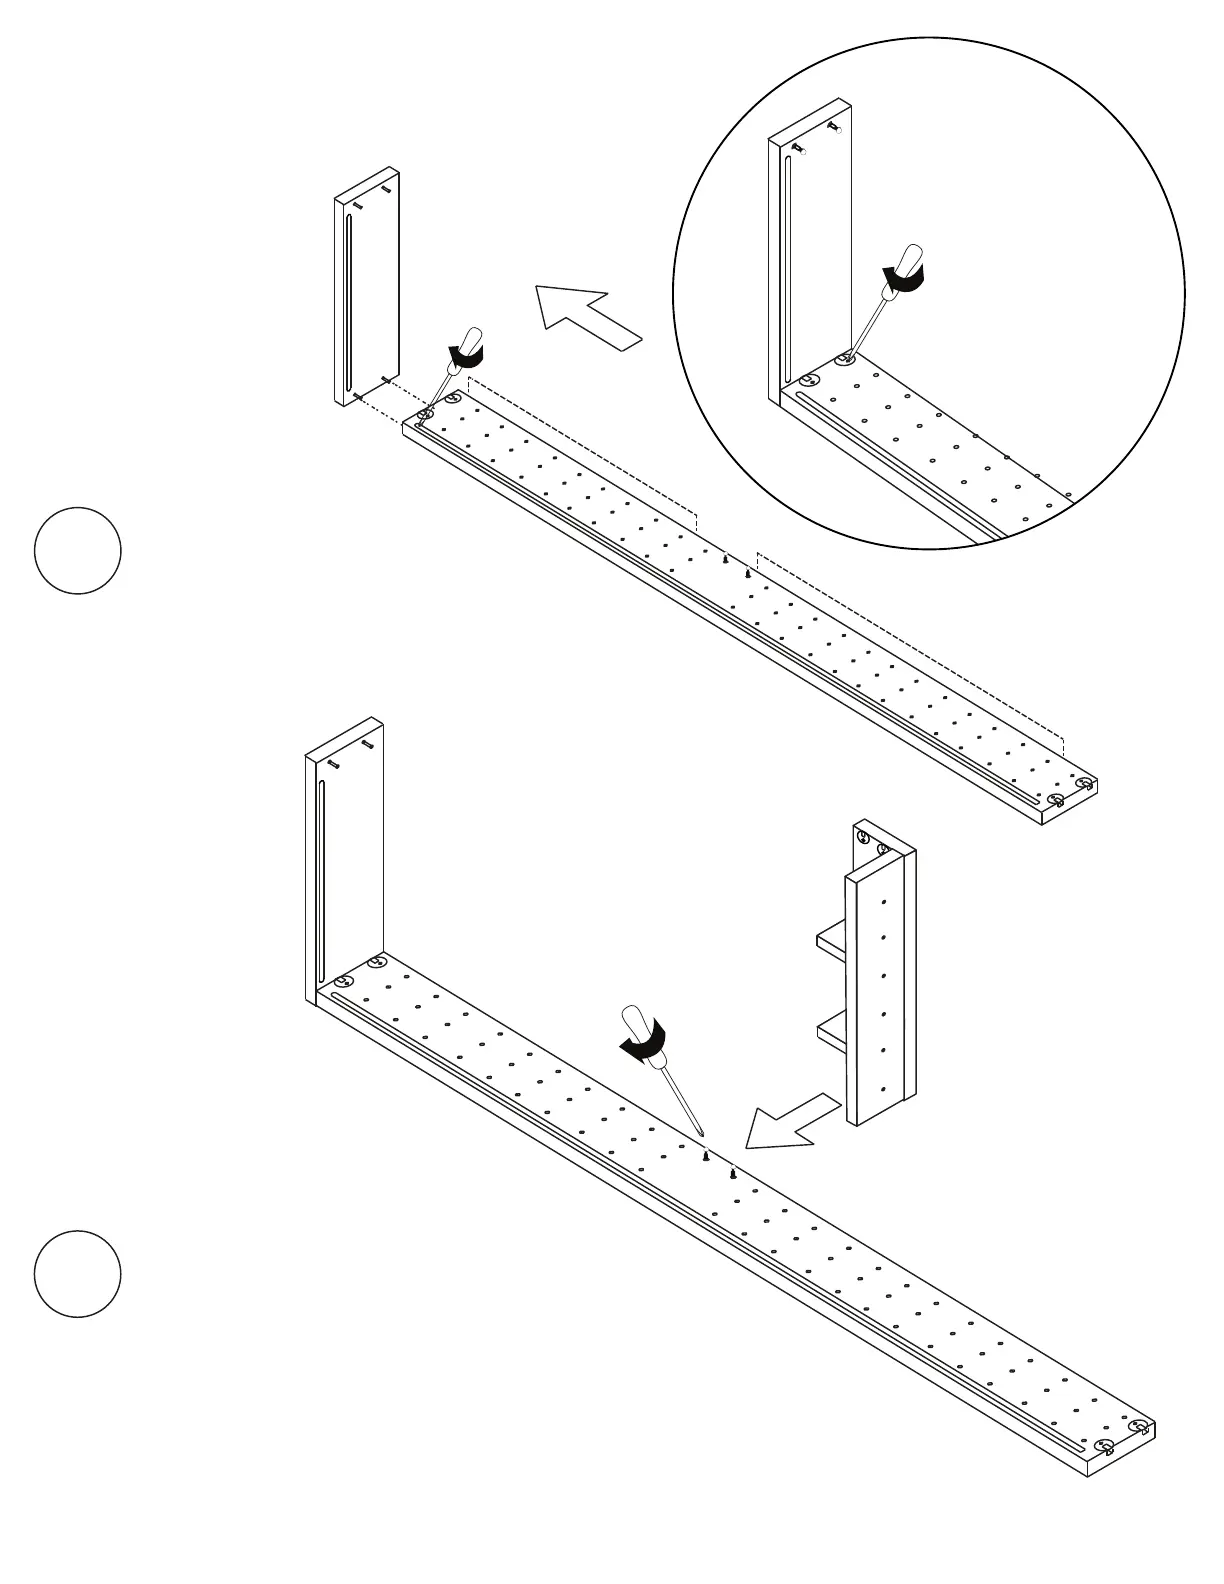
Use ONLY a MANUAL phillips
(2) angle brackets
(8) #5 14mm washer
CB1
Proprietary, patented product and assembly instructions. Do not copy or distribute.
Use ONLY a MANUAL phillips
(2) angle brackets
(8) #5 14mm washer
CB1
Proprietary, patented product and assembly instructions. Do not copy or distribute.
RH
Use ONLY a MANUAL phillips
(2) angle brackets
(8) #5 14mm washer
CB1
28
Proprietary, patented product and assembly instructions. Do not copy or distribute.
RS1
RS1
RS Lid
tekcoP gniwS BL
10 Rows of Holes
13 Rows of Holes
Top
Pocket Shelf
RS Lid
Attach RS Lid to RS1. Insert Phillips
head screwdriver at a slight angle into
installed Locking Cams. Turn clockwise
until tight (about 220 degrees).
2
Slide Pocket over Connecting Bolts into
RS1. Make sure the open side is facing
the lid and unfinished edge is facing the
groove for the back panel. Tighen two
Locking Cams.
3