MODEL PS18EAS
19862-600 Rev E (01-19)
© Copyright 2014, Creative Playthings
Page 19
ASSEMBLY INSTRUCTIONS
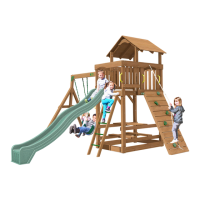
STEP 28 — Climbing Rope:
Note the 5/8" diameter hole above the arch in the Right Wall
Support.
Push one end of the Climbing Rope (AR) through the hole in
the Right Wall Support. Tie a gure-eight knot at the end of
the rope, inside the gym. Leave at least 3" of rope extending
beyond the knot inside the gym.
From the outside of the gym, tie an overhand knot approxi-
mately every 9" along the length of the rope. Make sure each
knot is tight.
Push the loose end of the rope through the hole in the Bot-
tom Rope Support. Pull the rope taut and tie a gure-eight
knot to secure it.
Set the Climber Rails into the playground surface to en-
sure that the bottom rope connection is as close to the
ground as possible.
IMPORTANT: Check the rope often. At no time should
the bottom end of the rope be untied or the rope loose
enough to form a loop. This presents extreme danger to
your children.
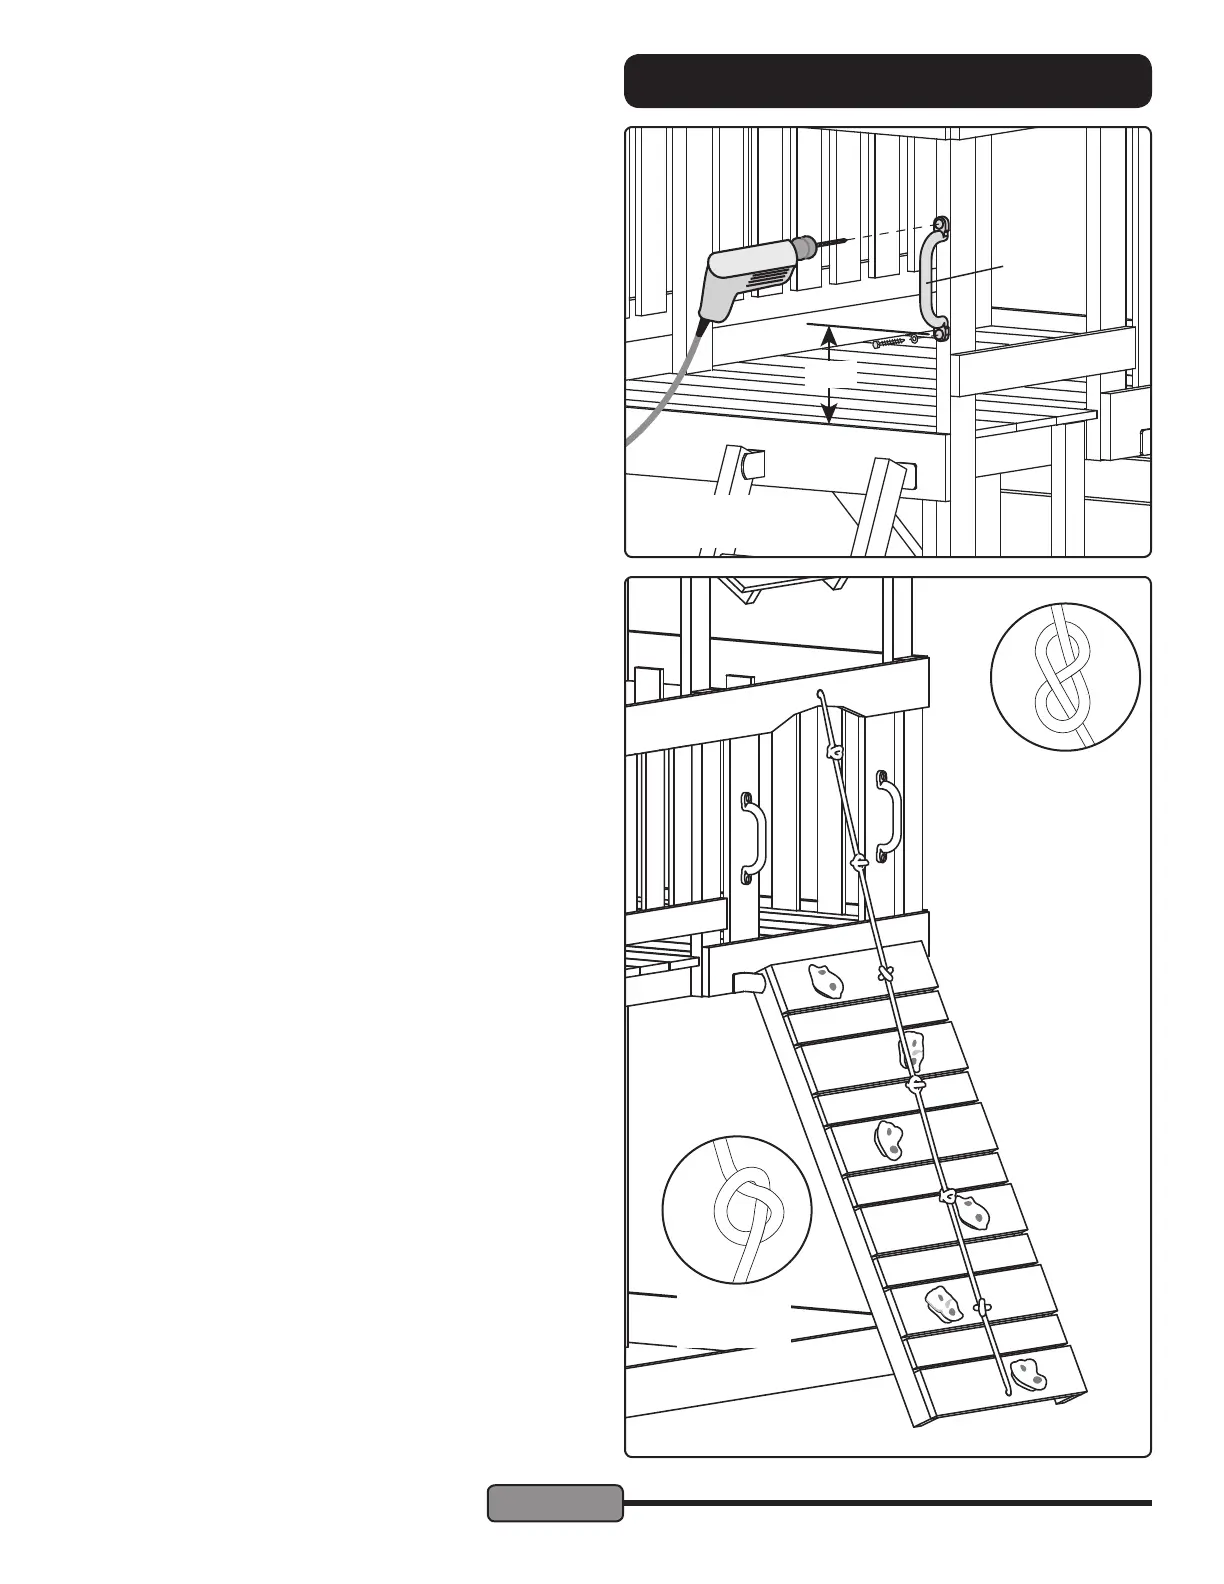
STEP 27 — Front Hand Grip:
Hold one Hand Grip (AQ) against the front face of the front
right post above the Access Ladder. The lower hole should
be 8" above the top of the platform.
Drill 3/16" diameter pilot holes 1" deep into the post through
the holes in the Hand Grip. Fasten using 1/4 x 1-1/2" Lag
Screws and Flat Washers.
8"
3/16" Pilot Drill & 1/4" x
1-1/2" Lag Screw
AW
Figure Eight
Knot
Overhand
Knot
If the rope is too
long you can tie
extra knots along
the length of the
rope. If too short,
remove knots.