EasyManua.ls Logo

Creative Playthings Playtime PS18SPH - User Manual

Creative Playthings Playtime PS18SPH
22 pages
Print Icon
To Next Page IconTo Next Page
Loading...
MODEL PS18SPH
ASSEMBLY MANUAL
If you have problems or questions about your Creative Playthings play set,
DO NOT CALL THE RETAILER.
Contact Creative Playthings Customer Service at 1-800-598-4997 or
customerservice@creativeplaythings.com
Please read the owners manual before the
assembly of your Play Set. it provides additional
information on the care and use of your Play Set.
You must carefully read the entire instruction man
-
ual before proceeding with the assembly or use
of your new Play Set.
Creative Playthings takes great care to design its
products with your child’s safety in mind. How
-
ever, only with careful supervision and proper
safety instructions, can you be assured of safe
play time on any product designed for children.
Save these instructions for reference in case you
need to contact customer service.
By
This product is intended for single
family home/residential use only and
not intended for use in any public
setting. Placement in any public
setting constitutes a misuse of this
product.
All hardware on this set is specially coated
for corrosion resistance.
If non-Creative Playthings hardware is used,
it must be galvanized or stainless steel.
Question and Answer IconNeed help?

Do you have a question about the Creative Playthings Playtime PS18SPH and is the answer not in the manual?

Summary

PLAY SET SAFETY

Assembly Safety:

Outlines safety precautions during the assembly process.

SAFE PLAY AREA

Play Set Dimensions:

Details the physical footprint and required space for the play set.

Safe Play Area:

Defines the critical safety zone around the play structure.

HARDWARE BAG CONTENTS

ASSEMBLY HARDWARE:

Lists and identifies all hardware components included in the kit.

PRE ASSEMBLY INFORMATION

Hex Bolt & Weld Nut Assembly Procedure:

Explains the correct method for using hex bolts and weld nuts.

Typical Installation - Lag Screws:

Details the proper installation technique for lag screws.

Typical Installation - Wood Screws:

Details the proper installation technique for wood screws.

PLAY SET VIEW

COMPONENT VIEW

MAINTENANCE INSTRUCTIONS

Re-staining Information:

Provides guidance on how and when to re-stain the play set.

Maintenance:

Outlines regular upkeep procedures for the play set.

Tools & Materials Suggested for Finishing & Assembly:

Lists necessary tools and materials for assembly and finishing.

ASSEMBLY INSTRUCTIONS

STEP 1 - Assemble Posts:

Guides on assembling the main posts of the play set.

STEP 2 - Front of Tower:

Details on attaching components to the front of the tower structure.

ASSEMBLY INSTRUCTIONS

STEP 3 - Back of Tower:

Instructions for assembling the back section of the tower.

STEP 4 - Left Sandbox Side:

Steps for attaching the left side of the sandbox.

STEP 5 Left Platform Side:

Guidance on attaching the left platform.

ASSEMBLY INSTRUCTIONS

STEP 6 - Raise the Tower:

Instructions for lifting and positioning the tower structure.

STEP 7 Platform and Sandbox Side:

Attaching platform and sandbox components to the tower.

STEP 8 Midposts & Rock Wall Mount:

Installing midposts and the rock wall mount.

ASSEMBLY INSTRUCTIONS

STEP 9 - Left Wall Support & Roof Uprights:

Attaching wall supports and roof uprights on the left side.

STEP 10 - Right Wall Support & Roof Uprights:

Attaching wall supports and roof uprights on the right side.

STEP 11 - Angle Braces:

Installing angle braces for structural support.

ASSEMBLY INSTRUCTIONS

STEP 12 - Stringer:

Instructions for installing the stringer board.

STEP 13 - Deck Boards:

Guidance on attaching the deck boards.

STEP 14 Assemble Roof Panels:

Steps for assembling the roof panels.

ASSEMBLY INSTRUCTIONS

STEP 15 Roof Panels to Roof Uprights:

Attaching the assembled roof panels to the uprights.

ASSEMBLY INSTRUCTIONS

STEP 16 - Ceiling Joists:

Installing ceiling joists within the roof structure.

STEP 17 - Lower and Short Wall Supports:

Attaching lower and short wall supports.

STEP 18 Swing Mounts:

Installing the mounts for the swings.

ASSEMBLY INSTRUCTIONS

STEP 19 Short Wall Slats & Entrance Slats:

Attaching short wall and entrance slats.

STEP 20 Narrow Wall Slats:

Installing narrow wall slats.

STEP 21 Seat Supports:

Attaching the supports for the seats.

ASSEMBLY INSTRUCTIONS

STEP 22 - Seats & Seat Cleats:

Attaching the seats and seat cleats.

STEP 23 Table Supports:

Installing the supports for the table.

STEP 24 Table Boards & Table Cleat:

Attaching table boards and the table cleat.

ASSEMBLY INSTRUCTIONS

STEP 25 Access Ladder Rungs & Slat:

Installing ladder rungs and slats.

STEP 26 Access Ladder:

Attaching the assembled access ladder.

ASSEMBLY INSTRUCTIONS

STEP 27 - Climber Rails, Rope Board:

Attaching climber rails and the rope board.

STEP 28 Rock & Spacer Boards:

Installing rock and spacer boards.

STEP 29 Climbing Rocks:

Fastening the climbing rocks to the boards.

ASSEMBLY INSTRUCTIONS

STEP 30 - Hand Grips to Entrance Slats:

Attaching hand grips to entrance slats.

STEP 31 - Climbing Rope:

Instructions for installing the climbing rope.

ASSEMBLY INSTRUCTIONS

STEP 32 - Front Hand Grip:

Installing a hand grip on the front post.

STEP 33 - Slide:

Attaching the slide to the play set.

ASSEMBLY INSTRUCTIONS

STEP 34 - Swing Beam & Swings:

Installing the swing beam and hanging swings.

STEP 35 - Ground Stakes:

Securing the play set with ground stakes.

Overview

This document is an assembly and safety manual for the Creative Playthings PS18SPH Playtime Swing Set. It provides detailed instructions for assembly, safety guidelines, maintenance information, and a comprehensive list of parts and hardware.

Function Description:

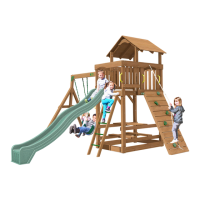
The Creative Playthings PS18SPH Playtime Swing Set is a residential outdoor play structure designed for single-family home use. It features a multi-level tower with a roof, a slide, a rock wall with climbing rocks and a rope, and a separate swing beam with two swings and a trapeze. The play set also includes a sandbox area, picnic table with seating, and various access points like a ladder and climber rails. Its primary function is to provide a safe and engaging environment for children's outdoor play, promoting physical activity and imaginative interaction.

Important Technical Specifications:

  • Model Number: PS18SPH
  • Ground Dimensions: 14'-6" x 14'-0" (for the main play set)
  • Safe Play Area Required: 26'-6" x 30'-6" (This area extends 6' (2 meters) beyond the play set on all sides, including the slide and the space above the play set. For swinging accessories, the safe play area must extend to 14' (4.27 meters) in front of and behind the accessory.)
  • Maximum Fall Height: 87" (measured from the top of the swing beam)
  • Swing Accessory Weight Limits:
    • Single occupancy swing accessories (Sling Swing, Trapeze): Do not allow more than 120 lbs.
    • Multiple use swing accessories (Back-to-Back Plastic Glider): Do NOT allow more than 175 lbs.
  • Hardware: All hardware is specially coated for corrosion resistance. If non-Creative Playthings hardware is used, it must be galvanized or stainless steel.
  • Recommended Ground Cover (Uncompressed Depth):
    • Double Shredded Bark Mulch: 9"
    • Uniform Wood Chips: 12"
    • Fine Gravel: 12"
    • Fine Sand: 12"
  • Construction Materials: Primarily wood components (posts, beams, slats, boards) with metal hardware (hex bolts, lag screws, wood screws, lock washers, flat washers, weld nuts, access brackets, ground stakes) and plastic accessories (rungs, hand grips, climbing rocks, slide, swings, trapeze, rope).
  • Swing Beam (Packaged Separately): Model 60081-102 Playtime Swing Beam.
  • Swings/Trapeze (Packaged Separately): Model AA934-204 (2 Swings, 1 Trapeze). Alternative swing features may be included.
  • Slide (Packaged Separately): Model 8570-202 (10 Ft. Wave Slide).

Usage Features:

  • Residential Use Only: This product is strictly intended for single-family home/residential use. Public placement constitutes misuse.
  • Adult Supervision: On-site adult supervision is required at all times for children of all ages.
  • Safety Guidelines: The manual emphasizes numerous safety rules, including:
    • Use equipment only in its intended manner.
    • Do not wear loose or stringed clothing.
    • Avoid playing on wet surfaces.
    • Do NOT walk too closely to moving swings.
    • Do NOT swing empty seats or jump off moving swings.
    • Do NOT twist swing chains.
    • Sit in the center of swings with full weight.
    • Do NOT be on the top surface of the swing beam.
    • Do NOT use equipment in unintended ways or get off while in motion.
    • Do NOT fasten unapproved items to the play set (e.g., dog runs, clothes lines).
    • Suspended ropes, chains, and cables must be secured at both ends and not capable of looping back.
    • Children MUST NEVER wear bicycle helmets while playing on the play-set.
  • Assembly Requirements: Adult assembly is required. The work area must be clean and clear, and children should be kept away until assembly is complete. Proper tools and safety equipment (safety glasses, boots, gloves) are recommended.
  • Slide Placement: The slide should face away from the sun.
  • Ground Surface: The play set must be installed on a level ground surface, free of obstacles, and not over concrete, gravel, asphalt, packed earth, or other hard surfaces. Recommended ground covers are listed with required uncompressed depths.
  • Climbing Rope: Features overhand knots approximately every 11" along its length, with figure-eight knots at both ends for security. Regular checking of the rope for tightness and to ensure no loops are formed is critical.
  • Hand Grips: Provided for assistance on the access ladder and rock climber.

Maintenance Features:

  • Stain: The play set is factory-stained; re-staining is not needed at initial assembly. Pigmented, exterior, water-repellent stains are recommended for future re-staining to protect the wood and maintain its finish. Rungs are pre-finished and do not require additional finishing.
  • Hardware Checks: As a safety precaution, all hardware (nuts, bolts) must be checked for tightness twice a month during use and at the beginning of each play season. Tighten as required, but do not over-tighten.
  • Structure Checks: The structure should be checked twice monthly for any evidence of deterioration (sharp edges, rust, premature failure of structural pieces). Replace defective parts through Creative Playthings Customer Service.
  • Lubrication: All metallic moving parts should be oiled monthly during the usage season.
  • Accessory Removal: Swings, trapeze, tent, rope ladders, and other removable plastic accessories should be removed and stored indoors when outside temperatures drop below 32° F (0° C).
  • Wood Characteristics: Wood will naturally expand and contract, and checks or cracks are normal and do not affect strength or durability.
  • Finish Maintenance: Light sanding and exterior stain application can repair scratches and prevent premature aging of the wood. Finishes applied to ladder rungs must not create slippery surfaces.
  • Disposal: Wood parts should never be burned. All parts should be disposed of safely.
  • Coverings: Check all coverings for bolts and sharp edges and replace when required.
  • Swing Attachments: Check swing seats, chains, ropes, and other means of attachment for evidence of deterioration and replace through Creative Playthings Customer Service.
  • Protective Surfacing: Twice a month during the play season, rake and check the depth of loose fill protective surfacing materials to prevent compaction and maintain appropriate depth. Replace as necessary.
  • Customer Service: Contact Creative Playthings Customer Service at 1-800-598-4997 or customerservice@creativeplaythings.com for problems, questions, or part replacement. Do NOT call the retailer.
  • Manual Retention: Save all instruction sheets and receipts for warranty service and part replacement. The warranty information is in the Owner's Manual.

Creative Playthings Playtime PS18SPH Specifications

General IconGeneral
BrandCreative Playthings
ModelPlaytime PS18SPH
CategoryPlay Sets & Playground Equipment
LanguageEnglish

Related product manuals