MODEL PS18SPH
19861-300 Rev A (07-20)
© Copyright 2013, Creative Playthings
Page 9
ASSEMBLY INSTRUCTIONS
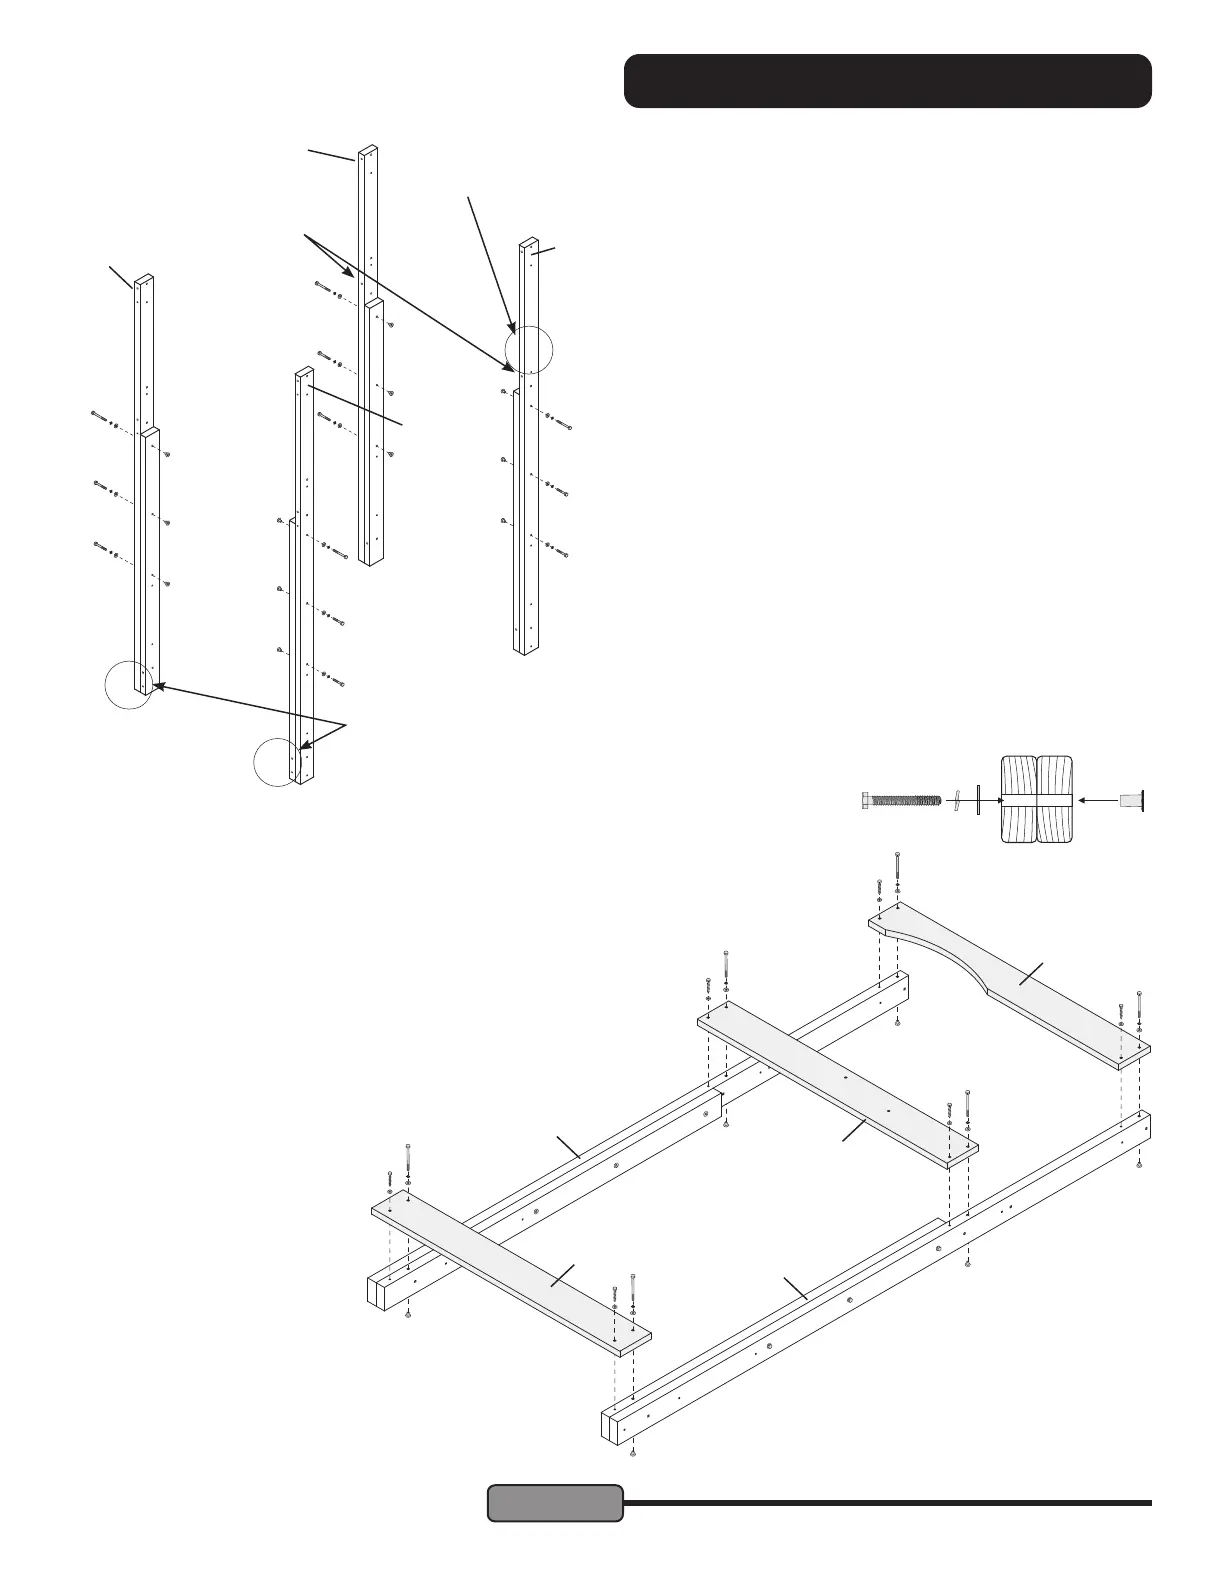
STEP 1 — Assemble Posts:
Locate Back Left Post (M), Back Right Post (N), Front Left
Post (O), and Front Right Post (P).
Secure each post using two 1/4 x 3" Hex Bolt Assemblies
through the three central holes as shown at left. If the tip of
a Hex Bolt protrudes, add a second Flat Washer next to the
rst.
The parts required to start assembly are in box 1, subse-
quent parts are in box 2 and parts to complete assembly
are in box 3.
Hex Bolt Assembly:
Throughout this guide a Hex Bolt Assembly consists of one Hex
Bolt, one Lock Washer, one Flat Washer and one Weld Nut.
M
O
O
E
G
J
P
N
P
Back of
tower
Front of
tower
The posts are shown in the positions
they will be in the nal assembly.
1) These holes are
higher on back posts.
3) These holes face
opposite on the left
& right front posts
2) No holes here
on Back Right Post
Hint: The posts can be difcult to tell apart. There are three
clues at left.
1) The holes for the Platform Ends are higher on the back
Posts.
2) There are no holes for a Lower Wall Support on the Back
Right Post.
3) Look at the holes on the narrow edge of the post to tell the
Left Front Post from the Right Front Post.
1/4 x 4" Hex Bolts in
top holes, 1/4 x 2" Lag
Screws in bottom holes.
1/4 x 3"
Hex Bolts
STEP 2 — Front of Tower:
Fasten one Sandbox End (E) to the front of the Front Left
Post (O) and Front Right Post (P) as shown. Use 1/4 x 4"
Hex Bolt Assemblies in the top holes and 1/4" x 2" Lag
Screws with 1/4" Flat Washers in the bottom holes.
Repeat the process with the Platform Front (G) and Front
Arch (J). Align the hole at the center of the Platform Front
closer to the upper end of the tower.