MODEL PS18SPH
19861-300 Rev A (07-20)
Page 10
ASSEMBLY INSTRUCTIONS
© Copyright 2013, Creative Playthings
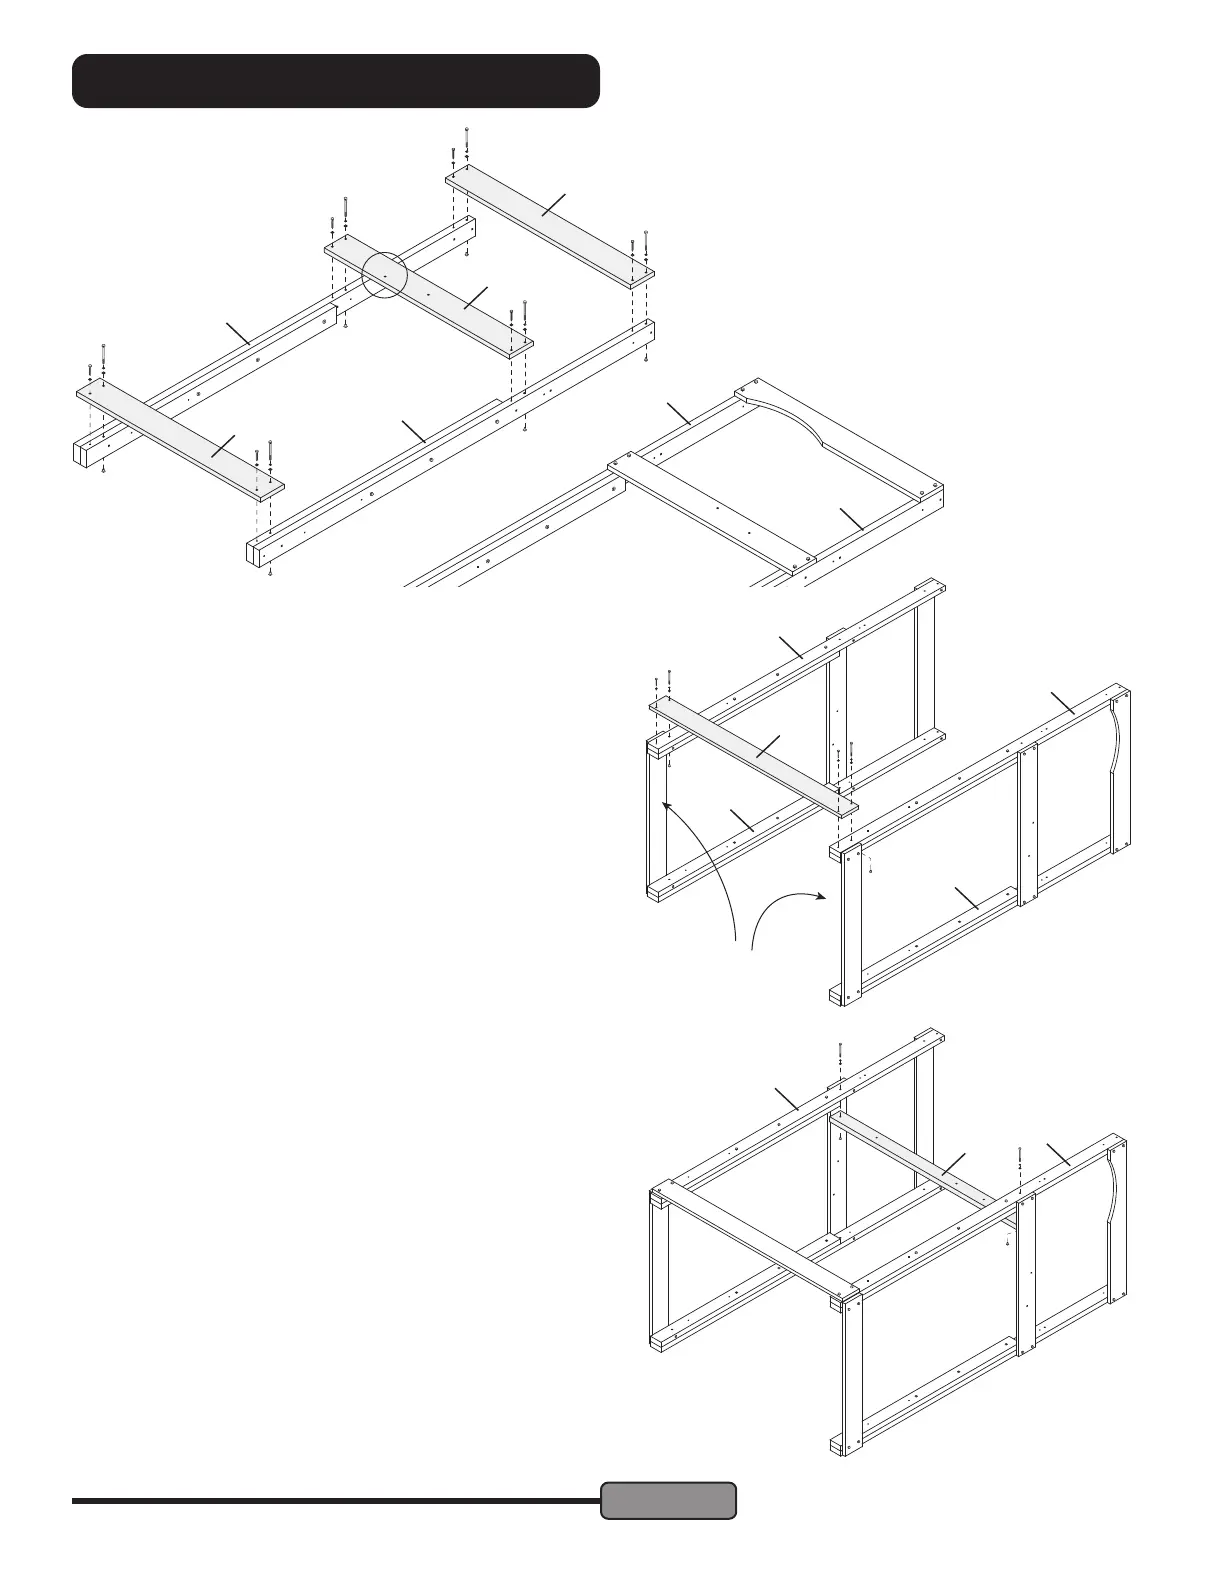
STEP 4 — Left Sandbox Side:
Arrange the back tower assembly and front tower assembly
next to each other on edge as shown at right.
Fasten one Sandbox Side (F) to the Front Left and Back Left
Posts as shown at right. Use 1/4 x 3-1/2" Hex Bolt Assemblies
in the top holes and 1/4" x 2" Lag Screws with 1/4" Flat
Washers in the bottom holes.
STEP 5 — Left Platform Side:
Fasten the Platform Left (D) to the Back Left Post and Front
Left Post in the orientation shown using 1/4 x 3" Hex Bolt As-
semblies. Note the hole positions along the board.
N
N
E
H
I
M
M
1/4 x 4" Hex Bolts in
top holes, 1/4 x 2" Lag
Screws in bottom holes.
1/4 x 3-1/2" Hex Bolts in
top holes, 1/4 x 2" Lag
Screws in bottom holes.
1/4 x 3" Hex Bolts.
O
O
P
P
F
D
M
O
STEP 3 — Back of Tower:
Fasten one Sandbox End (E) to the front of the Back
Left Post (M) and Back Right Post (N) as shown.
Use 1/4 x 4" Hex Bolt Assemblies in the top holes
and 1/4" x 2" Lag Screws with 1/4" Flat Washers in
the bottom holes.
Repeat the process with the Platform Back (H) and
End Support (I). Align the hole circled in the illustra-
tion closer to the bottom end of the tower.
Back of
tower
Back of
tower
Front of
tower
Front of
tower