MODEL PS18SPH
19861-300 Rev A (07-20)
© Copyright 2013, Creative Playthings
Page 11
ASSEMBLY INSTRUCTIONS
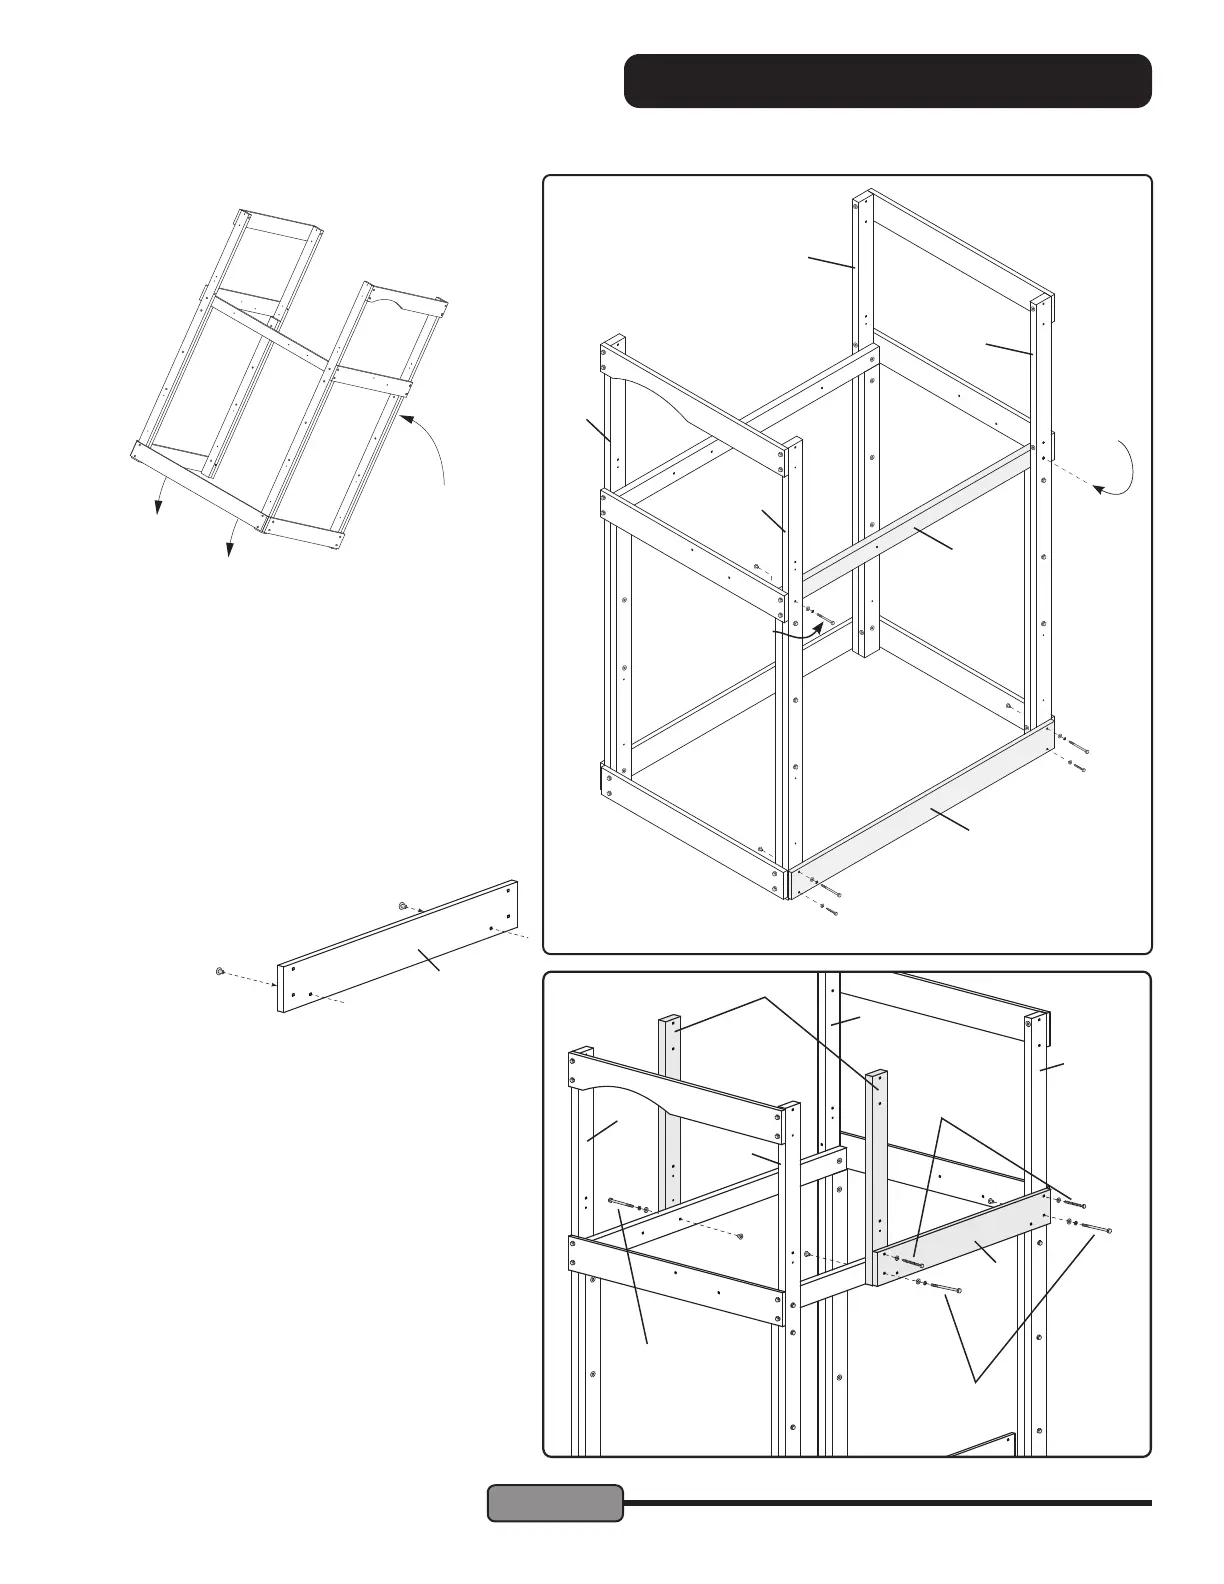
STEP 8 — Midposts & Rock Wall Mount:
Align one Midpost (B) as shown at right. Fasten
it to the Platform Left using one 1/4 x 3" Hex Bolt
Assembly.
Fasten the Rock Wall Mount (X) to the Back Right
Post and the Platform Right using one 1/4 x 3-1/2"
Hex Bolt Assembly in the lower right hole.
Fasten the other end of the Rock Wall Mount to the
right Midpost (B) and the Platform Right using one
1/4 x 3-1/2" Hex Bolt Assembly in the lower left hole.
Fasten one 1/4 x 2" Lag Screw and Flat Washer
through the top right hole of the Rock Wall Mount
and into the Back Right Post
Use a level to assure the right Midpost is plumb. Se-
cure using one 1/4 x 2" Lag Screw and Flat Washer.
3-1/2" Hex Bolt
Assembly
3" Hex Bolt
Assembly
B
X
X
2" Lag
Screw
M
M
N
O
P
N
1/4 x 3-1/2" Hex Bolts in
top holes, 1/4 x 2" Lag
Screws in bottom holes.
1/4 x 3" Hex Bolt
align
STEP 6 — Raise the Tower:
Lift the top of the tower and walk it up until it
stands vertical on the base.
STEP 7 — Platform and Sandbox Side:
Fasten one Sandbox Side (F) near the base of the
Front Right and Back Right Posts as shown at right.
Use 1/4 x 3-1/2" Hex Bolt Assemblies in the top holes
and 1/4" x 2" Lag Screws with 1/4" Flat Washers in
the bottom holes.
Fasten the Platform Right (C) to the Front Right
Post using one 1/4 x 3" Hex Bolt Assembly. Rest
the other end of the Platform Side on the Back Right
Post with the holes aligned as shown.
Back of
tower
Front of
tower
F
C
P
O
Before Step 8, insert 1/4" Weld Nuts into the
two central holes from the back of
the Rock Wall Mount (X)