© Copyright 2013, Creative Playthings
MODEL PS18SPH
19861-300 Rev A (07-20)
Page 18
ASSEMBLY INSTRUCTIONS
1/4 x 1-1/2"
Hex Bolt
1/4 x 1" Hex Bolts1/4 x 1" Hex Bolts
Drill 5/16" dia. holes
1-3/8"
AE
W
AB
V
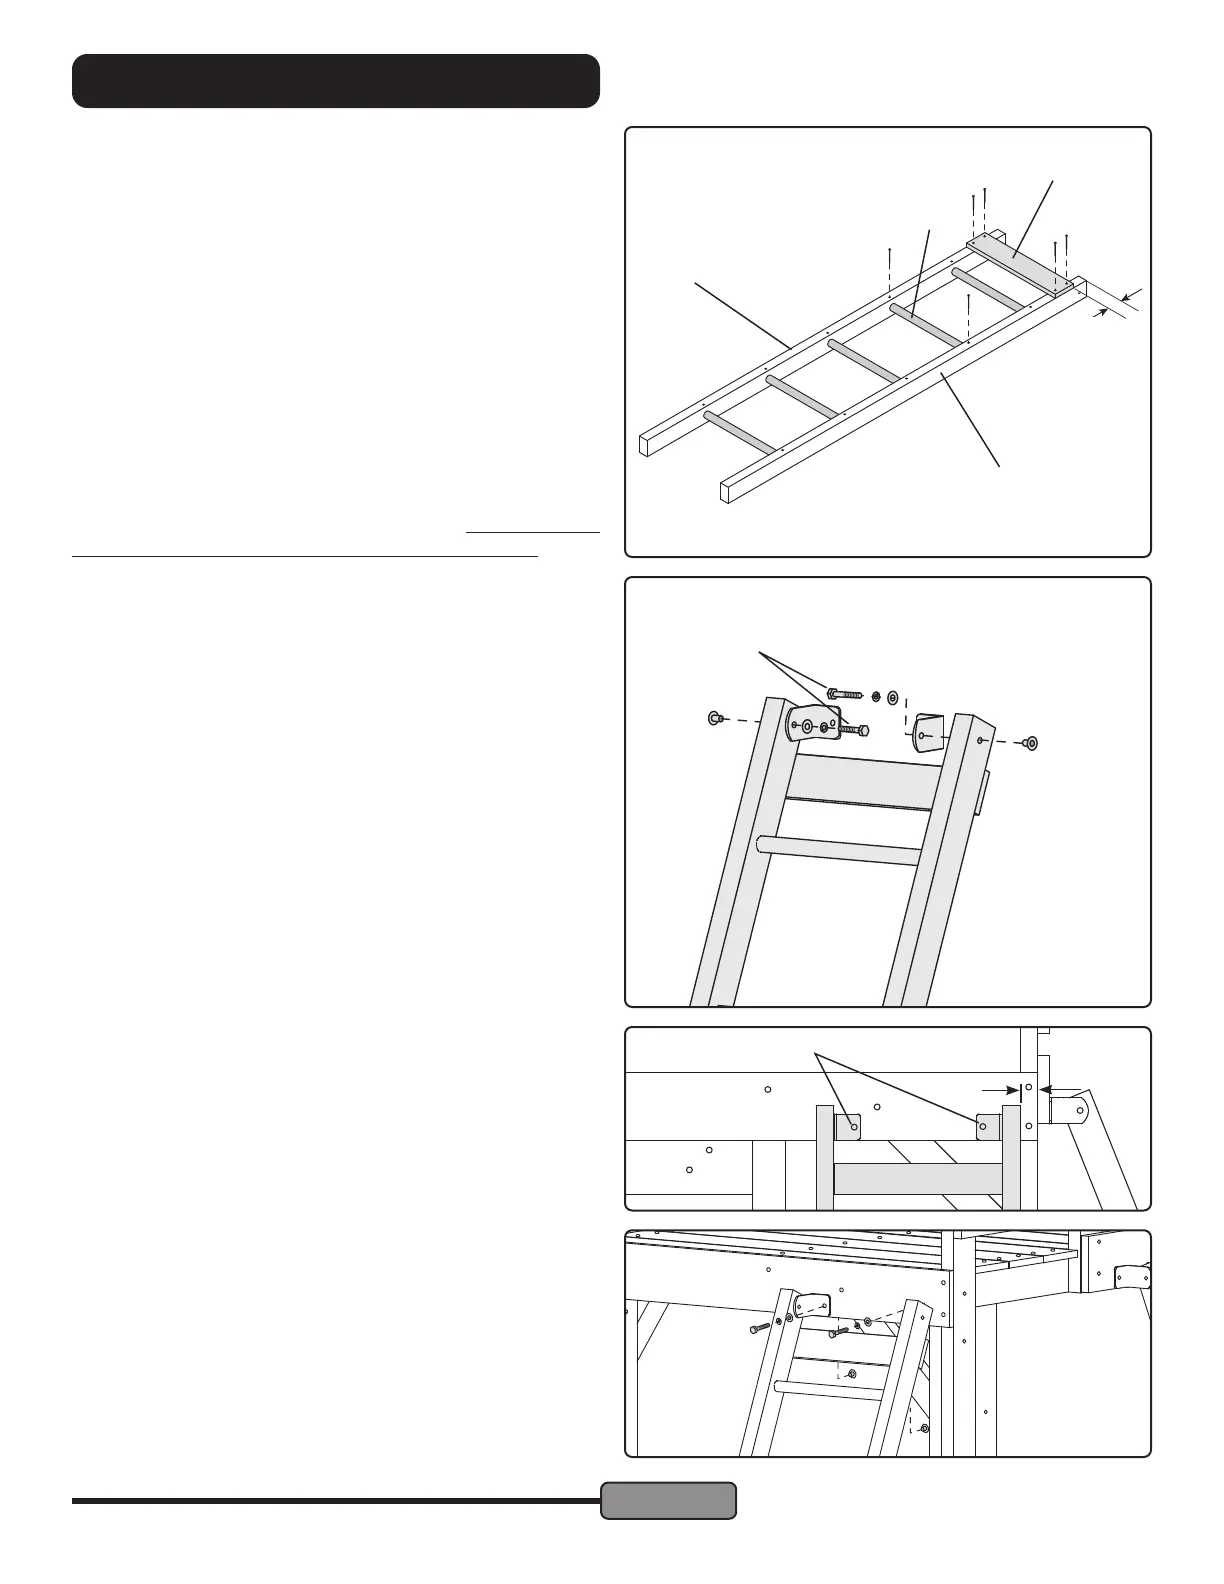
The top of the ladder is
the end with holes in the
rails for brackets
2-1/4"
STEP 25 — Access Ladder Rungs & Slat:
Fit ve 15" Rungs (AE) into the holes in the Left Ladder Rail
(V) and the Right Ladder Rail (W). Set the assembly at on
a solid surface. Make sure that the rungs are completely
inserted with the ends of the rungs snug against the bottom
of the holes.
Use #10 x 1-1/2" Self-Drilling Screws, through the holes
provided, to fasten the rungs in place. (The Self-Drilling
Screws have a drill-bit tip. Point the screw toward the center
of rung diameter and press rmly. Do not sink the head of the
screw beyond ush with the surface of the wood.
Use four #10 x 1-5/8" Screws to fasten the Ladder Slat (AB)
to the Ladder Rails. The top edge of the Ladder Slat should
be about 2-1/4" below the top of the Ladder Rails as shown.
Make sure the gap between the top Rung and the Ladder
slat is less than 3-1/2"; adjust if necessary. Drill 1/8" diam-
eter pilot holes 1" deep for each #10 x 1-5/8" Screw.
STEP 26 — Access Ladder:
Fasten one Access Bracket to inside of each Ladder Rail
using 1/4 x 1-1/2" Hex Bolt Assemblies as shown at right.
Note: Temporarily place the Slide into position to help judge
the best placement for the Access Ladder. Make sure that all
hardware has room to t before drilling.
See the standard placement below right.
Lean the Access Ladder against the gym with the Access
Brackets at against the Platform Front and the lower edge
of the Brackets ush with the lower edge of the Platform
Front.
Drill 5/16" diameter holes through the holes in the Brackets
and through the Platform Front. Secure the Brackets using
1/4 x 1" Hex Bolt Assemblies.