Do you have a question about the Creda Shower SPA and is the answer not in the manual?
Verify power and water are connected and on before operating the shower unit.
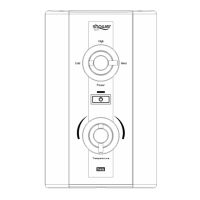
Press the designated button to initiate or cease water flow and activate the indicator light.
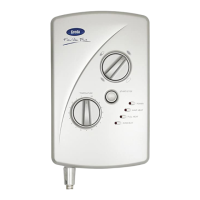
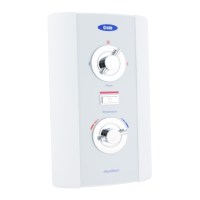
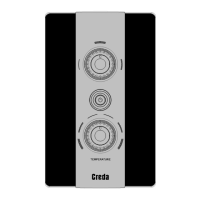
Knob A allows selection of three power levels: High, Medium, or Cold settings.
Knob C adjusts water temperature; turn clockwise for cooler, anti-clockwise for warmer water.
Press the start/stop button again to halt water flow; the indicator light will extinguish.
Switch off the electricity supply at the ceiling switch or local isolator after use.
Wait 20s for stabilization, note indicator light function, and temperature variations.
Important warnings on frozen appliances, pressure relief valve, and user supervision for safety.
Introduces the Creda Shower Spa and emphasizes reading the manual before installation.
Highlights the shower's design to stabilize temperature changes from water pressure fluctuations.
Lists crucial safety guidelines for the installation, use, and maintenance of the appliance.
Explains water is heated instantly as it flows over internal heating elements in the copper cylinder.
Heaters switch on automatically via a water pressure switch, indicated by the neon light.
A solenoid valve manages water flow, activated by the start/stop button.
Water flow is automatically maintained at the user-set level despite incoming pressure variations.
The pressure switch deactivates power to elements if water supply pressure drops too low.
A thermal cut-out switch powers off the unit if the water temperature exceeds the set limit.
This device safeguards against abnormal pressure conditions within the shower unit.
Details how seasonal changes in mains water temperature affect the required flow rate for desired heat.
Explains how other water-consuming devices can affect shower temperature stability.
Stresses that all wiring and installation must be supervised by a qualified person.
Advises against installing the shower where it may be subjected to freezing temperatures.
Outlines the recommended step-by-step order for the installation process.
Covers fixing the shower unit to the wall and making the necessary plumbing connections.
Provides detailed instructions and diagrams for making electrical connections.
Specifies the required minimum/maximum water pressure and flow for correct installation.
Emphasizes the importance of flushing pipework before connecting it to the shower unit.
Illustrates various methods for connecting cold water supply from the top.
Shows different configurations for connecting cold water supply from the bottom.
Mandates that the shower unit must be properly earthed for safety.
Details the single phase AC supply requirements and rating plate information.
Provides guidance on appropriate cable sizes and fuse/MCB ratings for different power outputs.
Specifies the need for a means of disconnection in all poles for the fixed wiring.
Instructions for routing and connecting the electrical cable, with specific advice for left-hand entry.
Critical warning regarding stripping back cable sheath for left-hand entry installations.
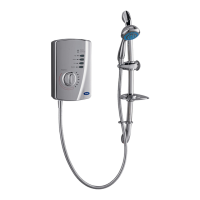
Step-by-step instructions for assembling and fitting the riser rail and soap dish.
Details the procedure for assembling and attaching the height adjuster to the riser rail.
Guidance on connecting the shower hose and securing the wall brackets correctly.
Emphasizes the importance of demonstrating the shower's operation to all users.
Ensures power/water are on and users are familiar with control knobs A, B, and C.
Detailed steps for fine-tuning water temperature using knob C during use.
Explains how to select different power levels using knob A for varied heating needs.
Instructions on how to properly stop the shower and switch off the power supply.
Key warnings regarding potential freezing and pressure relief valve issues during use.
Provides guidance on cleaning the shower unit and hose using safe methods.
Stresses the necessity of regularly inspecting the shower hose for wear and damage.
Details the importance of regularly cleaning the shower handset to maintain performance.
Lists additional accessories and common spare parts available for purchase.
Offers user-level steps to resolve common shower issues before contacting a professional.
Troubleshooting steps for when the shower temperature cycles erratically.
Advice on addressing situations where the water temperature is excessively hot.
Guidance for resolving issues where the water temperature is too low.
Steps to diagnose and fix a weak or obstructed water spray pattern.
Troubleshooting tips for when the water takes an extended time to heat up.
Advice for when the water temperature drops unexpectedly during a shower.
Instructions on how to contact the spares department to order replacement parts.
Guidance on seeking professional help when self-help troubleshooting is insufficient.
Crucial safety warning to switch off electricity before performing any checks.
Information for contacting Creda's after-sales service for assistance.
Details the product's warranty period, conditions for claims, and specific exclusions.
Provides the official contact details for Creda and Applied Energy Products Limited.
| Brand | Creda |
|---|---|
| Model | Shower SPA |
| Category | Plumbing Product |
| Language | English |