27
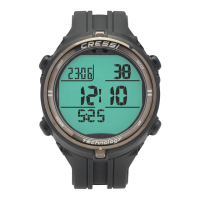
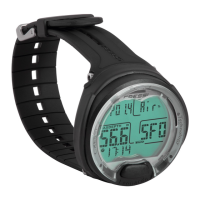
SURFACE SCREEN (PRE-DIVE)
After the launch sequence, the surface screen appears with the
following information:
1. CURRENT CYLINDER PRESSURE (set in BAR or PSI)
2. CURRENT DEPTH (set in m or ft)
3. MAXIMUM DEPTH reached in the previous dive (set in m or ft)
4. DIVE TIME (minutes) of the previous dive
– TEMPERATURE (set in C° or F°).
This information appears in rotation on the screen.
5. BATTERY STATUS (see BATTERY chapter).
WARNING! Cressi Sub S.p.A. declines all responsibility for any
malfunction and/or damage resulting from incorrect or improper
connection/assembly of the DIGI 2 console to the first stage/
regulator unit!
IMPORTANT! Cressi Sub S.p.A. recommends that you
arrange the DIGI 2 console within your preferred configuration in
an optimal hydrodynamic position using the fasteners provided to
prevent accidental knocks or snags.
HOW TO ACTIVATE THE DIGI 2 CONSOLE
Remove the smart cover (see the "SMART COVER" FUNCTIONS).
The DIGI 2 console activates automatically when the first stage/
regulator group connected to the cylinder is pressurized.
Tank pressure must be greater than 10 BAR.
WARNING! Do not dive if the DIGI 2 is not correctly connected
to a pressurized scuba unit.
LAUNCH SEQUENCE AFTER ACTIVATION
Immediately after it is activated, the DIGI 2 console will run the
launch sequence, during which it will display, in order:
1. Switch on all segments
2. Version of FIRMWARE INSTALLED
3. TOTAL NUMBER OF DIVES TAKEN WITH THE DIGI 2 CONSOLE
4. Result of the most recent seal test: PASS/FAIL (see the
CHANGE BATTERY chapter).
1 second
5 seconds
P80-DIGI 2.indb 27 13/06/19 14:01

 Loading...