DO GUIDE
DO Check the Box
QTY PRODUCT PART NUM.
1 Power Pack, 24 Vdc 0.75 A, 100-240 Vac 2037209
1 Interface Connector, Plug, 2-Pin 20 03574
1 Interface Connector, Plug, 5-Pin 2003577
Not Included: Cables
NOTE: The DM OUT port is a PoDM (Power over DM) or PoH (Power over HDBaseT) PD
(Powered Device) port. To receive PoDM or PoH, the DM-TX-401-C requires a connection to
a DigitalMedia™ switcher or other equipment that has a PoDM or PoH PSE (Power Sourcing
Equipment) port. Any wiring that is connected to a PoDM or PoH PSE port is for intra-building
use only and should not be connected to a line that runs outside of the building in which the
PSE is located.
DO Set the IP Address
The con guration of the DM-TX-401-C within the DigitalMedia 8G+™ system determines how
the IP address of the DM-TX-401-C is set:
• If the DM-TX-401-C connects to a DigitalMedia switcher, the DM-TX-401-C is con gured by
the switcher automatically.
• If the DM-TX-401-C connects to a DigitalMedia 8G+ receiver, the DM-TX-401-C uses its
own con guration settings. By default, DHCP (Dynamic Host Con guration Protocol) is
enabled. If desired, you can assign the default IP address to the DM-TX-401-C by holding
down the SETUP button while the unit boots up. The default IP address 192.168.1.234
overwrites the current setting. To manually set a different IP address, use Crestron
Toolbox™.
DO Select Inputs
By default, automatic switching of inputs is enabled. Automatic switching causes inputs to
switch according to the following priorities:
• Video switching priority: DisplayPort, HDMI, RGB, composite
• Audio switching priority: DisplayPort, HDMI, 1/8” analog, dual RCA analog
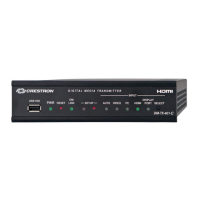
The AUTO LED on the front panel of the DM-TX-401-C lights to indicate that automatic switching
is enabled.
To manually select the desired audio/video input, press the SELECT button on the front panel of
the DM-TX-401-C until the corresponding LED lights (refer to illustration ).
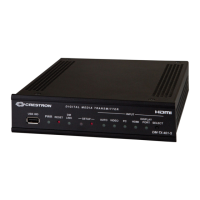
DM-TX- 401-C
DigitalMedia 8G+™ Transmitter 401
DO Mount the DM-TX-401-C
Mount the Crestron
®
DM-TX-401-C in the desired location (for example, in a stationary rack or
podium, on a shelf, or in a movable lectern or AV cart). If rack mounting is desired, use the
ST-RMK Rack Mount Kit (sold separately).
DO Make Connections to the DM-TX-401-C
Make connections to the front and rear of the DM-TX-401-C as appropriate for the application
(refer to illustrations and ).
Unbalanced Stereo
Line Level
Audio Input
Unbalanced Stereo
Line Level
Audio Input
To Any
RS-232
Device
To IR Device (e.g.,
Projector) or Devices
Without RS-232
Ground
Composite
Video
Input
RGB or
Component
Video Input
HDMI
®
Digital Video/
Audio Input
DisplayPort
Digital Video/
Audio Input
24 Vdc from
Power Pack
(Included)
10BASE-T/
100BASE-TX
Ethernet to Local
Network Device
To DM
®
Switcher,
Receiver, or Other
DM Device or to
HDBaseT
®
Device
VID PC
VIDEO IN
AUDIO IN
HDMI
DISPLAY PORT
L
G
COM
TX
RX
RS
CS
DM OUT
IR
24V
S G
G
0.75A
LAN
R
Rear Panel Connections
Mouse/Keyboard Input
VIDEOAUTOSETUP
INPUT
DM
LINK
USB HID
PC
HDMI
DISPLAY
PORT
SELECT
RESET
PWR
DM-TX-401-C
Front Panel Connection
VIDEOAUTOSETUP
INPUT
DM
LINK
USB HID
PC
HDMI
DISPLAY
PORT
SELECT
RESET
PWR
DM-TX-401-C
Input Selection LEDs and Button