7
CRICKET Installation and Setup Instructions
Once you have safely and completely removed your vehicle from its shipping crate, you are ready to perform the
basic installation and set-up procedures prior to the initial operation of your new CRICKET SX3.
*You may dispose of the protective barrier.
1. Unpack the CRICKET Vehicle
1.1. Remove all packing material including the rear step plate and the front seat from the CRIKCET. Set
these items aside until needed.
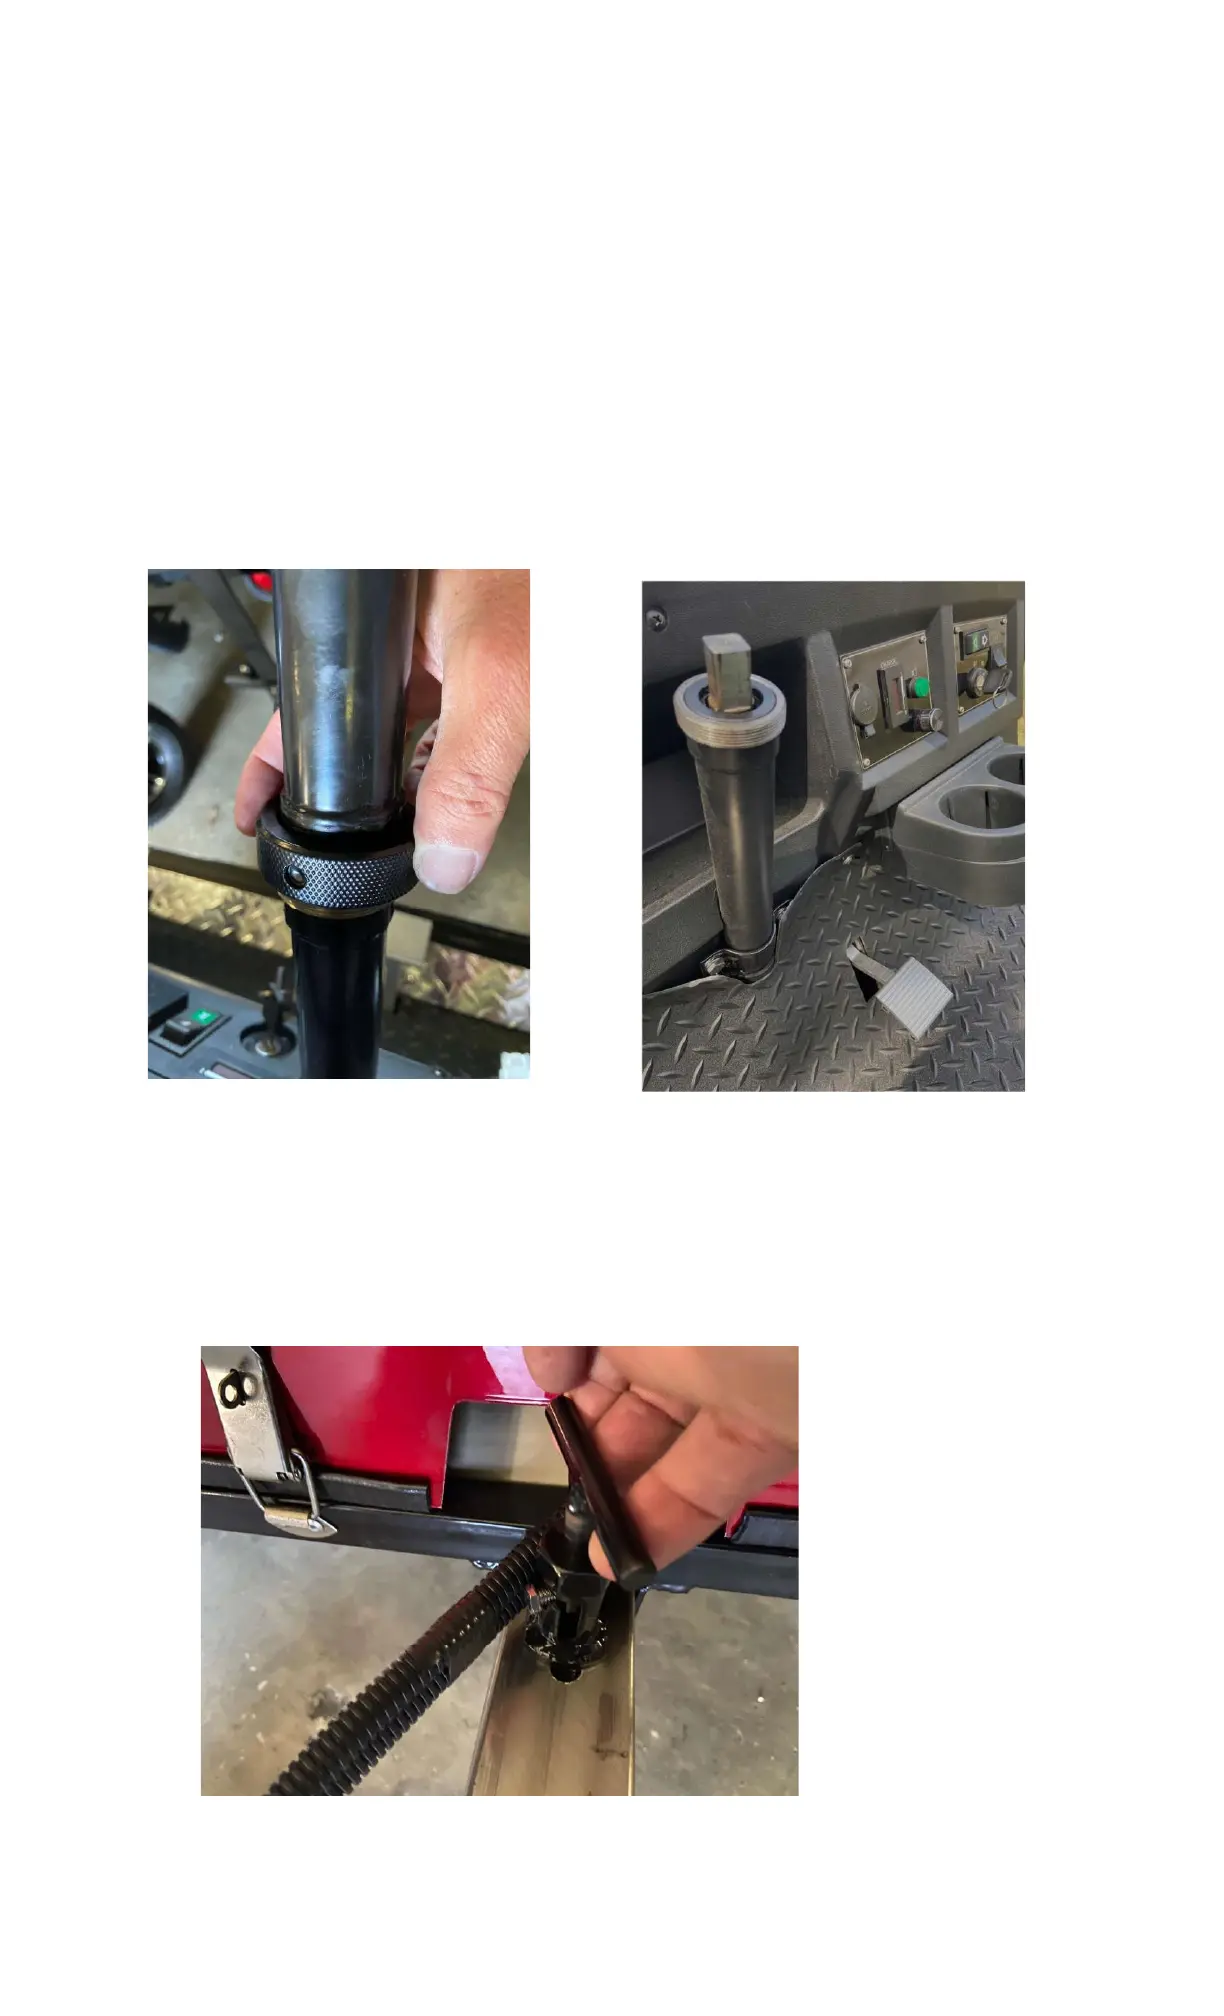
2. Install the Steering Shaft
2.1. Make sure the steering wheel in the correct orientation for driving straight and the front wheels are
pointing straight. Line up the square pin (Fig. 2.1.1) on the lower shaft with the upper shaft and slide the
two shafts together. Then tighten the large nut on the upper shaft until tight. (Fig. 2.1.2)
Figure 2.1.2 SX3 Steering Shaft Nut Figure 2.1.1 RX5 Lower Steering Shaft
3. Install the Floorboard Extension
3.1. Use your hand to pull up on the spring-loaded T-Lever in the center of the permanent floorboard. Turn
the lever clockwise until it locks open. (Fig. 3.1.1)
Figure 3.1.1 SX3 T-Lever Released