Using the EasyPress Mini:
Using the EasyPress Mini:
3 4
1.) Power Cricut EasyPress Mini on.
For flat base materials: find a flat, heat-resistant. Use
a towel to protect surface.
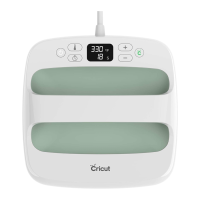
For shapely materials that are hollow, like shoes and
hats, use a form or folded towel inside to create a firm
pressing surface.
Be sure to avoid flimsy ironing boards!
2.) Set temperature.
Use the Cricut Heat Guide to determine project
settings.
Powering machine ON sets temperature to Low. Press
button again for Medium, and again for High.
Orange lights mean it's heating up.
Green lights mean temperature has been reached.
Use extreme caution. Machine operates at high
temperatures that can cause burns.
3.) Set separate timer to recommended time.
4.) Preheat base material.
Move Cricut EasyPress Mini over application area for
recommended time.
5.) Position design.
Make sure shiny side (clear liner) is facing up.
6.) Apply Heat.
Start timer and move Cricut EasyPress Mini
continuously across design until timer reaches 0.
Before removing liner, refer to the Cricut Heat Guide to
determine the peel temperature — warm or cool.
cricut.com/heatguide
Always use Cricut EasyPress Mini at room
temperature.
Before using Cricut EasyPress Mini ensure that
fabrics and other base materials are
completely dry.
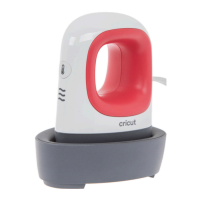
When not in use, always return Cricut
EasyPress Mini to its Safety Base.
Design sizes for application with Cricut
EasyPress Mini range from the smallest area
you can reach with the precision tip up to a
surface area that is about 2X the heat plate.
Recommended settings are optimized with the
maximum sizes in mind:
Iron-on: 4” W x 3.5” L or 1.7” W x 5.25” L.
Infusible Ink: 2.75” W x 2.75” L or 1.625” W x 5” L.
Quick Tips!
Quick Tips!