EasyManua.ls Logo

Cricut EasyPress - User Manual

Cricut EasyPress
6 pages
Print Icon
To Next Page IconTo Next Page
Loading...
If you are using a computer, open your Bluetooth settings and select Cricut Explore. The
pairing code is 0000.
You can also connect using the USB Cable to connect your computer and Cricut.
Download Design Space via the Cricut website.
Once downloaded, create or sign into your Cricut account.
Now start designing!
You will also have to connect the Cricut to your computer, you can follow the prompts in
Product Setup.
Cricut
Cricut
EasyPress
EasyPress
Instructions
Instructions
11
Visit the Cricut Help Center for Further Assistance!
Designing in
Designing in
Cricut Design Space on Desktop
In Design Space, you
can browse their
projects or create a
New Project.
You are able to add images
and text here. Once happy
with your design, select Make
It.
Please do not return item hot.
EasyPress takes about two hours to cool
down. Please plan accordingly.

Other manuals for Cricut EasyPress

Question and Answer IconNeed help?

Do you have a question about the Cricut EasyPress and is the answer not in the manual?

Summary

Cricut EasyPress Instructions

Cricut Design Space App

Using HTV (Heat Transfer Vinyl) Iron On

Using the EasyPress

Setting Timer and Temperature

Use Heat Guide or app for settings; adjust with +/- buttons; lights indicate heating status.

Cricut Heat App: Set Custom Time & Temp

Customizing Heat Settings

Open Heat app, select EasyPress, and set custom time, temp, Preheat Blank, and Flip & Press.

Using the Cricut Heat App

Activating the Cricut EasyPress

Connect to your press via Bluetooth in the app and confirm activation terms.

Send Recommended Time & Temp Settings to Cricut EasyPress

Project Setup in Heat App

Select transfer material and base material, then proceed to send settings.

Finishing the Project

Applying Heat and Pressure

Place EasyPress on material, press Go button, and apply light pressure.

Overview

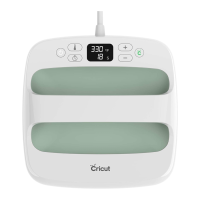
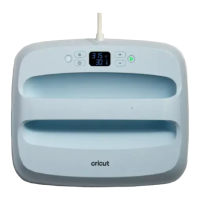
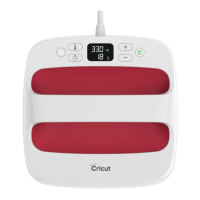
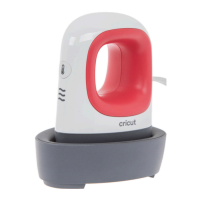
The Cricut EasyPress 3 is a heat press designed for applying heat transfer vinyl (HTV), iron-on designs, iron-on patches, iron-on transfers, and Infusible Ink to various base materials. It combines the speed of a heat press with the convenience of an iron, offering precise temperature and time control for consistent results.

Function Description:

The Cricut EasyPress 3 serves as a versatile heat application tool for crafting and personalization projects. It allows users to transfer designs onto fabrics and other compatible materials by applying controlled heat and pressure. The device is designed to work in conjunction with Cricut cutting machines (like Cricut Explore, Cricut Joy, and Cricut Maker) which cut the designs, and the Cricut Design Space app or Cricut Heat app, which provide project settings and control over the EasyPress.

Important Technical Specifications:

  • Temperature Range: The EasyPress 3 can reach temperatures up to 315°F (157°C) or higher, depending on the model and specific settings.
  • Cool-down Time: The device takes approximately two hours to cool down after use.
  • Connectivity: It features Bluetooth® connectivity, allowing it to connect wirelessly to the Cricut Heat app on a mobile device for setting custom time and temperature, as well as sending recommended settings directly to the EasyPress. It can also be connected to a computer via USB cable for Design Space use.
  • Power: The device is powered by an electrical outlet.
  • Size: The manual mentions an "EasyPress 3 (9 x 9 in)" model, indicating various sizes may be available.

Usage Features:

  • Desktop Design Space Integration: Users can design projects on a desktop computer using Cricut Design Space. This software allows browsing existing projects, creating new ones, adding images and text, and then sending the design to a Cricut cutting machine. After cutting, the EasyPress is used for the transfer.
  • Mobile App Control (Cricut Heat App): The Cricut Heat app, available on app stores, allows users to set up and activate their EasyPress 3. Once connected via Bluetooth, the app enables users to:
    • Browse through projects or create new ones.
    • Select transfer material (e.g., Smart Iron-On™, Infusible Ink) and base material (e.g., 100% Cotton) to get recommended time and temperature settings.
    • Customize temperature and press time as desired.
    • Select options like "Preheat Blank" and "Flip & Press" for specific project requirements.
    • Send settings directly to the EasyPress 3.
  • On-Device Controls: The EasyPress 3 itself has physical controls:
    • Go Button: Initiates the timer and heat application.
    • Temperature Buttons (+/-): Adjust the temperature manually.
    • Timer Buttons (+/-): Adjust the press time manually.
    • Power Button: Turns the device on/off.
  • Indicator Lights:
    • Orange Light: Indicates the device is heating up.
    • Green Light: Indicates the desired temperature has been reached.
    • Beep Sounds: Signal when the device is ready or when the timer is complete.
  • Prepping HTV: HTV sheets should be laid on a mat with the dull side facing up and the glossy (clear carrier sheet) side facing down, ensuring full adherence. The HTV is then cut using a Cricut cutting machine, with the design mirrored in Design Space.
  • Weeding: After cutting, excess HTV material (words, images, edges) is removed using weeding tools, leaving only the desired design on the clear carrier sheet.
  • Application Process:
    1. Power On: Turn on the EasyPress 3.
    2. Set Time & Temperature: Use the Cricut Heat Guide (cricut.com/heatguide) or the Cricut Heat app to determine and set the appropriate time and temperature for the specific materials.
    3. Preheat Base Material: Place the EasyPress on the fabric for the recommended preheat time.
    4. Position Design: Place the design on the base material with the shiny side (clear liner) facing up.
    5. Apply Heat: Place the EasyPress firmly on the design and press the Go button to start the timer. Apply light, constant pressure.
    6. Remove Carrier Sheet: Refer to the Cricut Heat Guide or Cricut Heat app for instructions on when and how to peel the carrier sheet (e.g., cool peel, warm peel).
  • Included Tools: The EasyPress 3 typically comes with a set of tools to aid in crafting projects, including an EasyPress Mat, Safety Base, scoring stylus, weeder, tweezers, spatula, scissors, scraper, and a carrying case.

Maintenance Features:

  • Safety Base: Always return the Cricut EasyPress to its Safety Base when not in use to prevent accidental burns or damage.
  • Cleanliness: Ensure fabrics and other base materials are completely dry before using the EasyPress.
  • Control Panel Protection: Ensure there is no tape or protective film over the control panel before use.
  • Room Temperature Use: Always use the Cricut EasyPress at room temperature for optimal performance.
  • Cool-down Period: Allow approximately two hours for the EasyPress to cool down completely after use. Do not return it hot.
  • Mirroring Images: Always mirror images before cutting with a Cricut machine when using iron-on or Infusible Ink to ensure the design appears correctly when transferred.

Cricut EasyPress Specifications

General IconGeneral
BrandCricut
ModelEasyPress
CategoryPower Tool
LanguageEnglish

Related product manuals