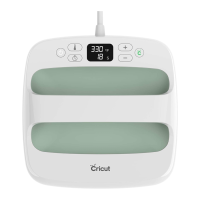
1.) Power Cricut EasyPress on.
For flat base materials: find a flat, heat-resistant
surface. Use EasyPress mat to protect surface.
Be sure to avoid flimsy ironing boards!
2.) Set timer & temperature.
Use the Cricut Heat Guide to determine project
settings.
Press timer, then use +/- buttons to set
recommended time. Cricut Heat app can send
settings directly to Cricut EasyPress 3.
Press temperature, then use +/- buttons to set
recommended temperature. Cricut Heat app can
send settings directly to Cricut EasyPress 3.
Orange lights mean it's heating up.
Green lights mean temperature has been reached.
Beep sounds when it's ready.
3.) Preheat base material.
Place Cricut EasyPress on fabric for recommended
time.
4.) Position design.
Make sure shiny side (clear liner) is facing up.
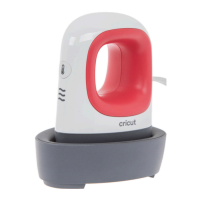
Using the EasyPress:
Using the EasyPress:
3 8
cricut.com/heatguide
Cricut Heat App:
Cricut Heat App:
Set custom time & temp
Open Cricut Heat app.
Under My Heat Presses, select the Cricut
EasyPress 3 and scroll to the Set Custom
Time & Temp option.
Change the Temperature and Press time
as desired. You can also select options to
Preheat Blank and Flip & Press when
pressing blanks that require these steps.
When you’re finished, select Send Settings
to EasyPress.
Always use Cricut EasyPress at room temperature.
Before using Cricut EasyPress ensure that fabrics and other base
materials are completely dry.
Always return Cricut EasyPress to its Safety Base when not in use.
Before using Cricut EasyPress, ensure there is no tape or
protective film over its control panel.
Make sure you mirror your image before cutting it with the Cricut
when using iron-on or infusible ink.
Quick Tips!
Quick Tips!