Turntable Operation
1. Place the record on the turntable. Use the 45 RPM Adapter if necessary.
2. Turn the Speed Selector to the desired speed.
3. Remove the stylus protector from the stylus assembly.
Note: To avoid stylus damage, make certain the included stylus guard is in place whenever the turntable is being moved or cleaned.
4. Use the Tonearm Lift Lever to raise the Tonearm Lift and let the Tonearm sit on it, and move it over the record where
play is desired to begin.
5. Set the Tonearm Lift Lever back to the down position, the tonearm will descend slowly onto the record and begin
playback.
6. When the record is finished playing, use the Tonearm Lift Lever to raise the tonearm and then return it to the Tonearm
Rest. To suspend the playback, repeat the same steps.
Anti-Skate Adjustment
A small outward “anti-skating” force can be applied to the tone arm to compensate for the “skating” force that pulls the
arm toward the center of the record.
For best performance during normal turntable usage, it is recommended to set the anti-skate control knob to the same
value as indicated by the downforce scale dial.
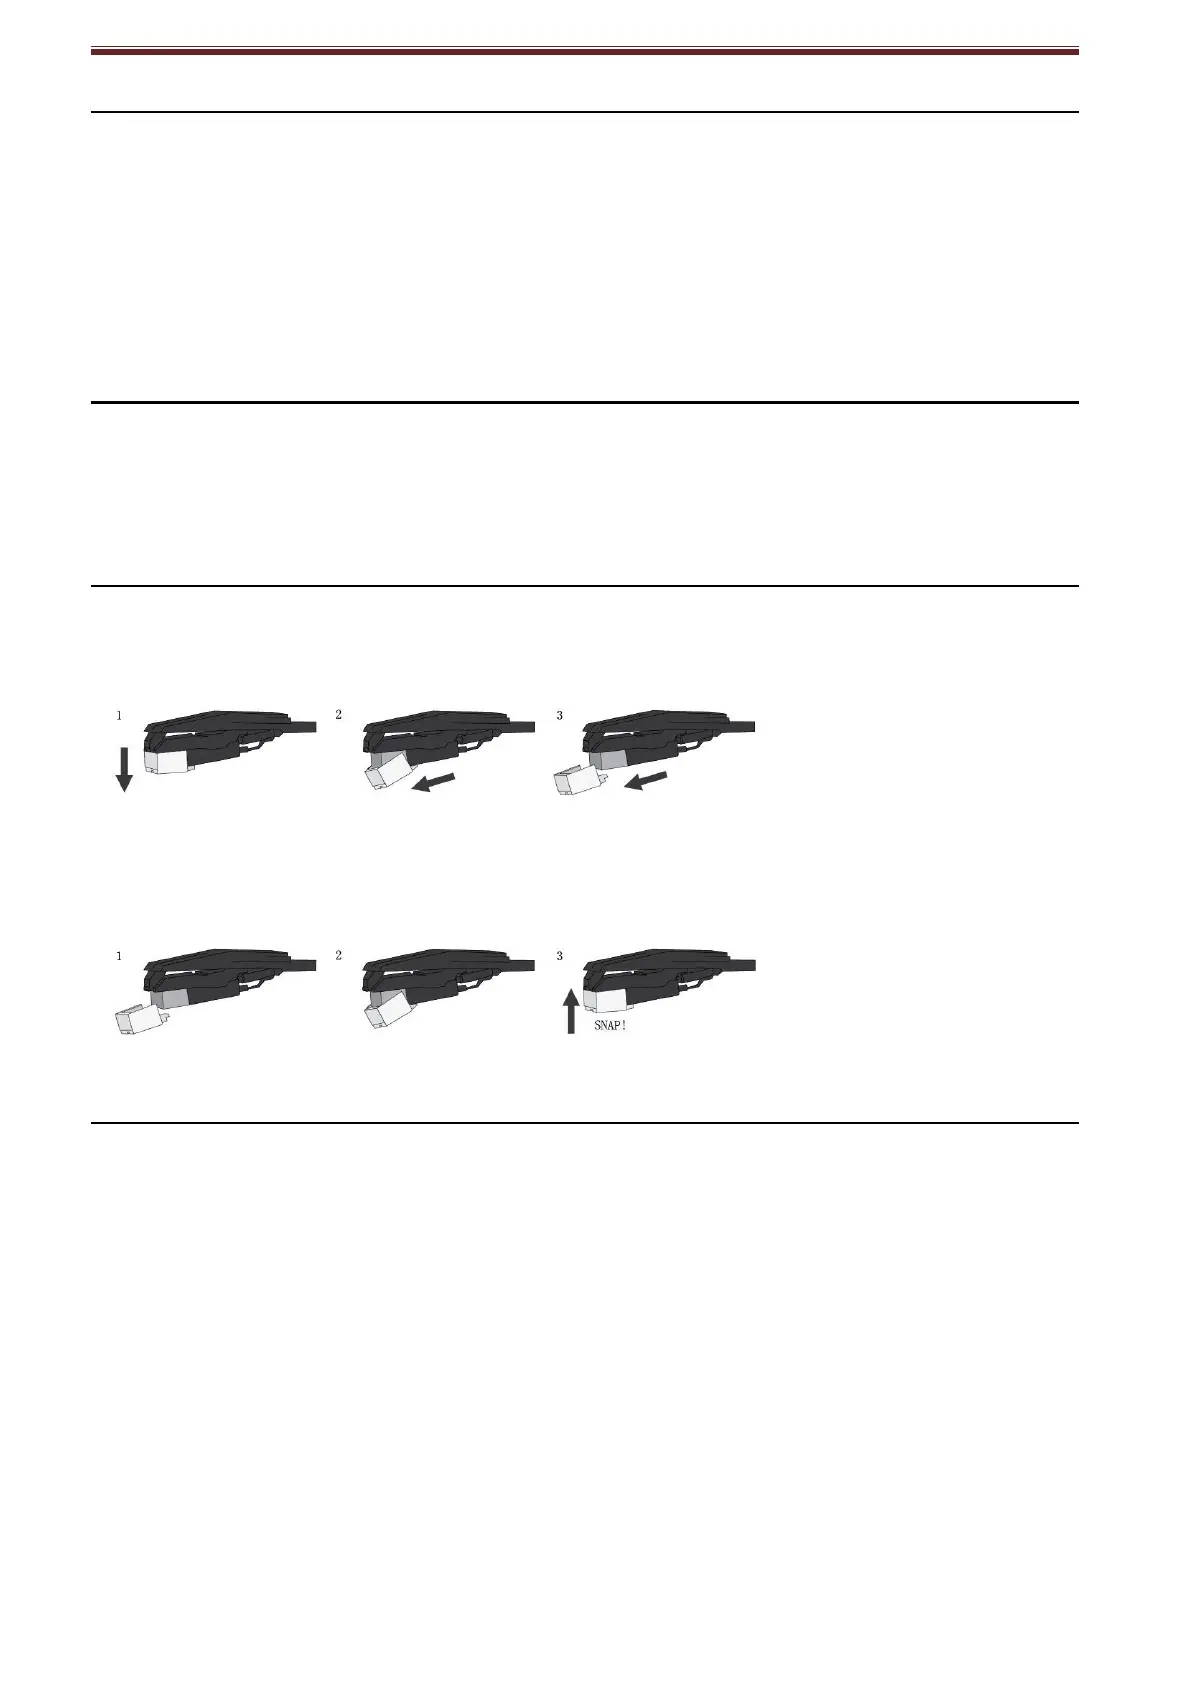
Needle Replacement
Removing Needle
1. Gently pull down the front edge of the needle.
2. Pull needle forward.
3. Pull out and remove.
Installing Needle
1. Position the needle with its tip facing down.
2. Line up the back of the needle with the cartridge.
3. Insert the needle with its front end at a downward angle and gently lift the front of the needle upward until it snaps into
place.
Cartridge Replacement
1. Before replacement, put the stylus protector back on the stylus to prevent damage to the stylus during the replacement
process.
2. Carefully remove the wire leads from the original cartridge.
3. Loosen the two screws on the headshell that are securing the cartridge and then remove the original cartridge.
4. Mount the new cartridge to the headshell and tighten it lightly. Do not completely tighten the screws at this moment.
5. Connect the wire leads to the new cartridge’s terminals .The wire lead color codes are as below:
White Left channel positive (L+)
Blue Left channel negative (L–)
Red Right channel positive (R+)
Green Right channel negative (R-)
6. Adjust the cartridge’s position to make sure it is precisely aligned on the headshell so that the stylus will be tracking the
grooves in parallel perfectly.
7. Tighten the screws completely once the perfect alignment is achieved.
 Loading...