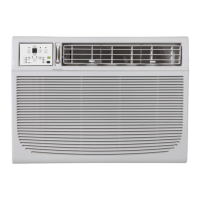
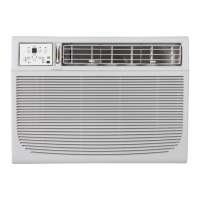
This document is a Use & Care Guide for a Crosley 18,500-25,000 BTU Window Heat/Cooling Unit, specifically models CAMHE18C2 and CAMHE25C2. It provides comprehensive instructions for installation, operation, and maintenance, emphasizing safety throughout.
Function Description
The Crosley window unit is a versatile appliance designed to provide both heating and cooling for indoor spaces. It functions as a window-mounted air conditioner, capable of regulating room temperature within a specified range. The unit features a compressor for cooling and a heating element for warmth, making it suitable for year-round use. It also includes a fan-only mode for air circulation and a dry mode for dehumidification. The unit is equipped with an electronic control panel and can be operated either directly from the unit or via a remote control.
Usage Features
The air conditioner offers a range of features designed for user convenience and optimal performance:
- Operating Modes: Users can select from several operating modes: Auto, Cool, Dry, Heat (for reverse cycle models), and Fan Only. The Auto mode automatically selects the appropriate operation (cooling, heating, or fan only) based on the set temperature and the current room temperature.
- Temperature Setting: The desired temperature can be set using UP/DOWN buttons, with a range typically between 62°F (17°C) and 86°F (30°C). In Fan Only mode, the display shows the actual room temperature rather than a set temperature.
- Fan Speed Adjustment: The fan speed can be adjusted in four steps: Auto, Low, Med, or High, allowing users to control airflow intensity. However, in Heat mode (for applicable models) and Dry mode, the fan speed may be automatically controlled.
- Sleep Feature: This mode is designed for comfortable sleep. After activation, the selected temperature gradually increases (for cooling) or decreases (for heating) by 2°F/1°C over 30 minutes, and then by another 2°F/1°C after an additional 30 minutes. This new temperature is maintained for 6 hours before returning to the original setting. The Sleep mode can be canceled at any time.
- Energy Saver Feature: Available in Cool, Dry, and Auto modes, this feature helps conserve energy. The fan continues to run for 3 minutes after the compressor shuts off, then cycles on for 2 minutes at 10-minute intervals until the room temperature rises above the set temperature, at which point the compressor restarts.
- Follow Me Feature (on some models): This feature, activated only via the remote control, allows the remote to act as a remote thermostat. The remote displays the actual temperature at its location and sends this signal to the air conditioner every 3 minutes, enabling precise temperature control based on the remote's position.
- Timer Function (Auto Start/Stop): Users can program the unit to automatically turn on or off after a set period. The timer can be adjusted in 0.5-hour increments up to 10 hours, then in 1-hour increments up to 24 hours.
- Fresh Air Vent Control: The unit includes a fresh air vent that allows for three options: recirculating inside air (vent closed), drawing fresh air into the room (vent open), or exchanging air from the room while drawing fresh air in (vent and exhaust open).
- Air Directional Louvers: The 4-way directional louvers allow users to manually direct airflow up, down, left, or right, ensuring even distribution of conditioned air throughout the room.
- Clean Air Feature (on some models): This feature energizes an ion generator to help remove pollen and impurities from the air, trapping them in the filter.
- Error Codes: The display can show error codes (AS for room temperature sensor error, E for evaporator temperature sensor error, HS for electric heating sensor error) to help diagnose issues.
- Power Outage Memory: If the unit experiences an unexpected power cut, it will automatically restart with the previous function settings when power resumes.
- Delayed Start: The Cool circuit has an automatic 3-minute time-delayed start if the unit is turned off and on quickly, preventing compressor overheating and circuit breaker tripping. The fan continues to run during this time.
- Temperature Display Conversion: The control is capable of displaying temperature in either Fahrenheit or Celsius. Users can switch between the two by pressing and holding the Left and Right Temp/Timer buttons simultaneously for 3 seconds.
Maintenance Features
Proper maintenance is crucial for the longevity and efficient operation of the air conditioner:
- Air Filter Cleaning: The air filter should be checked at least once a month and cleaned when necessary. Trapped particles can reduce efficiency and lead to frost accumulation on cooling coils. The filter can be washed with liquid dishwashing detergent and warm water, rinsed thoroughly, and dried, or vacuumed. The unit should never be operated without the air filter. A "Check Filter" reminder feature illuminates an LED after 250 hours of operation to prompt cleaning.
- Cabinet Cleaning: The cabinet and front panel can be dusted with an oil-free cloth or washed with a cloth dampened in a solution of warm water and mild liquid dishwashing detergent. Harsh cleaners, wax, or polish should not be used. Excess water should be wrung from the cloth before wiping around controls to prevent damage.
- Winter Storage: For winter storage, the unit should be carefully removed from the window according to installation instructions, covered with plastic, or returned to its original carton.
- Troubleshooting Tips: The manual includes a comprehensive troubleshooting guide to help users identify and resolve common issues before calling for service, such as the unit not starting, insufficient cooling, ice formation, rapid cycling, noise, and water dripping.
The guide emphasizes important safety instructions, including proper grounding, avoiding extension cords, and being cautious of sharp metal fins during handling. It also provides detailed installation instructions for both window mounting and thru-the-wall installation, including specific steps for preparing the window or wall, assembling components, and securing the unit. For Energy Star models, additional R1 hardware and weather stripping installation steps are provided to minimize air leaks and ensure optimal insulation.