4 of 5
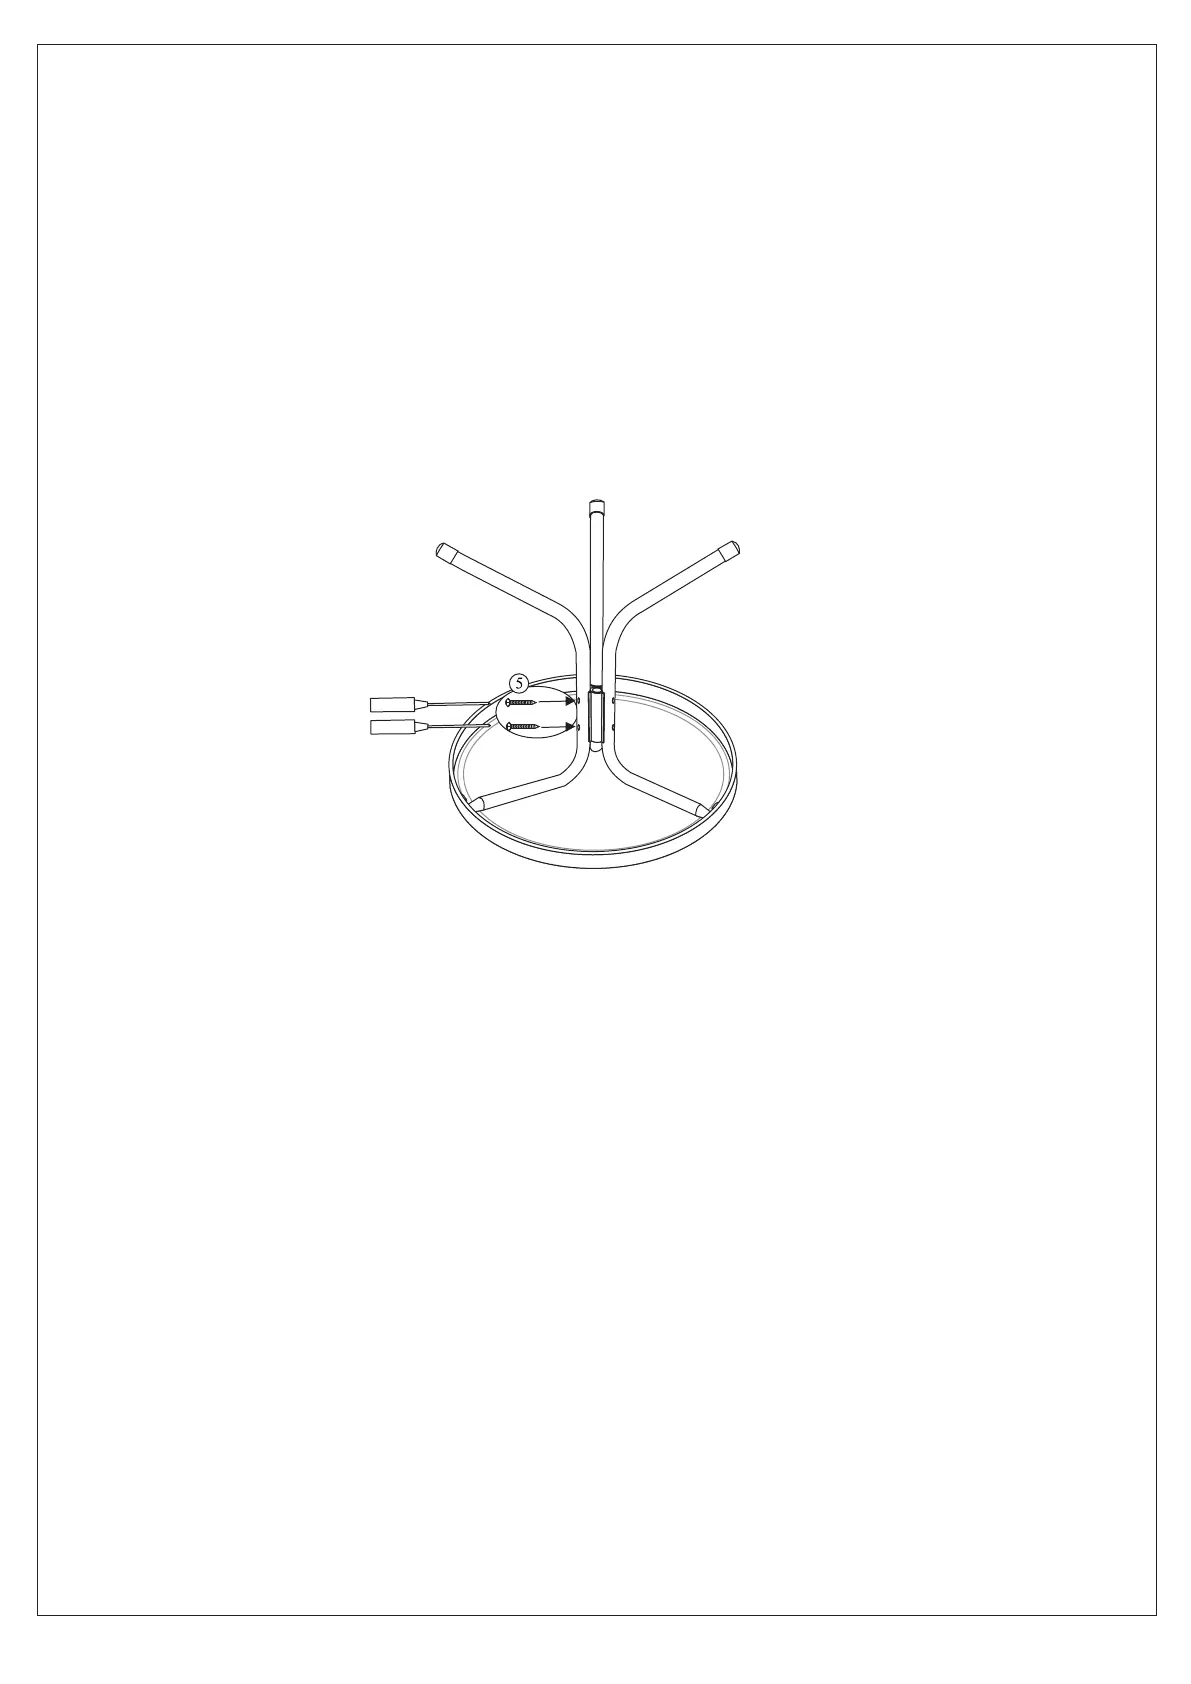
Step3: Make any adjustments to the parts to ensure they are properly aligned. At this time
tighten all nuts and bolts using Allen Wrench (6) and hex wrench (7). Tighten each
bolt connection a few revolutions at a time, rotating between bolt connections until
all nuts and bolts are completely tightened. DO NOT OVER TIGHTEN. Cover bolts
with PVC bolt covers. Turn table into the upright position.
YOUR TABLE IS NOW READY FOR USE.
Figure 3


 To Next Page