1. Speaker 10. Pitch Control
2. Power / Volume Knob 11. Cue Lever
3. Speed Switch 12. Tonearm Rest
4. Function Switch 13. Hold Down Clip
5. Headphone Jack 14. Tonearm
6. Aux In Jack 15. Spring clip speaker terminals
7. Tuning Knob 16. Power Jack
8. Turntable Platter 17.45 RPM Adapter
9. Turntable Spindle
Initial Setup
Essential Setup
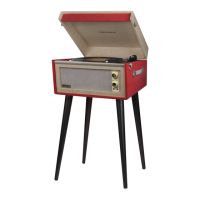
1. Place the unit on a flat and level surface. The selected location should be stable and free from vibration.
2. Remove the tie-wrap that is holding the tonearm.
3. Place the slip mat on top of the turntable platter.
4. Connect the speakers to the Spring clip speaker terminals of the turntable.
5. Connect AC adaptor to the Power Jack of the unit.
Note: Do not plug I/ie AC power adaptor to power outlet before all the assembly is completed. Before turning the power on, make sure again all the
connection settings are correct. Always turn off the power when connecting or disconnecting.
Stereo System Connection
Spring clip speaker terminals
The spring clip speaker terminals deliver amplified, speaker-level signals as output and should be connected with the passive speakers.
Aux Input Connection
You can connect an audio device to this unit and play your music through its speakers. To do this, rotate the Function Knob to Aux In mode, connect the
3.5mm auxiliary cable between your audio device and the Aux In Jack of this unit and start playing.
Turntable Operation
1. Rotate the Power / Volume Knob to turn on the power.
2. Set the Function Switch to PHONO position.
3. Set the Speed Switch accordingly.
4. Place the record on the turntable. Use the 45 RPM Adapter if necessary.
5. Remove the stylus protector from the stylus assembly.
Note: To avoid stylus damage, make certain the included stylus guard is in place whenever the turntable is being moved or cleaned.
6. Release the tonearm Hold Down Clip. Note: when the turntable is not in Use, remember to lock back hold down clip.
7. Use the Cue Lever to lift up the tonearm.
8. Gently move the tonearm over the record where play is desired to begin. Set the Cue Lever back to the down position, the tonearm will descend slowly
onto the record and begin to playback.
9. When the record is finished playing, use the Cue Lever again to raise the tonearm and then return it to the Tonearm Rest. Release the lever to let the
tonearm sit back at its rest. To suspend the playback, repeat the same steps.
10. Lock the Tonearm Clip to secure the tonearm.