9
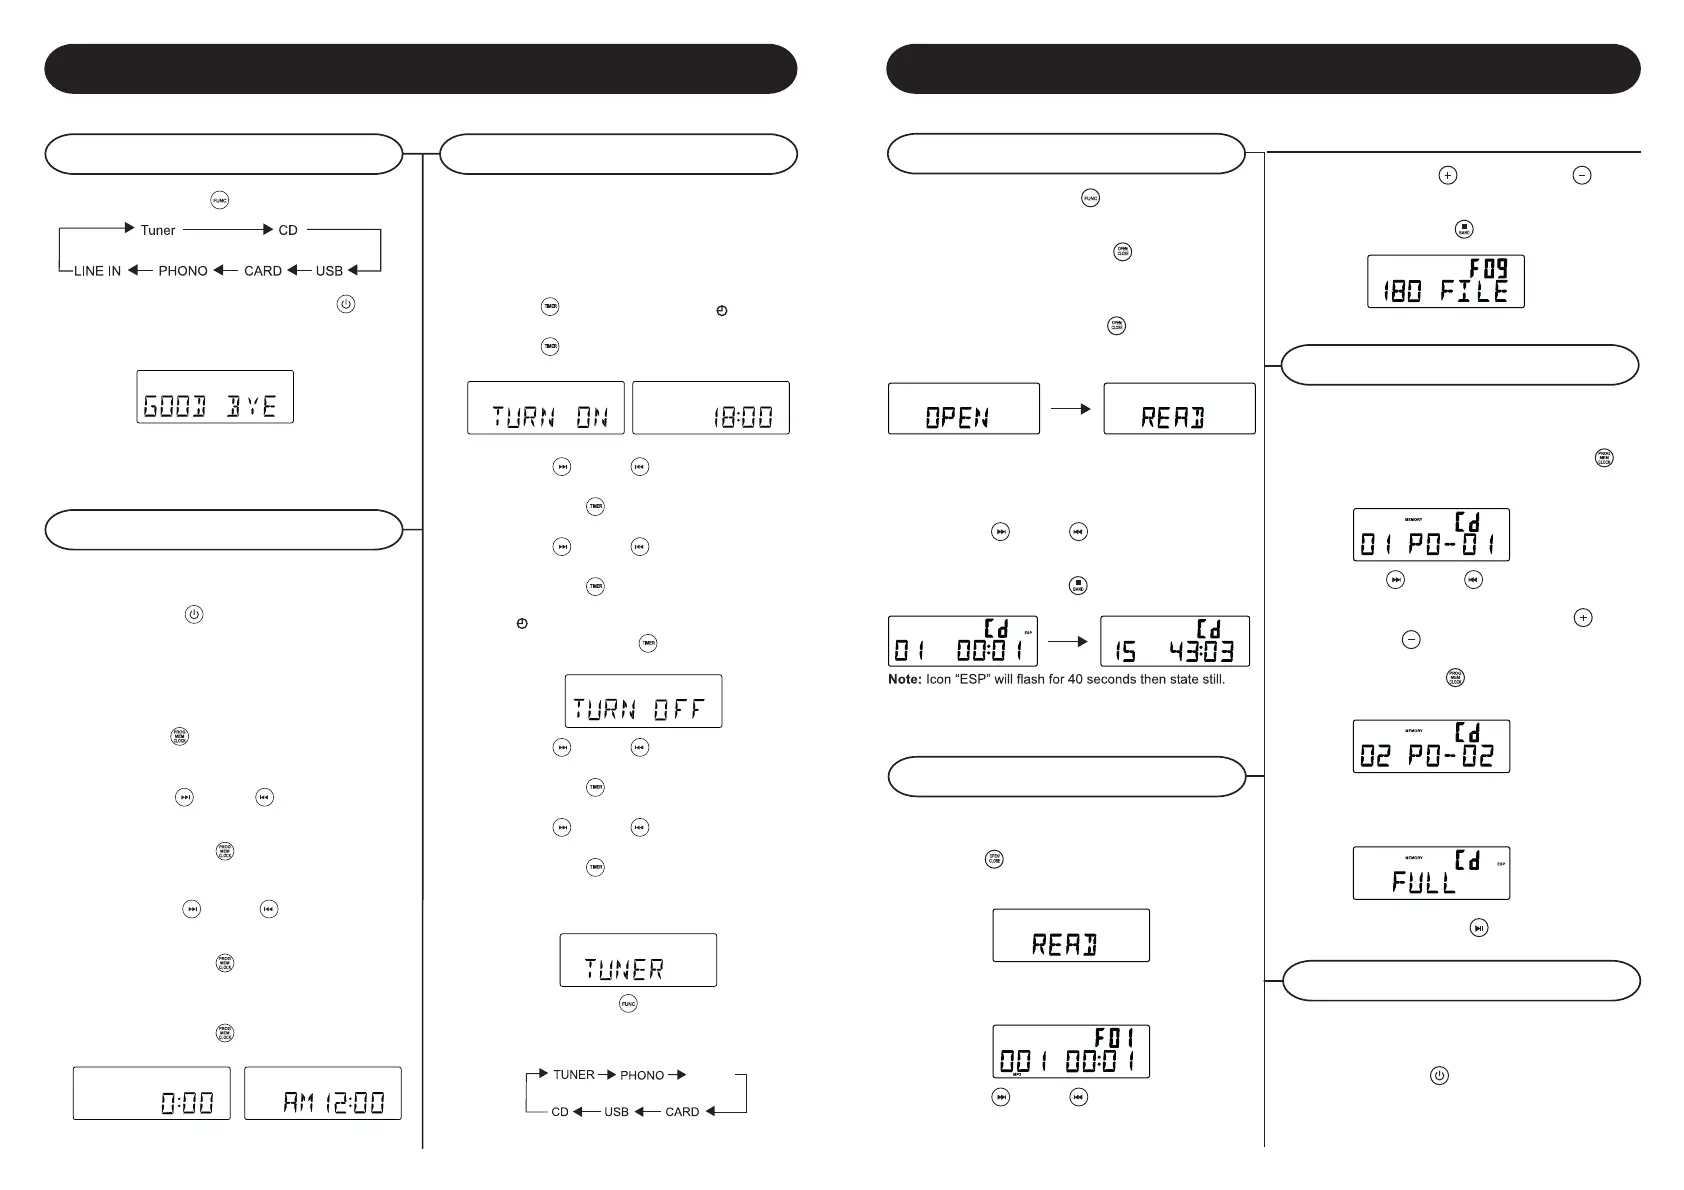
CD Operation
Playing a CD
Programming Tracks
CD-MP3 disc playback
4
1 Press the FUNCTION / to set the unit to CD
mode.
2 Press CD OPEN / CLOSE / to open the CD
compartment
3 Insert a disc with the printed side facing up.
Press CD OPEN / CLOSE/
. again to close
the compartment, READ is displayed as the CD
player scans the contents of a disc.
4 Track no. 1 will be playback automatically after
finish the reading CD disc contents.
5 Press FF/ or FB / once or repeatedly
until the desired track number appears in display.
6 Press STOP/BAND / to stop playback.
1 Insert CD-MP3 format disc. Press CD OPEN /
CLOSE /
again to close the compartment.
READ is displayed as the CD player scans the
contents of a disc.
2 Track no. 1 of root folder (Folder 1) will be
playback automatically after finish reading CD-
MP3 disc contents.
3 Press FF/ or FB / once or repeatedly
until the desired track number appears in display.
4 Press PRESET + / or PRESET – / to
select desired album.
5 Press STOP/BAND / to stop playback.
Erasing the program
You may store up to 20 tracks in the desired
sequence.
1 In the stop position, press PROGRAM / to
start programming. Icon “MEMORY” and P0-
01 start flashing.
2 Press FF/ or FB / once or repeatedly
until the desired track number appears in the
display. For MP3: press PRESET + /
or
PRESET – /
to select the desired album.
3 Press PROGRAM / to confirm, display shown
stored track no. and next store position.
4 Repeat step 2-3 to select and store all desired
tracks. FULL is displayed if you attempt to
program more than 20 tracks
5 Press PLAY/PAUSE / to play the program.
You can erase the contents of the memory by:
- once if in stop position, twice during
playback;
- Press POWER /
- Select another sound source
- Open the CD door
LINE IN
Setting the Timer
Basic Operation
Function Select
1 Press FUNCTION / to select among:
2 When the unit is on, press POWER / to
switch the unit off. LCD backlight will be turned
off and shown message “GOOD BYE” for 2
seconds, then the STANDBY LED is turned on.
Note: In the standby mode, EQ setting, sound
settings tuner presets and the volume level (up to
a maximum volume level of 30) will be stored in the
unit’s memory.
After connecting the system to power supply, set
the clock first.
1 Press POWER/ to switch the unit to Standby
mode.
-The display shows the time
-“0:00” flashes by default if you have not set the
clock
2 In the Standby mode, press and hold
PROGRAM /
over 1 second.
-The hours digit starts flashing
3 Press the FF/ or FB / repeatedly to set
the hours.
4 Press PROGRAM / again to confirm.
The minutes digit starts flashing
5 Hold down FF/ or FB / repeatedly to set
the minutes.
6 Press PROGRAM / again to confirm.
The minutes digit stop flashing, the clock begins
to run.
7 Press PROGRAM / to select between 12
and 24 hours, shown as below
The unit can be used as an alarm clock, whereby
the selected source (CD, TUNER, USB, SD CARD
OR PHONO) to start playback at a preset time.
Make sure the clock is set before using the timer.
1 In the standby mode, press and hold
TIMER / over 1 second, icon " " and
message” TURN ON” start flashing. Press
TIMER /
again to begin the “SYSTEM
POWER ON” timer setting.
2 Press FF/ or FB / repeatedly to set
hours.
3 Press TIMER / to enter minutes setting
mode.
4 Press FF/ or FB / repeatedly to set
minutes.
5 Press TIMER / again to begin “SYSTEM
POWER OFF” timer setting.
Icon
" " and message “TURN OFF” start
flashing.Press TIMER / again to begin timer
setting.
6 Press FF/ or FB / repeatedly to set
hours.
7 Press TIMER / on the remote to enter
minutes setting mode.
8 Press FF/ or FB / repeatedly to set
minutes.
9 Press TIMER / again to begin setting the
source from wake up.
Default at TUNER mode. Message TUNER
start flashing.
10 Press FUNCTION / to select wake up
source.The unit will be waked up from last
tuned station if TUNER mode is selected.
Setting The Clock
 Loading...