Amplicadores de potencia
page 26
Leistungsendstufen
Amplicateurs de puissance
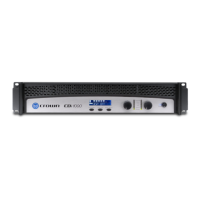
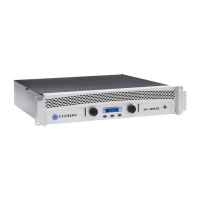
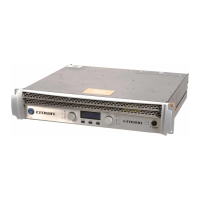
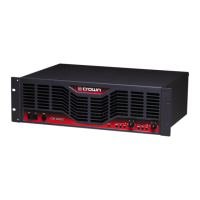
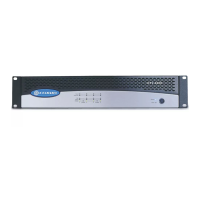
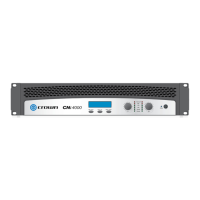
CNi Series Power Ampliers
Operation Manual Mode d’emploi Bedienungsanleitung Manual de Operación
CNi Series Power Ampliers
Operation Manual Mode d’emploi
page 27
Amplicateurs de puissance
Bedienungsanleitung
Leistungsendstufen
Manual de Operación
Amplicadores de potencia
DESIRED FUNCTION BUTTON PRESSES
(starting from the current preset screen)
Set amplifier to BRIDGE-MONO mode by loading the Quick-Start BRIDGE preset
Sel > Sel. Press Next until you see BRIDGE. Press Sel.
Set STEREO or BRIDGE-MONO mode manually Sel > Next. Press Sel until the BRG icon flashes. Press Next to set the amplifier to Bridge-Mono,
or press Prev to set the amplifier to Stereo. Press Sel to select your choice.
Select a user preset Sel > Sel. Press Next until you see PRESET 17-20. Press Sel.
Set INPUT Y mode Sel > Next > Sel. The Y icon flashes. Press Next to see the three options.
Choose one by pressing Sel.
Set EQ in or out for Ch. 1 or Ch. 2 Sel > Next. Press Sel until the EQ icon flashes along with CH1 or CH2.
Press Next to turn EQ on or off. Press Sel.
Set DELAY for Ch. 1 or Ch. 2 Sel > Next. Press Sel until the DEL icon flashes along with CH1 or CH2.
Press Next until you see the amount of delay you want, then press Sel to select it.
Set LIMITING for Ch. 1 or Ch. 2 Sel > Next. Press Sel until the LIM icon flashes along with CH1 or CH2.
Press Next until you see the limiting threshold you want, then press Sel to select it.
Turn off all the DSP Sel > Sel. Press Next until you see DSP OFF. Press Sel.
Configure a USER PRESET or modify a FACTORY PRESET 1. Sel > Sel .
2. Press Next until you see the desired preset. Press Sel to select it.
3. Sel > Next.
4. Press Sel until you see the DSP process you want to apply to that preset.
5. Press Next to see the processing options, then press Sel to select an option.
6. Repeat Steps 1–5 for all the processes you wish to apply to that preset. The CUSTOM ICON
will light if a factory preset has been modified.
* When you call up the XOV process, Ch.1 will always be set to low frequencies and Ch. 2
will always be set to high frequencies. DO NOT connect high-frequency drivers to Ch. 1.
HOW TO ACCESS PRESETS AND DSP PROCESSES
FONCTION SOUHAITEE UTILISATION DES BOUTONS
(En partant de l’écran actuel de préréglage)
Régler l’amplificateur en mode BRIDGE-MONO (mono-bridgé) en utilisant le préréglage
de mise en service rapide BRIDGE
Sel > Sel. Appuyez sur Next jusqu’à ce BRIDGE s’affiche. Appuyez sur Sel.
Régler manuellement le mode STEREO or BRIDGE-MONO (mono-bridgé) Sel > Next. Appuyez sur Sel jusqu’à ce que l’icône BRG clignote. Appuyez sur Next pour régler
l’amplificateur sur le mode mono-bridgé ou appuyez sur Prev pour régler l’amplificateur sur le
mode Stéréo. Appuyez sur Sel pour valider votre choix.
Sélectionner un préréglage utilisateur Sel > Sel. Appuyez sur Next jusqu’à ce que PRESET 17-20. Appuyez sur Sel.
Régler le mode INPUT Y (Entrée Y) Sel > Next > Sel. L’icône Y clignote. Appuyez sur Next pour afficher les trois options.
Pour en sélectionner une, appuyez sur Sel.
Activer ou désactiver la EQ (correction) pour CH1 ou CH2 Sel > Next. Appuyez sur Sel jusqu’à ce que l’icône EQ clignote pour CH1 ou CH2.
Appuyez sur Next pour activer ou désactiver la EQ. Appuyez sur Sel.
Régler le DELAY (retard) pour CH1 ou CH2 Sel > Next. Appuyez sur Sel jusqu’à ce que l’icône DEL clignote pour CH1 ou CH2.
Appuyez sur Next jusqu’à ce que le temps de retard souhaité s’affiche, puis appuyez sur Sel
pour le sélectionner.
Régler la LIMITING (limitation) pour CH1 ou CH2 Sel > Next. Appuyez sur Sel jusqu’à ce que l’icône LIM clignote pour CH1 ou CH2.
Appuyez sur Next jusqu’à ce que le seuil limite souhaité s’affiche, puis appuyez sur Sel pour le
sélectionner.
Désactiver tous les modes DSP Sel > Sel. Appuyez sur Next jusqu’à ce que DSP OFF s’affiche. Appuyez sur Sel.
Configurer un USER PRESET (préréglage utilisateur) ou modifier un FACTORY PRESET
(préréglage usine)
1. Sel > Sel.
2. Appuyez sur Next jusqu’à ce que le préréglage souhaité s’affiche. Appuyez sur Sel pour le
sélectionner.
3. Sel > Next.
4. Appuyez sur Sel jusqu’à ce que le mode DSP souhaité pour ce préréglage s’affiche.
5. Appuyez sur Next pour afficher les différents modes disponibles, puis appuyez sur Sel pour
sélectionner un mode.
6. Répétez les étapes 1 à 5 pour enregistrer tous le modes à appliquer à ce préréglage. L’ICÔNE
CUSTOM s’allume si un préréglage usine est modifié.
* Lorsque vous sélectionnez le mode XOV, C 1 est toujours réglé pour les basses fréquences
et C 2 pour les hautes fréquences. NE PAS brancher une enceinte hautes fréquences au C 1.
 Loading...