WMA 109 R08
4
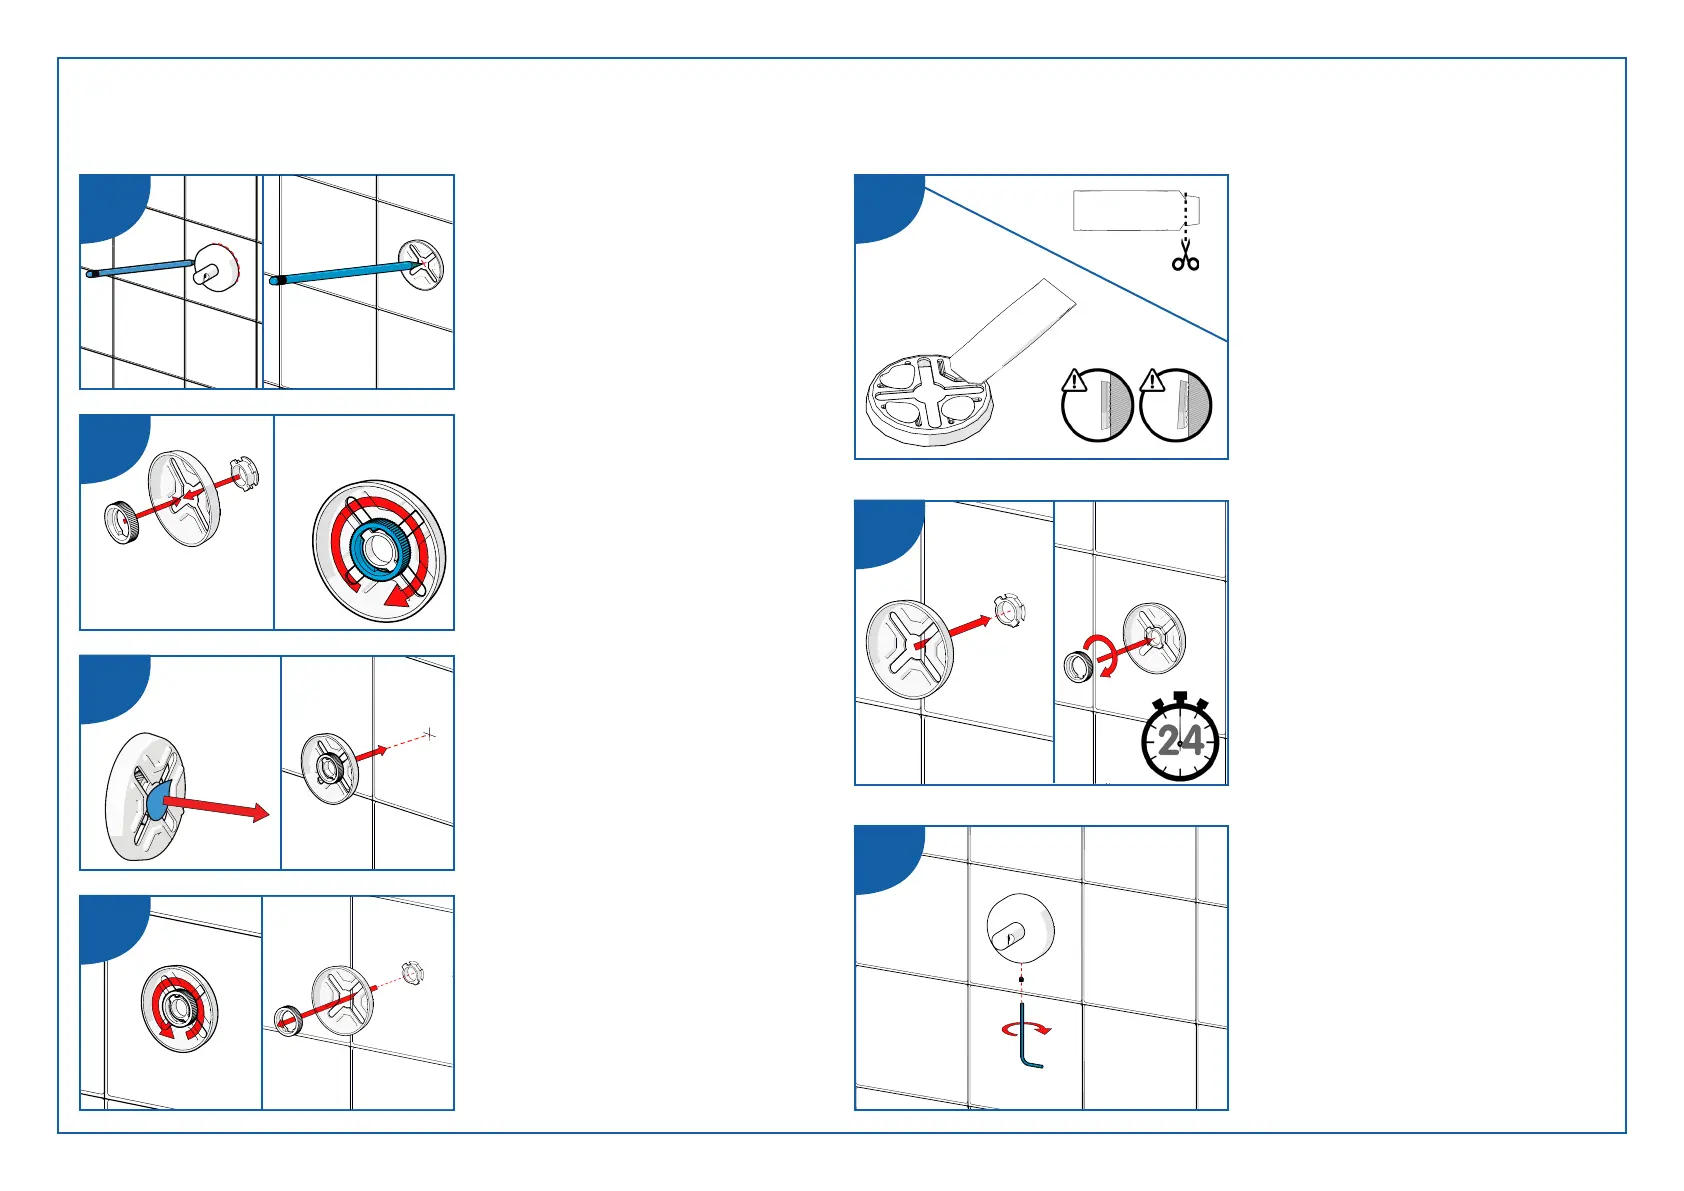
SECTION 5 - INSTALLATION WHEN USING ADHESIVE FIXING METHOD
1. Place the Flexi-Fix bracket
onto the wall and mark center
for glueing. DO NOT attempt
to install on grouting lines.
(See Fig. 7)
fig. 7
fig. 8
fig. 10
2. Assemble the Flexi-Fix
bracket as shown.
(See Fig. 8)
3. Peel o the adhesive sticker
backing and press to wall on
the marked center.
(See Fig. 9)
4. Unscrew and remove the
Flexi-Fix bracket as shown.
Be careful not to dislodge the
guide that is now adhered to
the wall.
(See Fig. 10)
fig. 11
fig.12
fig. 13
5. Open the sachet containing
the adhesive and apply to the
back of the Flexi-Fix bracket.
(See Fig. 11)
6. Re-install the Flexi-Fix
bracket onto the guide and
secure as shown.
YOU MUST wait 24 hours for
adhesive to cure.
DO NOT attempt to press the
Flexi-Fix bracket to the wall.
This will impede the bonding
process.
(See Fig. 12)
7. Install the Flexi-Fix Wall
Mounted Accessory and
tighten the grub screw to
secure in place.
Do not overtighten the grub
screw.
(See Fig. 13)
fig. 9