Loosen
the
clamp which secures
the
level gauge rod
to
the
right
tilt
cylinder
and
adjust
it
slightly
if
necessary.
Level
the
loader bucket
and
mark
the
gauge rod
at
the
appropriate
point
that
It
extends
past
its
guide
tube.
Use
paint
or
a durable marker that the operator will be able
to see indefinitely.
IMPORTANT
■
When the loader is removed from
the
tractor and the hoses are uncoupled from
the manifold adapter block, the flow control
switch
must
be
turned
back
to
the
"O"
posi-
tion. Failure
to
switch will cause blockage
of
the tractor hydraulic system, resulting in an
inoperable 3-point
hitch
and potential dam-
age to the hydraulic
pump.
Model 417 Loader Installation
Model
417
loader fits
Cub
Cadet tractor models 7232,
7234, 7235, 7272,
7274
and
7275
only. Please read
these instructions carefully before starting the installa-
tion. Follow the directions and refer
to
the
illustrations
as
needed throughout
the
installation procedure.
Mounting the Loader (Figure 29)
1. Front
mount
2.
Rear
mount
CO4190
Figure
29.
Loader
Mounts-
Model
417
Remove
the
front end weights, if
so
equipped,
and
the
front weight bracket
from
the
tractor. Attach the front
mount
(1)
to
the
front
frame
member
of
the
tractor
using
the
four
metric capscrews,
nuts
and lockwashers
2
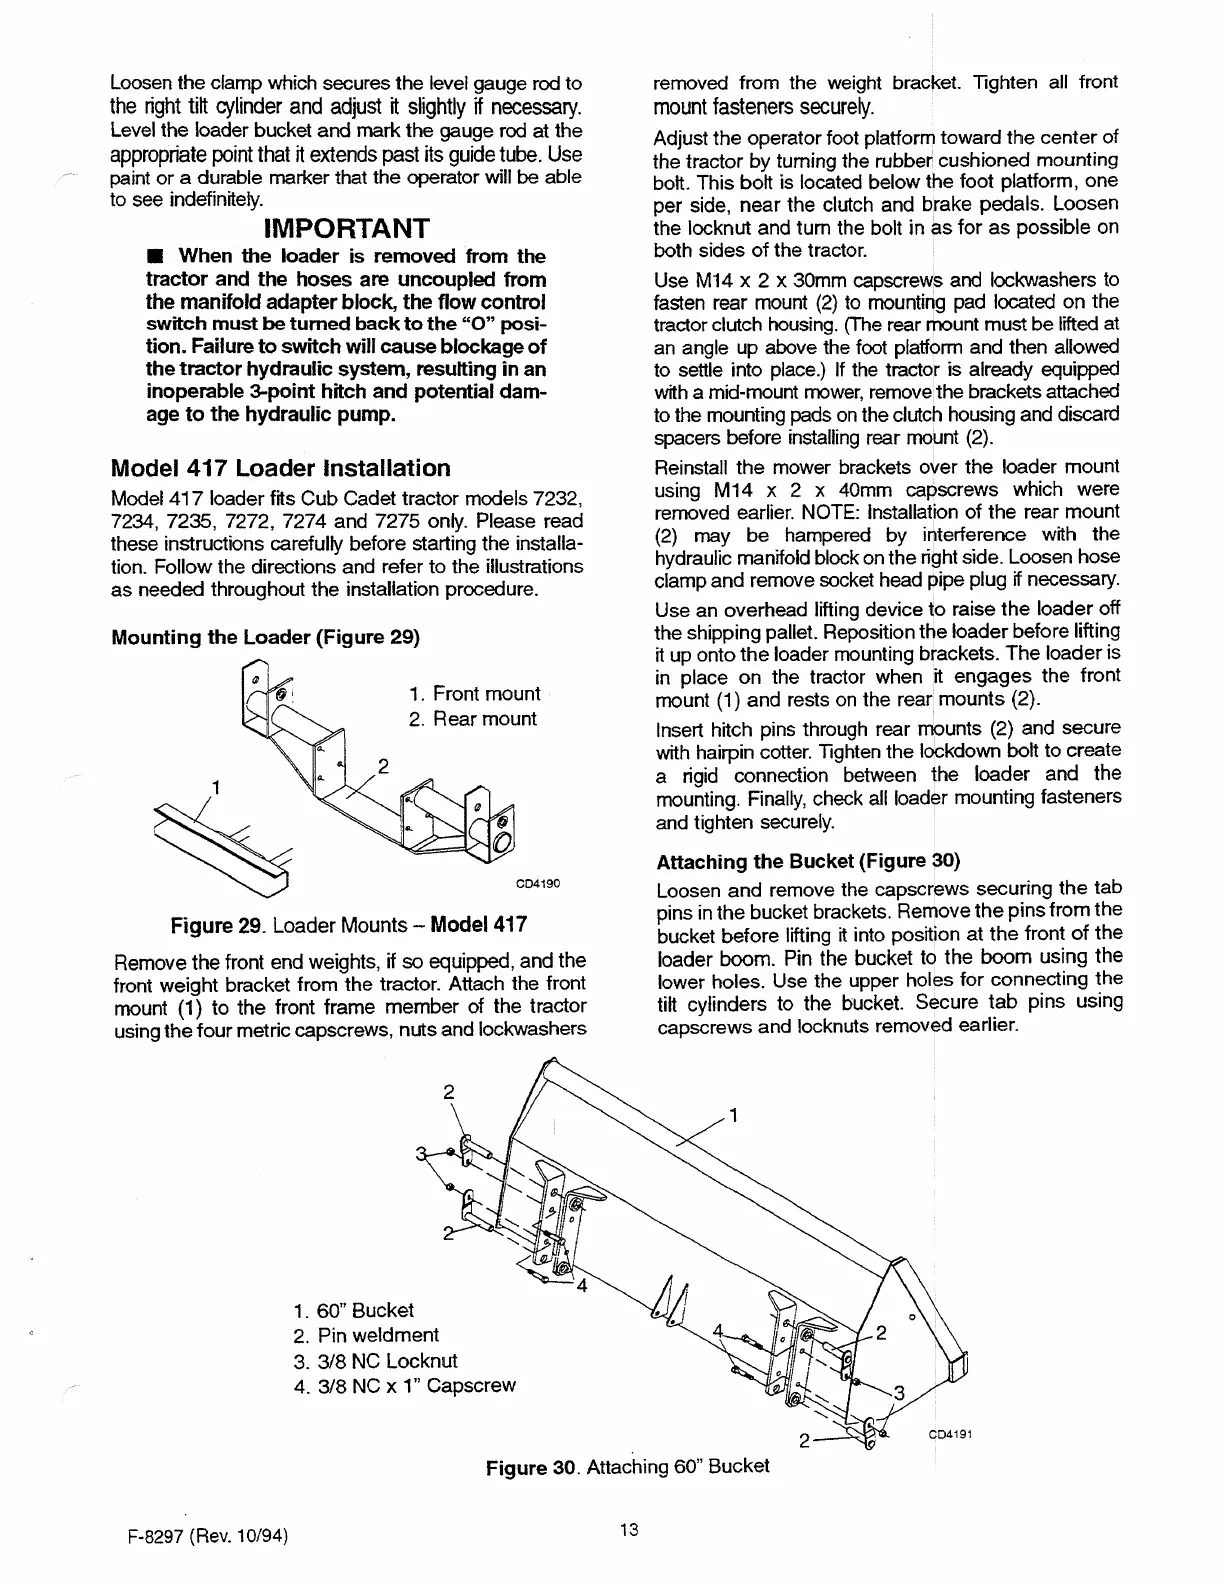
1 . 60"
Bucket
2. Pin
weldment
3.
3/8
NC
Locknut
4.
3/8
NC
x
1"
Capscrew
removed from the weight bracket. Tighten all front
mount
fasteners
securely.
Adjust
the
operator foot platform
toward
the
center
of
the
tractor
by
turning the rubber cushioned mounting
bolt.
This
bolt
is located below
the
foot platform,
one
per
side,
near
the
clutch and brake pedals. Loosen
the
locknut and
tum
the bolt
in
as
for
as
possible
on
both sides
of
the
tractor.
Use M14 x 2 x 30mm capscrews and lockwashers to
fasten rear mount
(2)
to mounting pad located
on
the
tractor clutch housing. (The rear mount must
be
lifted at
an angle up above the foot platform and then allowed
to settle into place.) If the tractor is already equipped
with a mid-mount mower, remove
the
brackets attached
to the mounting pads on the
clutch
housing and discard
spacers before installing rear mount (2).
Reinstall
the
mower brackets over
the
loader mount
using M
14
x 2 x 40mm capscrews which were
removed earlier. NOTE: Installation
of
the rear mount
(2)
may
be
hampered
by
interference with the
hydraulic manifold block on
the
right side. Loosen hose
clamp
and
remove socket head pipe plug
if
necessary.
Use an overhead lifting device
to
raise
the
loader
off
the
shipping pallet. Reposition
the
loader
before lifting
it
up
onto
the
loader mounting brackets.
The
loader
is
in place
on
the tractor when it
engages
the
front
mount (1)
and
rests on
the
rear,
mounts
(2).
Insert hitch pins through rear mounts (2) and secure
with
hairpin cotter.
lighten
the
ldckdown bolt
to
create
a
rigid
connection between
the
loader and the
mounting. Finally, check all loader mounting fasteners
and tighten securely.
Attaching the Bucket (Figure 30)
Loosen
and
remove the capscrews securing
the
tab
pins in
the
bucket brackets. Remove
the
pins
from
the
bucket
before
lifting
it
into position
at
the
front
of
the
loader boom. Pin the bucket to
the
boom using
the
lower holes.
Use
the
upper holes
for
connecting
the
tilt cylinders
to
the bucket. Secure
tab
pins
using
capscrews
and
locknuts removed earlier.
CD4191
Figure 30. Attaching 60"
Bucket
F-8297 (Rev. 10/94)
13
 Loading...