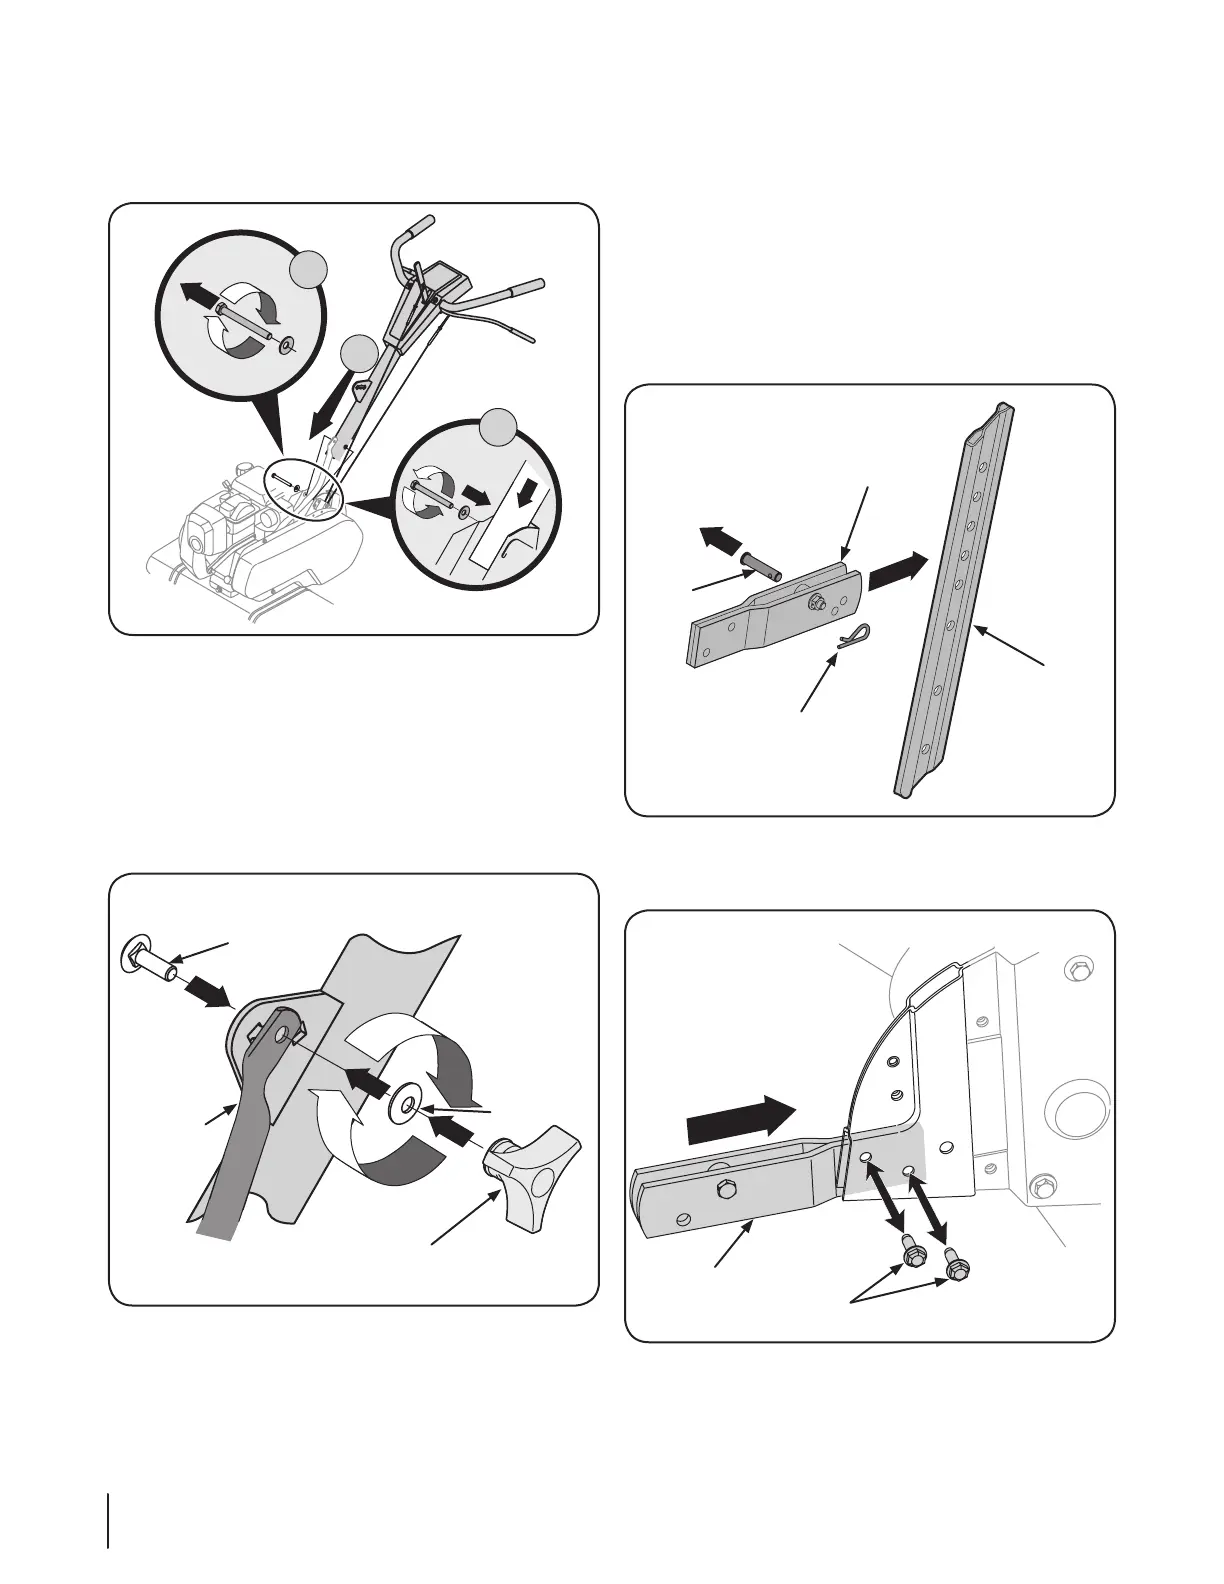
Remove the hex bolt and cupped washer from the right 4.
Insert the handle into tiller frame as shown. Step 2 in Fig. 5.
Insert the bolt through the cupped washer, frame, handle 6.
and into the cable guide bracket (note the notch in the
cable guide bracket goes over the flange on the frame.)
Tighten the bolt securely after securing the handle brace as 7.
Locate the carriage bolt, bell washer and hand knob 8.
packed with your tiller.
Insert the carriage bolt through the welded bracket on the 9.
handle, bell washer, handle brace and into the hand knob.
Select one of the three handle height positions (three
notches in the welded handle bracket) and tighten the
hand knob to secure the handle in the desired position. Fig.
securely.
Depth Gage
Retain the pin and clip for later reassembly.
Remove the two screws from the tail bracket as shown in 2.
Insert the depth gage bracket into the frame and reinstall
the two screws removed earlier. Tighten the hex bolts
Brace
Cotter
Pin
Pin
Stake
8 se c t i O n 3— as s e M b l y & se t -up

 Loading...