27
Changing the Deck Belt
WARNING: Be sure to shut the engine off,
remove ignition key, disconnect the spark
plug wire(s) and ground against the engine to
prevent unintended starting before removing
the belt(s).
WARNING: Avoid the possibility of a
pinching injury. Do not place your fingers on
the idler spring or between the belt and a
pulley while removing the belt.
All belts on your tractor are subject to wear and should
be replaced if any signs of wear are present.
IMPORTANT:
The V-belts found on your tractor are
specially designed to engage and disengage safely. A
substitute (non-OEM) V-belt can be dangerous by not
disengaging completely. For a proper working machine,
use factory approved belts.
To change or replace the deck belt on your tractor,
proceed as follows:
• Lower the deck by moving the deck lift lever into the
bottom notch on the right fender.
• Remove the belt guards by removing the self-
tapping screws that fasten them to the deck.
• Remove the belt keeper rod from around the
engine pulley.
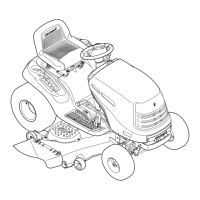
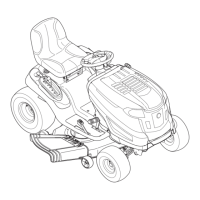
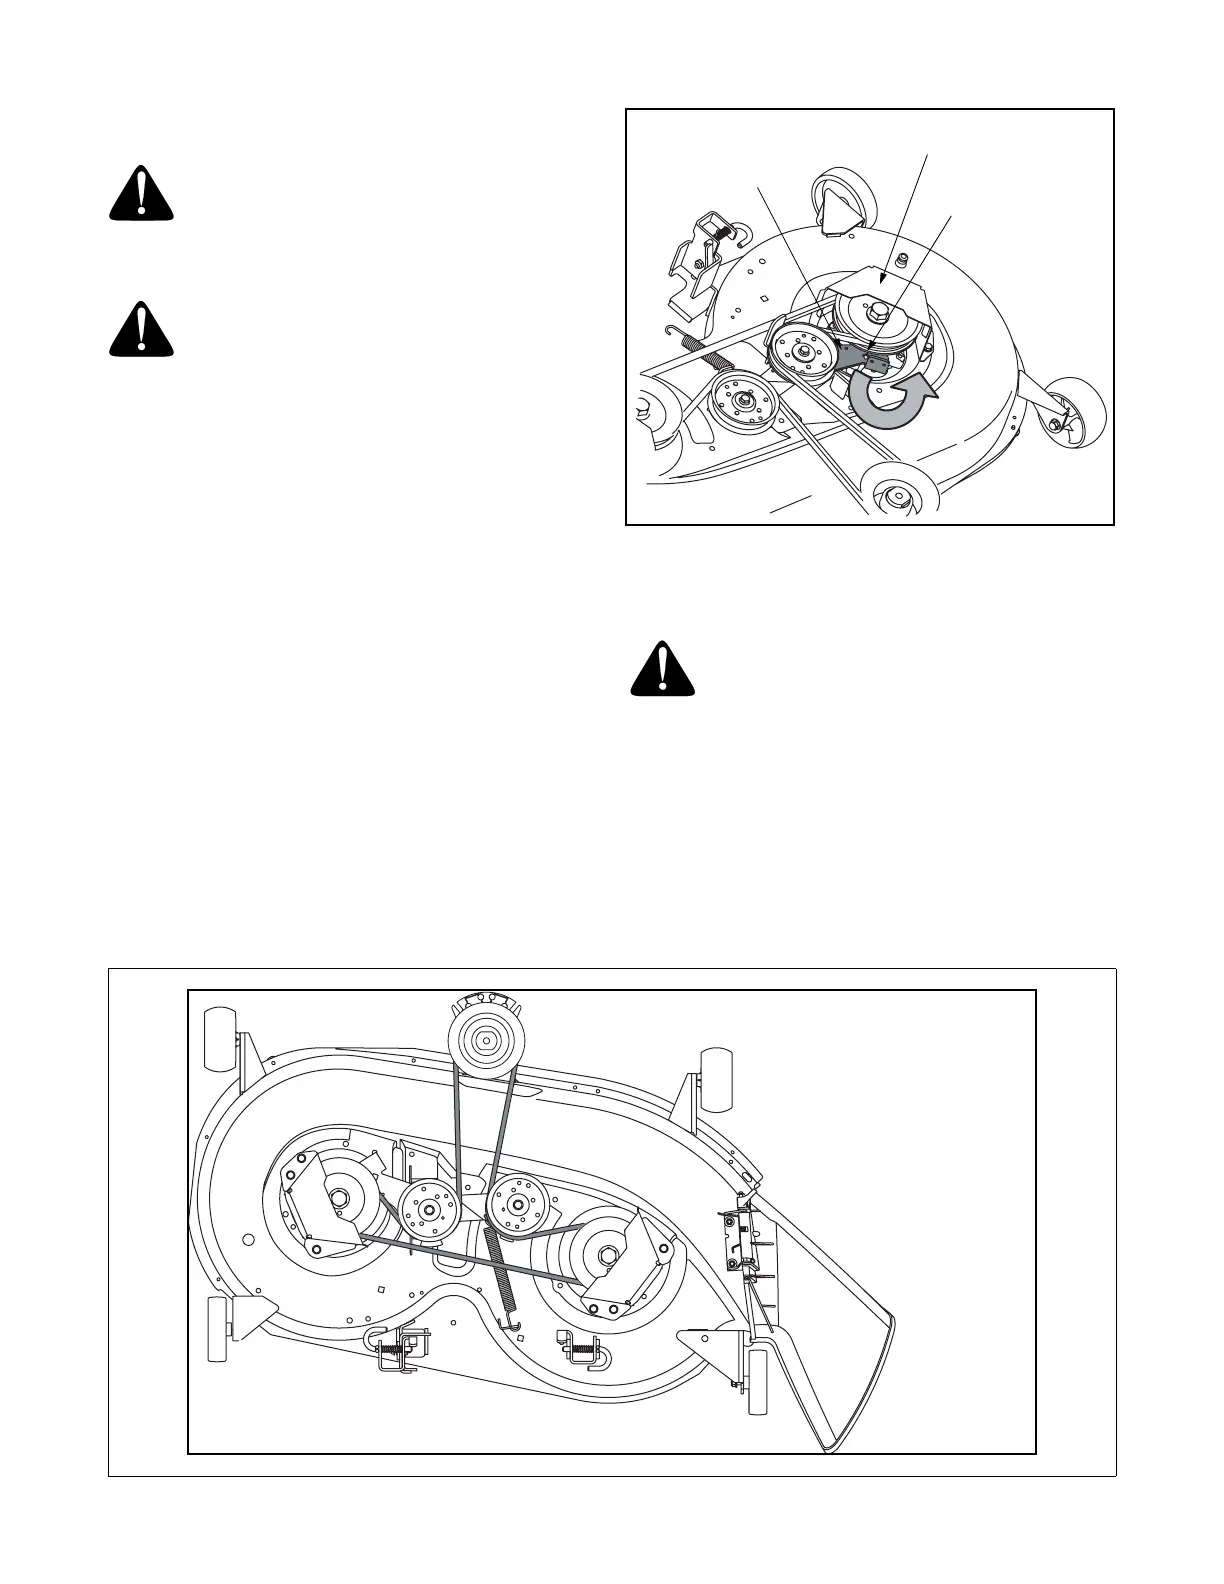
• Insert a 3/8”-drive ratchet wrench (set to loosen)
into the square hole found in the idler bracket on
the left side of the deck’s surface. See Figure 21.
• Grasp the ratchet’s handle and pivot it toward the
front of the tractor to relieve tension on the belt.
Figure 21
• With belt tension relieved, carefully remove the
belt from around the left-hand spindle pulley.
WARNING: Avoid the possibility of a
pinching injury. Do not place your fingers on
the idler spring or between the belt and a
pulley while removing the belt.
IMPORTANT:
Carefully allow the ratchet to pivot
rearward before removing it from the square hole.
• Remove the deck belt from around all pulleys,
including the deck idler pulleys.
• Route the new belts (deck belt first) as shown in the
figure below.
• Remount the belt guards removed earlier.
3/8” Square Hole
Idler Bracket
Belt Guard
LT1040
 Loading...