11
• Remove the starter rope from the rope guide.
• Remove the upper handle by removing the hand
knobs and carriage bolts. Lay the upper handle out
of the way, being careful not to bend or kink the
cable.
• Remove the hairpin clips from the weld pins on the
handle brackets. Press inward on the legs of the
lower handle. Remove lower handle from the
mower.
• Turn the lower handle around so the notch on the
bottom of the lower handle is facing forward as
shown in Figure 9. Reassemble, placing the bottom
holes in the handle over the weld pins in the handle
mounting bracket.
• Reassemble the upper handle.
• Place the hairpin clips in the inner holes in the weld
pins and attach the starter rope as instructed in the
Set-Up Instructions.
SECTION 8: SERVICE
WARNING: Always stop engine and
disconnect spark plug wire before
cleaning, lubricating or doing any kind of
work on lawn mower.
Blade Control
Lubricate the pivot points on the blade control handle
and the brake cable at least once a season with light oil.
See Figure 10. The blade control must operate freely in
both directions.
Wheels
Lubricate the wheel bearings (if so equipped) at least
once a season with light oil (or engine oil). Also, if the
wheels are removed for any reason, lubricate the
surface of the axle bolt and the inner surface of the
wheel with light oil.
Engine
Follow engine manual for lubrication instructions.
Lubrication Chart:
Figure 10
SECTION 9: MAINTAINING YOUR LAWN MOWER
WARNING: Be sure to disconnect and
ground the spark plug wire before
performing any repairs or maintenance.
NOTE: When tipping the unit, empty the fuel tank and
keep engine spark plug side up.
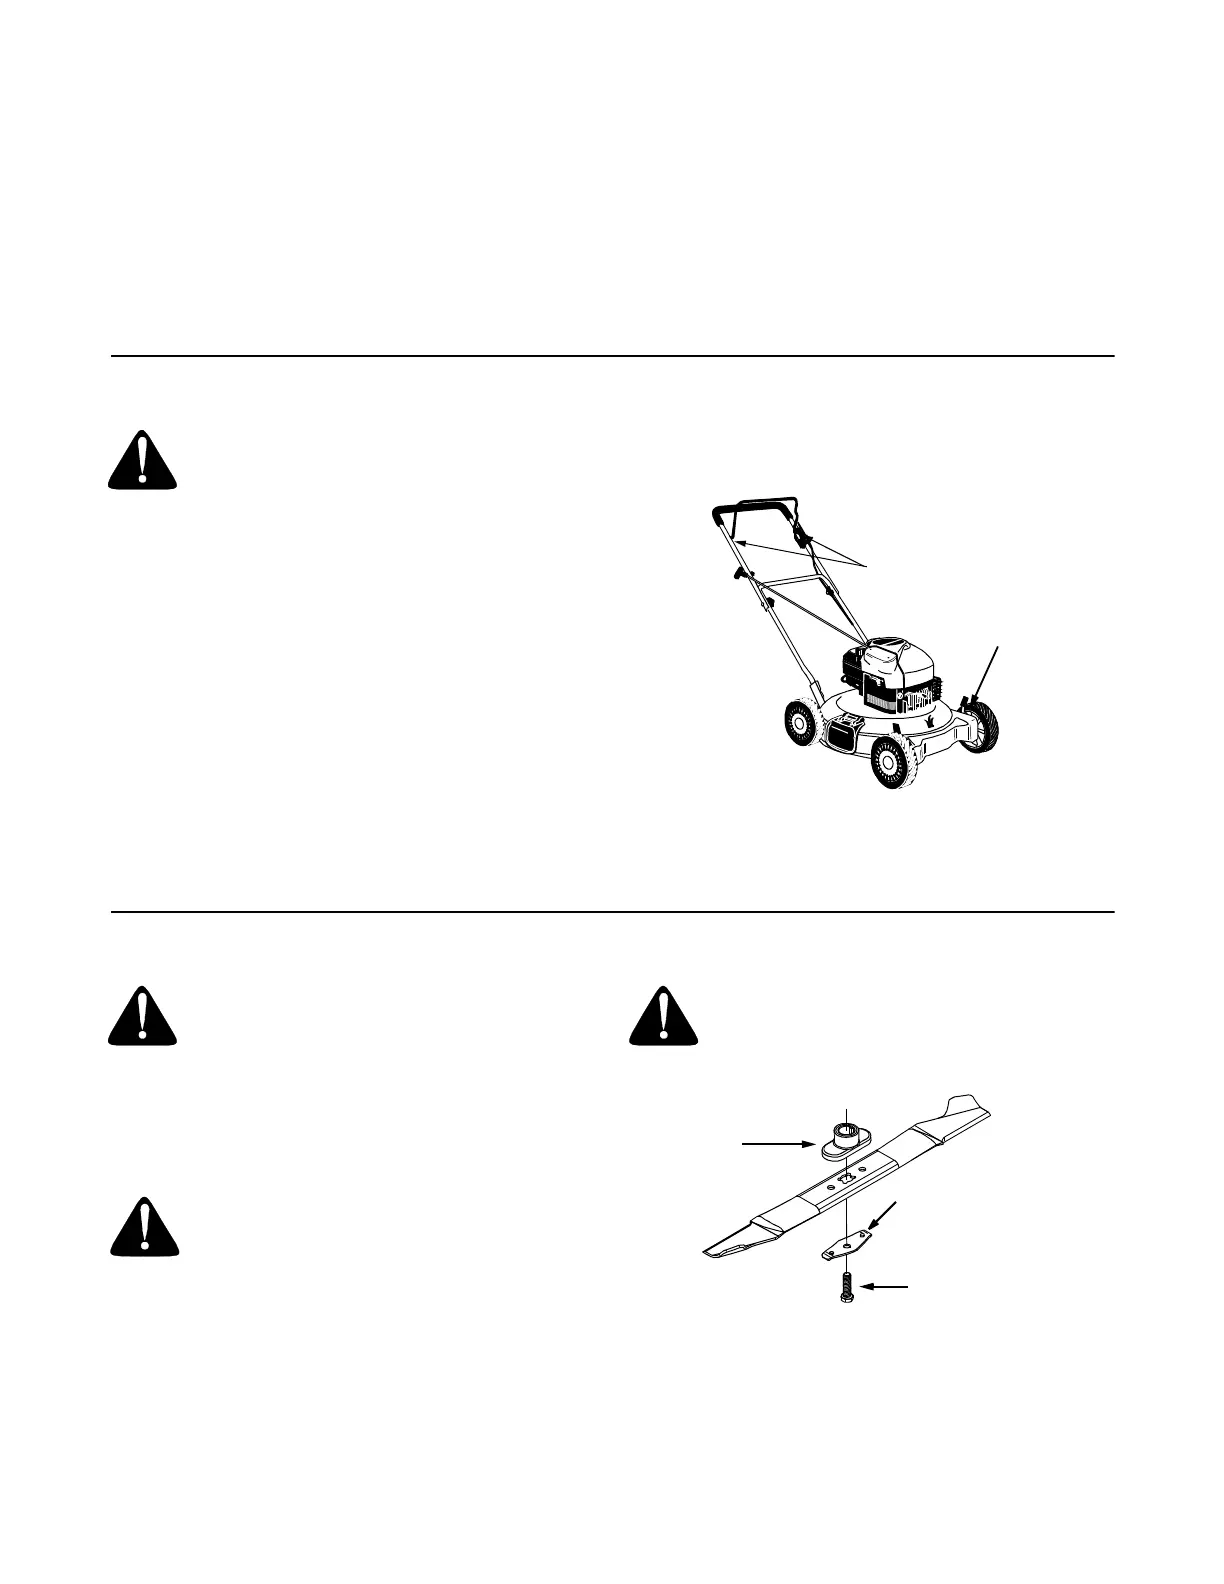
Cutting Blade
WARNING: When removing the cutting
blade for sharpening or replacement,
protect hands by using heavy gloves or a
rag to grasp the cutting blade.
To remove blade:
• Remove the bolt and blade bell support which hold
the blade and adapter to the engine crankshaft.
See Figure 11. Remove the blade and the adapter
from the crankshaft.
WARNING: Periodically inspect the blade
adapter for cracks, especially if you strike
a foreign object. Replace when necessary.
Figure 11
• When sharpening the blade, follow the original
angle of grind as a guide. It is extremely important
that each cutting edge receives an equal amount of
grinding to prevent an unbalanced blade. An
unbalanced blade will cause excessive vibration
Lubricate
Lubricate Bearings
Blade
Hex Bolt
Blade Bell Support
Adapter
 Loading...