25
PRODUCT CARE
Replacing the Deck Belt - 48, 54 and 60 inch decks only
NOTE: For mowers with 36 inch decks refer to Replacing the PTO Deck Belt - 36 Inch Decks Only on page
25.
1. Set the parking brake. Remove ignition key and both spark plug caps.
2. Remove the PTO belt, (refer to Deck Removal on page 24).
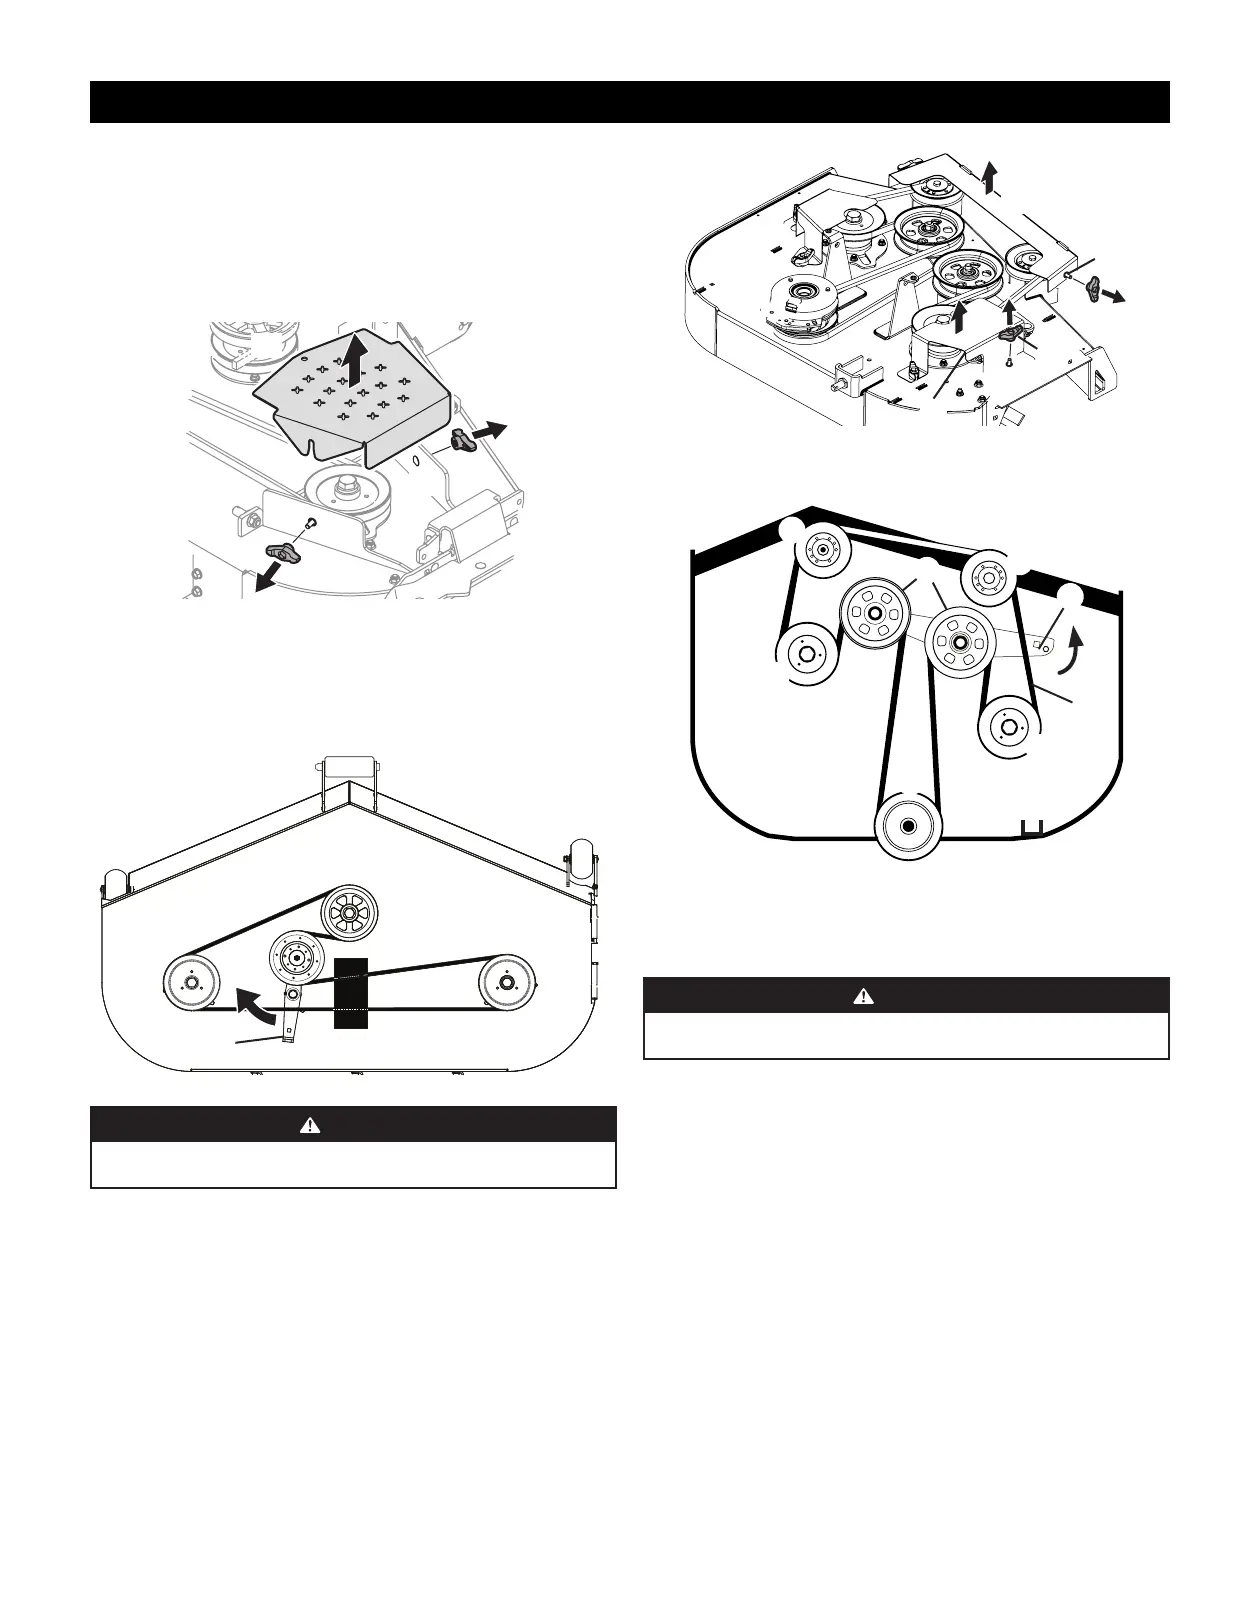
3. To remove the belt covers (a), remove the wing knobs (b) from the carriage screws (c) securing it to
the deck (Figure 39).
(a)
(b)
(c)
(b)
(c)
Figure 39
NOTE: Speed nuts should hold the carriage screws and tab bolt in place, if not re-install.
4. Using a 1⁄2” (12.7 mm) drive insert the end into the 1⁄2” (12.7 mm) square opening in the deck idler
assembly (d) and rotate the deck idler assembly clockwise (Figure 40).
5. While holding the deck idler assembly, loosen the deck belt from the pulley and slide the belt away
from the pulley.
(d)
Figure 40
WARNING
Avoid pinching injuries. Never place your fingers on the idler spring or between the belt and a
pulley while removing the belt.
6. Route the new belt as shown in Figure 40. Then reinstall the deck and PTO belt as instructed on page
25.
Replacing the PTO Deck Belt - 36 Inch Decks Only
1. Lower the deck to the ground. Capture the deck lift by placing the clevis pin behind the lowest
position.
2. Apply the parking brake. Remove ignition key and the spark plug cap.
3. Remove the wing knobs (a) from the carriage screws (b) securing the side belt covers (c) to the deck
and remove the side belt covers (Figure 41).
4. Remove the wing knobs (d) from the carriage screws (e) securing the front belt cover (f) to the deck
and remove the front belt cover (Figure 41).
(f)
(e)
(d)
(a)
(b)
(c)
Figure 41
5. Using a 1⁄2” (12.7 mm) drive in the idler pulley bracket (g), turn the wrench towards the front of the
mower and slide the PTO drive belt (h) off the right spindle pulley (i) (Figure 42).
(h)
(a)
(j)
(j)
(j)
(j)
(i)
(k)
Figure 42
NOTE: Speed nuts should hold the carriage screws and tab bolt in place, if not re-install.
6. While holding the idler pulley bracket, loosen the PTO deck belt from around the pulleys (j) and PTO
clutch (k) and slide the belt away from the pulleys.
WARNING
Avoid pinching injuries. Never place your fingers on the idler spring or between the belt and a
pulley while removing the belt.
7. Reverse STEPS 3 - 8 to install new PTO deck belt.
 Loading...