6
7
Operation
1. Cut meat into 1-inch (2.5 cm)
cubes, or 1-inch (2.5 cm)
long strips.
2. Turn the stand mixer to
Speed 3, and drop meat into
the grinder, one strip or a
handful of cubes at a time.
3. Use the pusher to gently
move food down and into the
grinder. Do not push hard –
this could damage your meat
grinder.
Note: Very cold meat is good
for grinding. Frozen meat should
never be processed.
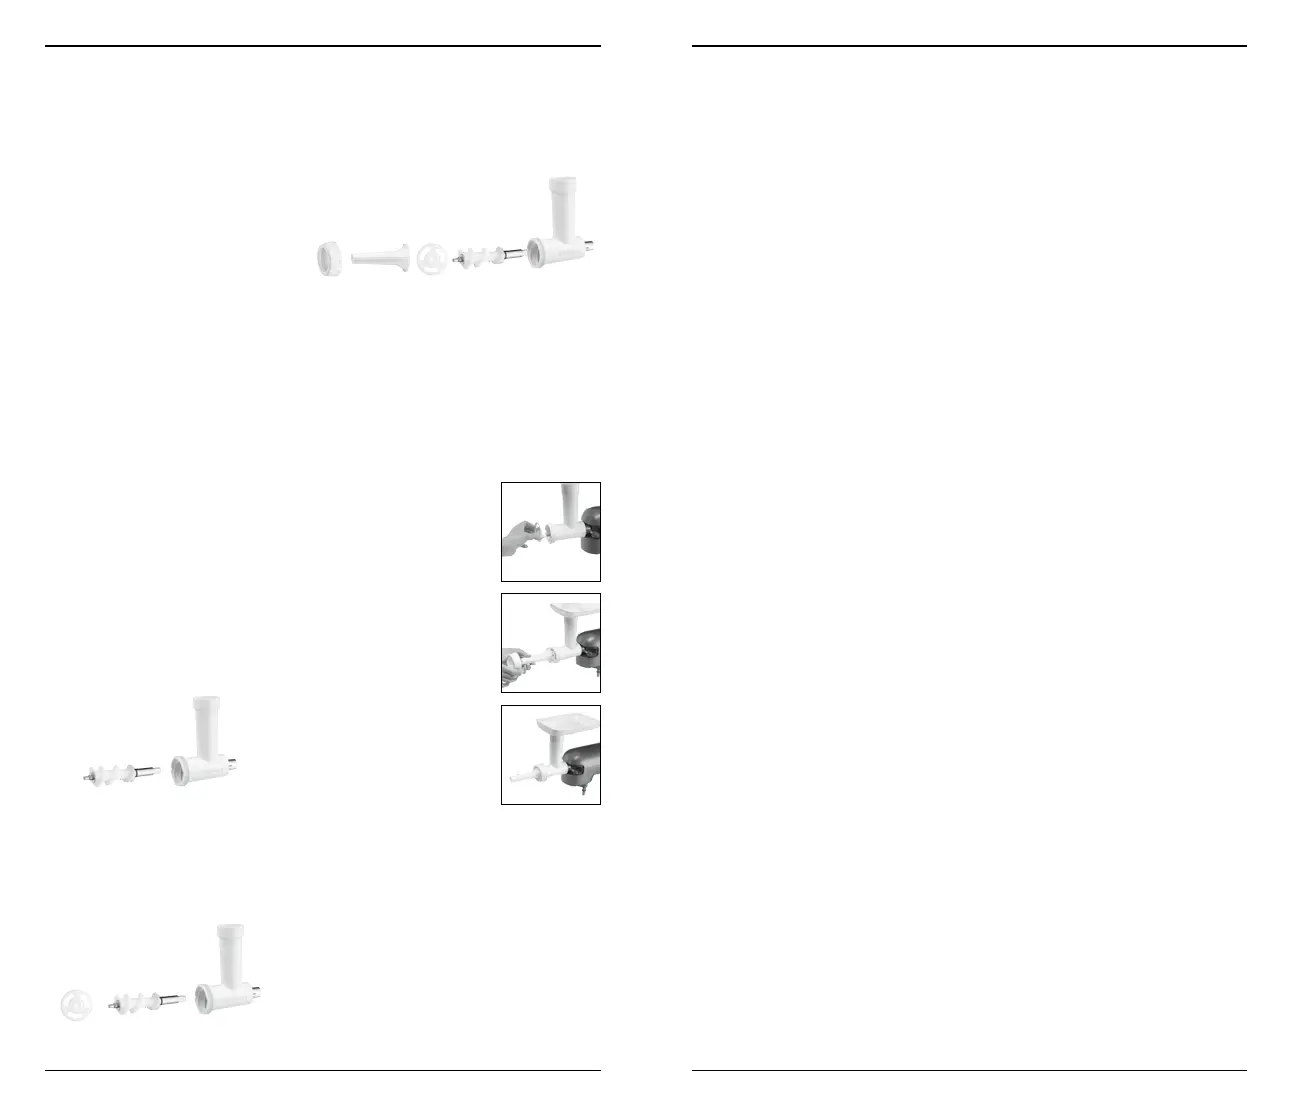
SAUSAGE MAKER
Assembling Sausage
Maker Attachment
Assemble the sausage maker
attachment prior to attaching to
the stand mixer.
1. Insert the feed screw pin into
the open end of the attach-
ment.
2. Place the sausage-making
ring with the notches tting
into the notch openings on
the feed meat grinder.
3. Place the sausage nozzle
onto the ring nut and screw it
onto the meat grinder nozzle
by turning it clockwise and
hand tighten.
When you are nished
making your sausages, and
if the ring nut is too tight to
remove, use the wrench to
loosen.
Attaching to Stand
Mixer
1. Follow steps
1 to 4 under
“Attaching to
stand mixer”
on page 5.
2. Turn the
stand mixer
attachment
knob clockwise
to secure
sausage maker
to mixer.
3. Fit the tray onto
the top of the
feed tube. If you
are not using
casing, place a bowl under
nozzle opening to catch
sausage.
Operation
Please see Tips and Hints on
page 7 for best results.
1. Slide open end of soaked
sausage casing over nozzle.
(See Tips and Hints for
instructions on soaking
sausage casings.)
2. Push as much casing as
you’ll need for the number of
sausages you want to make
onto the nozzle.
3. Tie a knot in the end of the
casing and cut off any
excess.
4. Poke a hole in the casing just
before the knot with a cake
tester to prevent air pocket
from forming.
5. Place sausage ingredients on
tray and turn stand mixer to
Speed 3.
6. Hold casing rmly on nozzle
as you use pusher to feed
ingredients into the sausage
maker.
7. Continue to hold casing on
nozzle, releasing it gradually
and pulling it off the nozzle
as it lls and forms a coil of
sausage in bowl below. Be
careful not to overll.
8. Turn mixer off when done,
leaving about 12 inches
(30 cm) of unlled casing.
To form Individual
Sausages*
1. Lay long sausage on at
tray and poke all over with a
sharp object, similar in size
to a needle or cake tester,
to prevent air pockets from
forming.
2. Twist into sausages – you
choose the size – by twisting
each “sausage” rst forward,
then backward, to prevent
them from untwisting.
3. Pierce any air pockets you
see.
4. For best results, dry
uncovered in refrigerator for
about 6 hours, then ip and
dry another 6 hours before
cooking.
* Please see Tips and Hints
on page 7 for best results.
CLEANING AND
MAINTENANCE
1. Remove the ring nut
manually or with the wrench
if it is fastened too tightly.
2. Disassemble and wash each
part in warm soapy water.
Dry all of the parts
thoroughly. Do not put any
of the metal parts in a
dishwasher. Tray, pusher
and wrench are top rack
dishwasher safe.
3. Reassemble.
4. Wipe the grinding plates with
vegetable oil and wrap each
plate with greaseproof paper.
This will prevent discoloring/
rusting.
5. Store the sausage
attachments and grinding
plates inside the pusher and
attach the lid.
6. Any other servicing should
be performed by an
authorized service
representative.

 Loading...