The Customizer™ Engraving Pen is a portable, cordless, battery-operated engraving tool designed for DIY enthusiasts and various crafting projects. It functions as a grinder, sander, polisher, carving, or cut-off tool, offering versatility for a wide range of tasks including engraving steel and glass.
Functional Description:
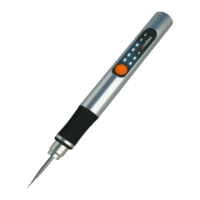
The engraving pen features a small, powerful electric universal motor housed in an electroplating alloy body. It is designed for comfortable handling, allowing users to grip it like a pencil between the thumb and forefinger for precise control during close work. The tool accepts a large variety of accessories, including abrasive wheels, drill bits, wire brushes, polishers, engraving cutters, router bits, and cutting wheels.
The device includes an Allen grub screw and a full copper chuck for securing bits. A power button/gear adjustment button is located on the body, along with a display that shows gear indicator lights, an overload pressure prompt light, and battery charge condition indicator lights. The pen is equipped with a USB-C charging port for convenient recharging.
Important Technical Specifications:
- Electrical source: USB Charging
- Transfer speed: 5000 - 25000 r/min
- Work rate: 25 W
- Battery capacity: 280 mAh
- Voltage Rating: 3.7V
- Gauge: 16'124 mm
Usage Features:
The Customizer™ Engraving Pen operates at high speeds, ranging from 5,000 to 25,000 revolutions per minute, which is significantly faster than standard portable electric drills (up to 2,800 RPM). This high-speed, low-torque design means the accessory does the work, requiring minimal pressure from the user.
Operating Instructions:
- Unboxing: Open the box and remove the Customizer™ and its plastic tray to access all components.
- Charging: Connect the USB Type-C Charging Cable to the Customizer™. Charge the device for at least 8 hours before initial use, preferably with a phone charger. Disconnect after charging.
- Bit Installation:
- Use the included hex key to loosen the Allen grub screw on the chuck.
- Select the desired engraving bit and insert it into the chuck.
- Tighten the Allen grub screw securely with the hex key. Ensure the bit is well tightened before turning on the pen.
- Power On/Off: Turn on the Customizer™ by pressing the Power Button on the display once. To turn off the tool, press the button four times; it will cycle through the speeds to the lowest setting and then power off.
- Speed Selection: The engraving pen features a three-speed configuration. The operating speed can be changed by pressing the green button on the display (from one to three times). The display lights will indicate the current speed:
- First light (highest rotary speed): 18000-25000 r/min
- Second light (medium rotary speed): 15000-18000 rpm/min
- Third light (lowest rotary speed): 5000-15000 rpm/min
- Engraving Technique:
- Hold the tool like a pencil for best control.
- Always hold the tool away from your face.
- Practice on scrap materials to get a feel for the high-speed action.
- Lower the spinning accessory lightly to the work surface. Do not apply excessive pressure; allow the accessory and speed to do the work.
- For most tasks, it is recommended to make a series of light passes rather than attempting to complete the work in a single pass.
Battery Charge Condition Indicator Lights:
The engraving pen is equipped with indicator lights to show the battery's charge status:
- 3 of 3 Solid LEDs: 67-100% charge
- 2 of 3 Solid LEDs: 34-66% charge
- 1 of 3 Solid LEDs: 16-33% charge
- 1 of 3 Flashing LEDs: 0-15% charge (battery too low, recharge required)
- 1 Red Light: Battery is too hot for use. Turn off the tool and allow the battery to cool down.
Safety Warnings:
- Always read all safety warnings and instructions before use to prevent electric shock, fire, or serious injury.
- Keep the work area clean and well-lit.
- Do not operate in explosive atmospheres or near flammable liquids, gases, or dust.
- Keep children and bystanders away.
- Only use 5V chargers with this tool.
- Do not expose the tool/charger/battery to rain or charge in damp/wet environments.
- Do not use a damaged charger or disassemble the battery.
- Always turn off the tool before changing accessories or servicing.
- Wear personal protective equipment, including eye protection.
- Dress properly; avoid loose clothing, jewelry, or long hair near moving parts.
- Do not force the engraving pen; use the proper speed and force.
- Store the idle engraving pen out of reach of children.
- Ensure accessories are properly adjusted before turning on the tool.
- Do not overreach; maintain proper footing and balance.
Maintenance Features:
- Accessory Care: Keep cutting accessories sharp and clean. Properly maintained accessories are less likely to bind and are easier to control.
- Tool Inspection: Regularly check for misalignment or binding of moving parts, breakage, or any other condition that might affect the engraving pen's operation. If damaged, have the tool repaired before use.
- Overload Protection: The tool features advanced electronics to protect the Li-Ion cells from damage due to excessive operating temperature and/or current draw. If a warning symbol illuminates red or the tool stops working during heavy use, it indicates the Li-Ion cells are near their maximum operating temperature. The battery pack should be changed or allowed to cool to ambient temperature. If the tool automatically turns off due to overload, the switch must be turned off for a few seconds to reset the circuit.
Warranty:
Culiau offers a sixty-day limited warranty against defective material or workmanship from the date of purchase. For warranty claims, users should email support@culiau.com with their order number, an issue description, and pictures/videos of the issue, using "Return request" as the email subject. The warranty does not cover damage resulting from tampering, accident, abuse, negligence, unauthorized repairs or alterations, unapproved attachments, or other causes unrelated to material or workmanship.