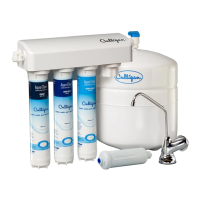
Aqua-Cleer Advanced Drinking
Water System Recommended Annual Maintenance
Thank you for taking part of the Aqua-Cleer Privilege Program. This program ensures that
replacement cartridges arrive on an annual basis in order to keep your Aqua-Cleer Drinking
System running at maximum efciency. All with the added convenience of having them shipped
directly to your door.
NOTE: The initial shipment for the Privilege Program includes two boxes. One box
will include the drinking water replacement cartridges while the other consists of the
Sanitization Kit. The Sanitization Kit is only sent to you once and must be saved for
future system maintenance.
Below is a reminder of the suggested annual maintenance for your drinking water system. (These services are included as part of the
Aqua-Cleer Privilege Program.)
Annual Check-up
Sanitize the System Check Replace
User instructions provided
on the back page
• RO Membrane*
• Flow Control Assembly
• TDS Reduction Performance
• Flow Rates (including air gap)
• Drain tubing for back-up
• Sediment Filter(s)
• Carbon Filter Pre-lter
• Polishing Post Filter
*If replacing RO Membrane, please contact your local Culligan dealer at 1-866-464-6401.
Changing the Cartridges
One of the many great features of the Aqua-Cleer Drinking Water System is the ease of changing
out cartridges. Please follow the instructions below to ensure proper cartridge replacement.
Removing the old cartridges:
1. Turn off inlet feed water valve.
2. Release each cartridge from manifold by making a counter-clockwise, quarter turn.
3. Pull down to remove cartridge and dispose.
Installing new cartridges:
1. Mark each cartridge with an install date in the space provided on cartridge label.
2. Match the inlet and outlet valve on the cartridge to corresponding port within
the manifold and insert the cartridge. (Figure 1)
3. Making a clockwise, quarter turn, twist the cartridge into locked position.
(Figure 2)
4. To replace the polishing lter, the tubing needs to be removed from the old lter.
Check both ends of 3/8” tubing for any scratches. If scratches exist, please use
a utility knife and make a straight cut to remove any imperfections on tubing.
(Figure 3) Connect the tubing to the new polishing lter with the “FLOW” arrow
pointed in the direction of the faucet.
5. Make sure all cartridges are locked in place, and close tank valve, then turn back on the inlet water valve.
• Run water for 10 minutes through the faucet in order to ush pre-lters and carbon post-lter.
• Check system thoroughly for leaks.
6. Reinstall the RO membrane, turn on tank valve. Wait for RO tank to rell before product water is available.
© 2010 Culligan International Company
Note: The RO cartridge must be
inserted into the 2nd, 3rd or 4th position
on the RO manifold.
If only three cartridges are to be inserted
into the manifold, the bypass plug
cartridge must be inserted in the 4th
position. (Figure 1)
Note: The activated carbon polishing lter needs a 10 minute ush to remove
carbon dust.
Figure 1
Bypass
Plug
1
2
3
4
Locked
Position
Unlocked
Position
Figure 2
Note: If your system conguration includes the GAC Pre-lter Cartridge, please
refer to the back page for special ushing instructions.
Note: At this time, do not replace the RO membrane, insert the bypass plug in
its place.