E3Metro Assembly Guide 2013
OM references to r71
April 4, 2013 12:17 PM
Display operation
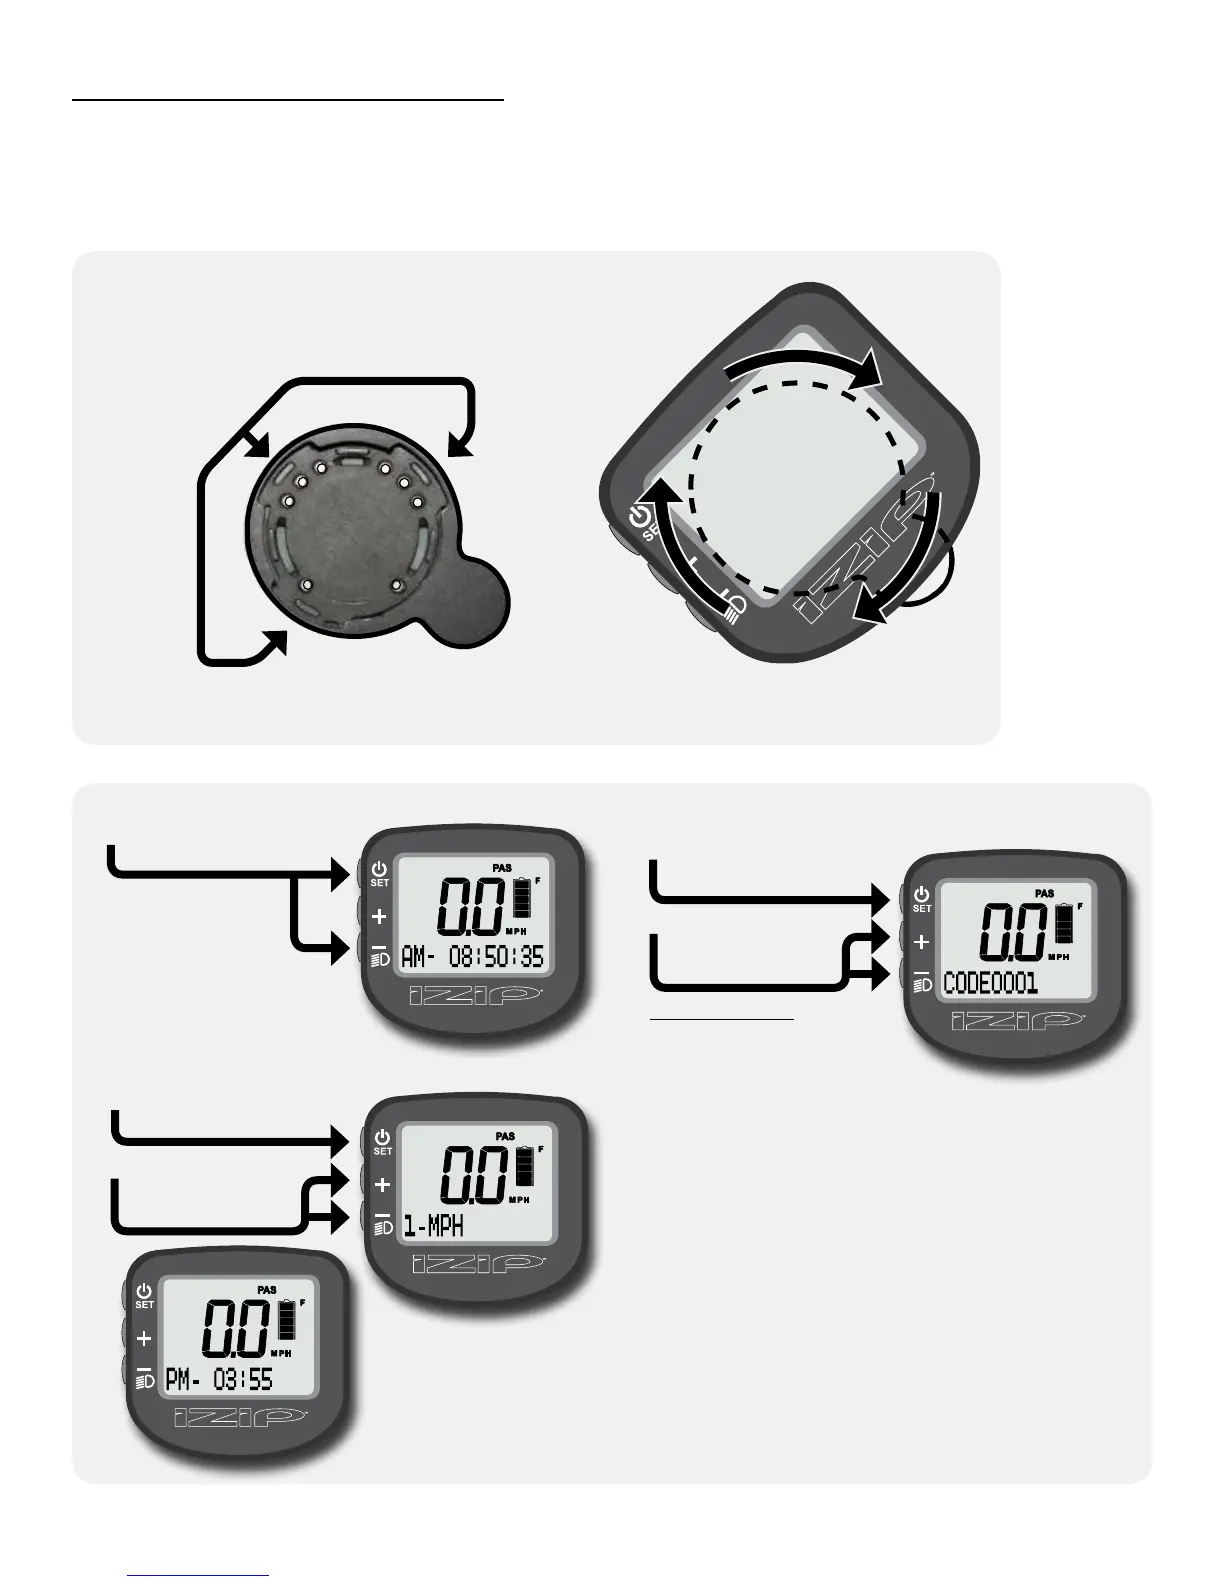
Connecting the display
2
3
While pushing down
on the display, rotate
it 45° clockwise until
it stops, parallel with
the handlebars.
Place the display on the handlebar
display mount at a 45° angle,
aligning the tabs on the bottom of
the display with the slots on the face
of the mount.
Sit on the bike, then turn it on by pressing the SET button.
1
Setting the clock and speed units
Hold SET and “–”
together for 5 seconds
to enter setup mode.
Tap SET to cycle
between digits. Hold
to conrm after the
code is entered.
Tap “+” or “–” to
set each digit
in the code.
In the setting screen,
tap SET to cycle
between characters.
Tap “+” or “–” to
change the ashing
character.
21
3
Hold SET to conrm
your changes.
Hold SET and “–”
together to exit the
code screen and save
the changes.
4
Codes:
Set clock: 0001
Set speed units: 0003
In setup mode, you
will enter codes
corresponding to
the setting you
wish to change.
Please do not experiment with undocumented codes.
While other settings exist, using them may cause the
bike to become unsafe to ride or to stop functioning
altogether.
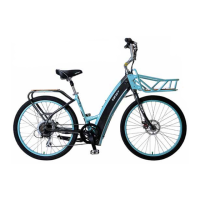
Your IZIP E3Metro electric bicycle is equipped with a multi-function display. The display is your user interface to the bike.
Using the display, you can program the riding characteristics of the bike, monitor the system self-tests as they occur,
and note any system errors. The display also serves as a cycle computer, giving information regarding time, speed and
distance.