6' - "
(184.8 cm)
3
4
TA
TC
TA
TC
7' - 7 "
(233.0 cm)
3
4
TA
TC
TA
TC
TA
TB
TA
TB
84"
(213.4 cm)
#1
#3
#2
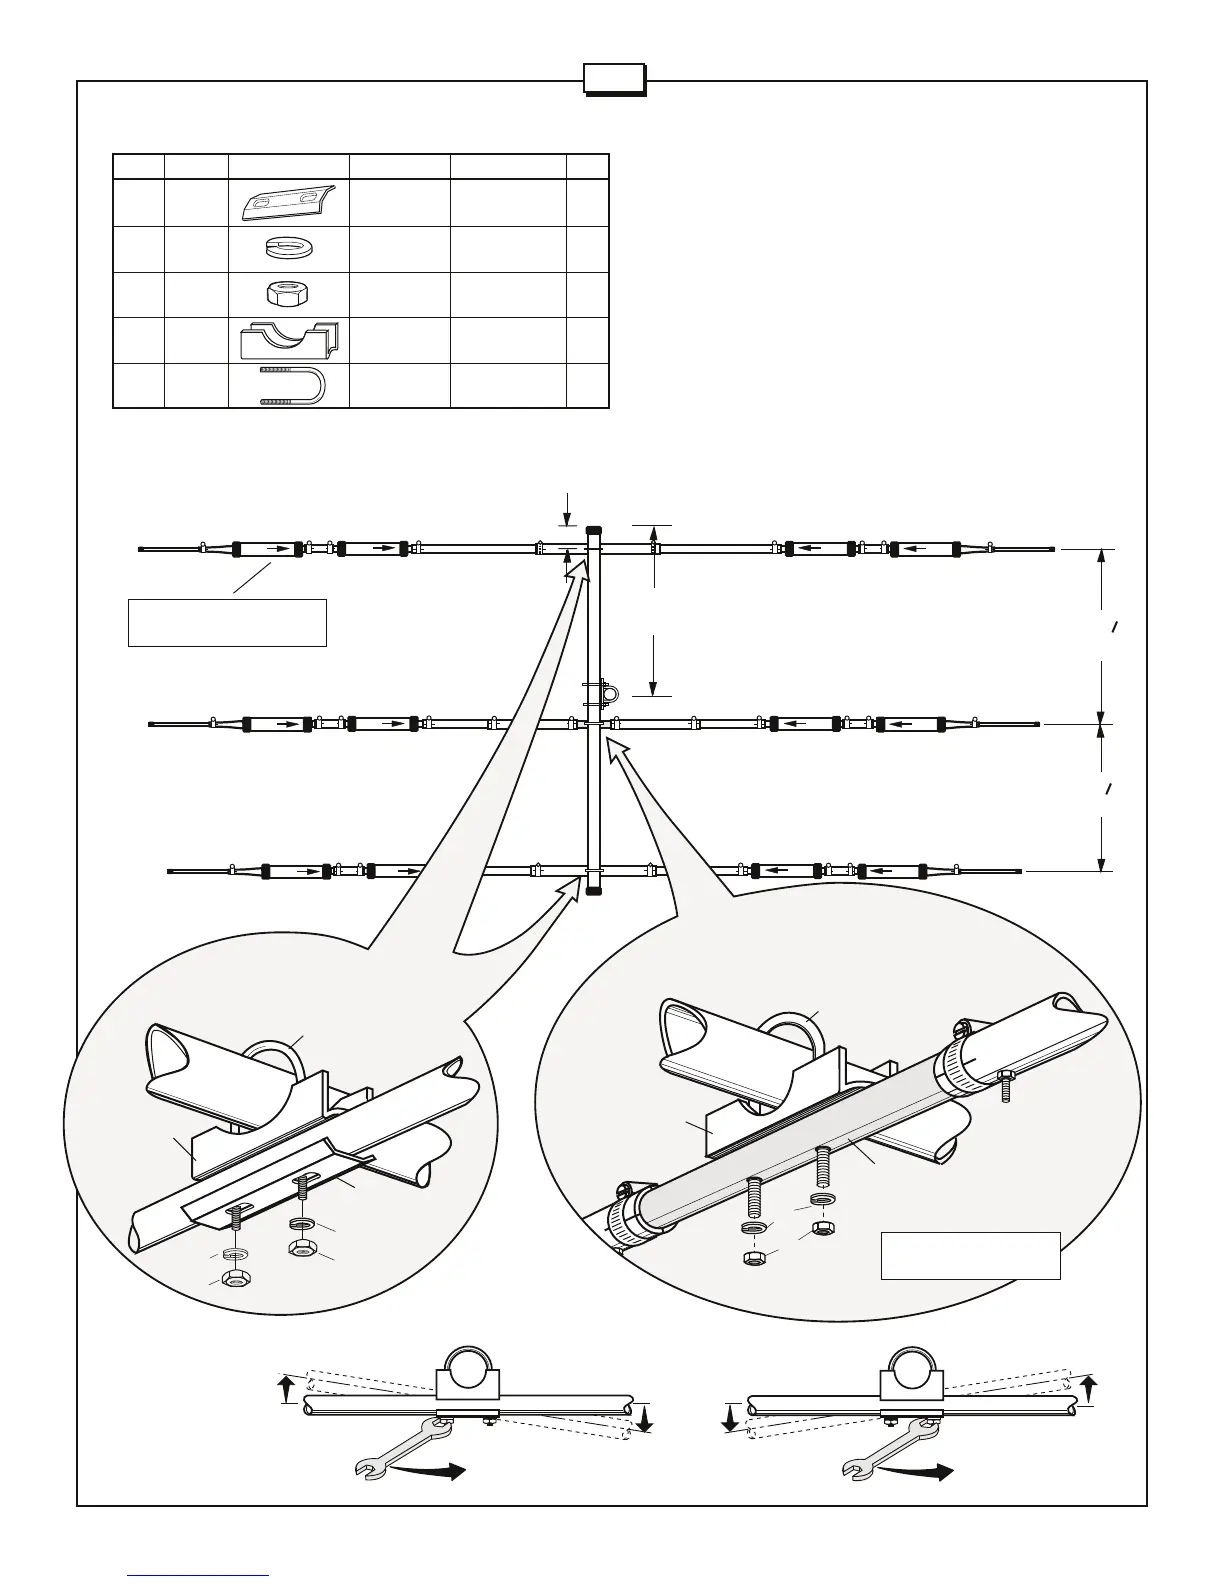
Important: Drain holes in traps
should all be facing the ground.
2"
(5.08 cm)
Attach elements #1 and #3 on the boom assembly using the U-bolts
(402), aluminum brackets (143), backing plates (33), washers (84)
and nuts (85) as shown in figure E. Attach the driven element (#2)
in the boom assembly using the U-bolt (402), aluminum bracket (143),
washers (84) and nuts (85) as shown in Figure F. Note that there is
no backing plate on the fiberglass insulator.
Check all dimensions for proper placement of elements on the boom.
Level the elements and tighten all the nuts on the U-bolts that hold
the elements on the boom per Figure G. Check all traps to make
sure that the arrows are pointed towards the boom and the drain
holes are facing the ground so that moisture will not build up in the
traps.
#3 - ELEMENT MOUNTING
5
KEY P/N DISPLAY DESC SIZE QTY
33 190033 BACKING 2
PLATE
84 010084 LOCK 1/4" 6
WASHER (.6 cm)
85 010085 HEX 1/4" 6
NUT (.6 cm)
143 190143 ALUMINUM 1-1/2" 3
BRACKET (3.81 cm)
402 010402 U-BOLT 1-1/2" x 3-3/4" 3
(3.8 x 9.6 cm)
FIGURE D
FIGURE G
402
143
96
BOOM
84
85
BOOM
ELEMENT
FIGURE F
Note: No backing plate (33)
on Fiberglass Insulator.
ELEMENT
ELEMENT
FIGURE E
402
143
33
84
85
84
85
Element
Boom
A3S