Do you have a question about the CWT 1630 and is the answer not in the manual?
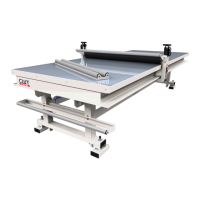
Lists components for the standard CWT lamination table configuration.
Details components specific to the premium upgrade package for the lamination table.
Specifies the required wrenches, allen keys, and spirit level for assembly.
Instruction to open the packaging from the designated side by removing screws.
Guidance on attaching the roller holder to the glide beam assembly.
Instructions for attaching the air regulator and wire brackets to the table legs.
Procedure for attaching the 100x40 girder to the table legs using specified hardware.
Instructions for mounting U-brackets and assistance legs onto the table top.
Details on assembling the table top by connecting U-brackets and assistance legs.
Guidance on performing a cross measurement of the table top for alignment.
Instruction to position the center profiles onto the middle of the table top.
Procedure for inserting LED kit plates into the table top, noting sticker orientation.
Instructions to connect 12V cables and tighten outer plates for LED kits.
Guide to attaching the plate with switch and cable to the table leg.
Instructions for placing diffuser and glass plates, including rubber band application.
Guidance on sliding the glide beam onto the assembled table top.
Instructions for attaching the final U-brackets to the table top and legs.
Procedure for removing assistance legs and leveling the table using a spirit level.
Instructions for positioning and trimming the cutting mat to fit the table surface.
Procedure for winding the spiral hose and attaching the wire to the brackets.
Instructions for attaching the end plates to the table structure.
Guide to installing the extra lower roll holder, part of the premium kit.
Detailed steps for adjusting the linear bearings if the roller is too loose or tight.
Instructions on how to adjust the roller's direction if it does not run straight.
Guidance on modifying the table's working height or leveling the table surface.