Assembly
Page 4-5
Product Number 8800/8810 Owner’s Manual
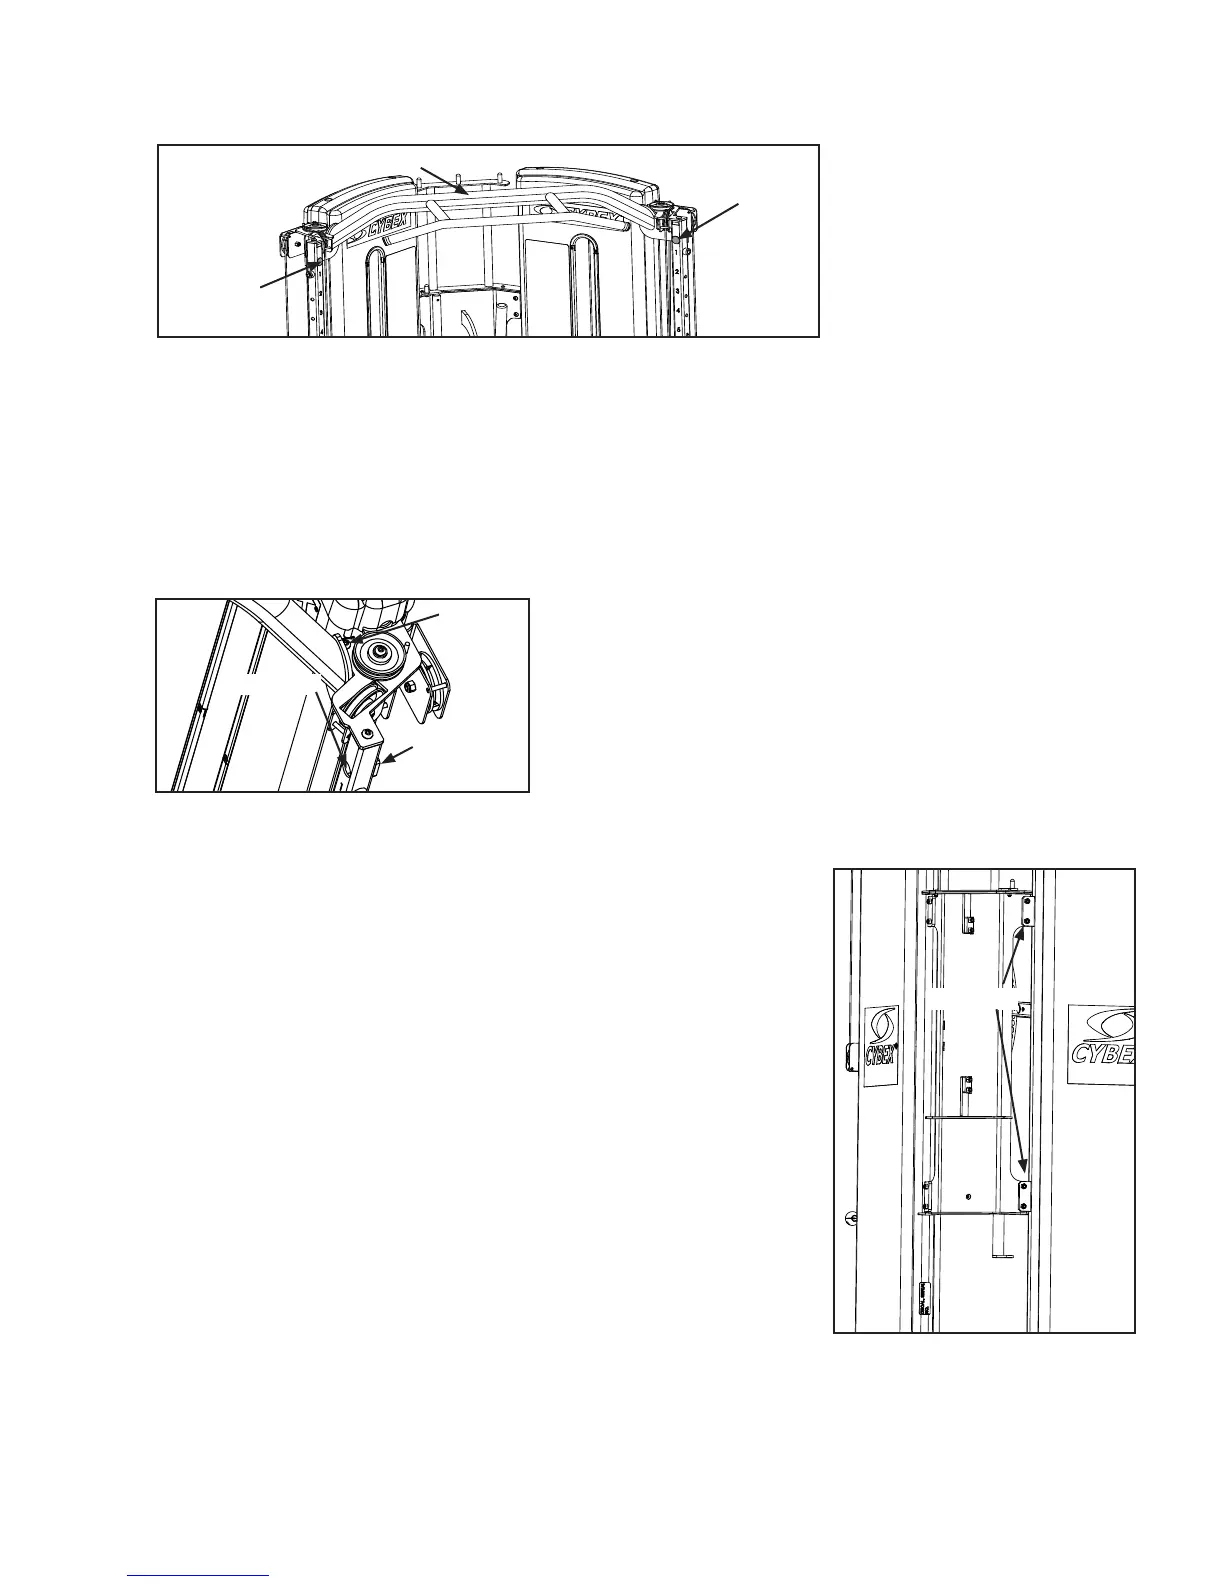
BHSCS
Locknut
BHSCS
Figure 8
Figure 7
Insert
plug
Chin-Up Bar
Remove insert plug to gain access to BHSCS securing Chin-Up Bar. See Figure 7. C. NOTE: 8810
is not shipped with Chin up bar (attached refer to step 13).
Repeat step 10C for insert plug on opposite side.D.
Locate BHSCS on top of frame near pulley. See Figure 8E. .
Using a 7/32” Allen wrench remove two BHSCS securing Chin-Up F.
Bar
Using a 7/32” Allen wrench and socket remove two BHSCS secur-G.
ing Chin-Up Bar.
Repeat step 10E and 10F for opposite sideH.
Carefully remove Chin-Up Bar and set aside. I.
With an assistant remove 4 (of 8) BHSCS securing frame halves J.
See Figure 9.
Move to desired location.K.
Place both halves of frame together and tightly secure the four L.
BHSCS removed in step 10J.
Place a drop of 242 Loctite on BHSCS and threaded hole removed M.
in step 10J.
Figure 9
BHSCS
Insert
plug
 Loading...